Carla Like It Is

Alex's DIY Home Fixes

Our Latest Project Reveal! New Color & Lighting in the Dining Room!

Kayd Roy7 Comments
It feels like an extra fun and special Friday because I get to share one of the best kinds of posts there is- A completed project and room reveal!!!  (Those are the best right?)  As promised on Wednesday, I rounded up some new photos of our updated Dining Room along with some 'before' and 'after' looks.

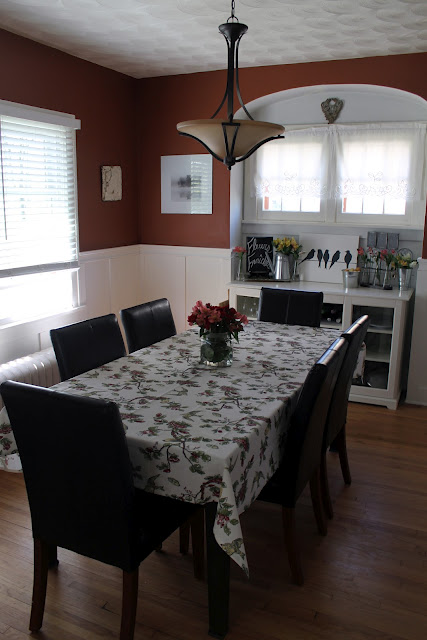
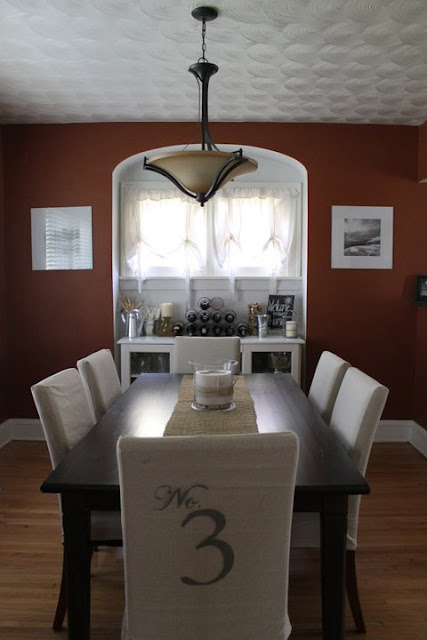
So, I might as well start with the 'before' and 'afters'- Here's our Dining Room before with the dark red we grew tired of....
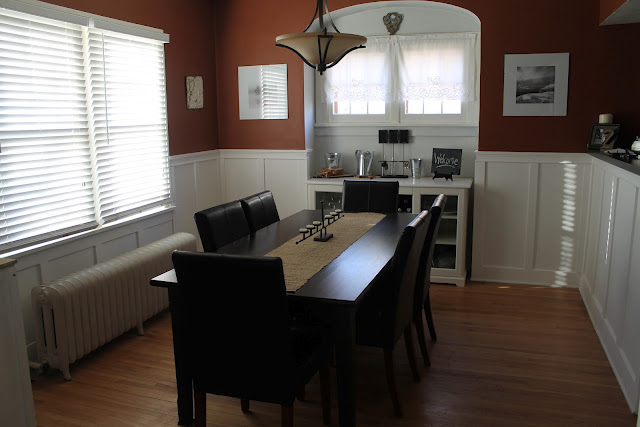
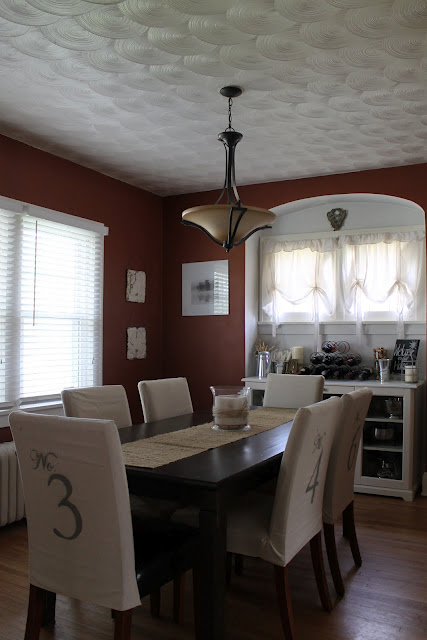
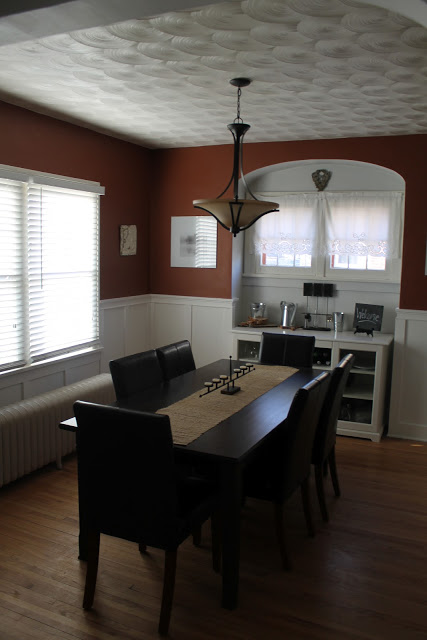
... compared to our new Dining Room look!  It's lighter, cleaner, neutral, and feels a bit more modern but still fits nicely in our old colonial style home.  I'm just in love with it and all we changed was the paint color on the walls and did a DIY update on the pendant light fixture.  Almost seems to easy peasy for creating a different look right?  Makes me love it even more!
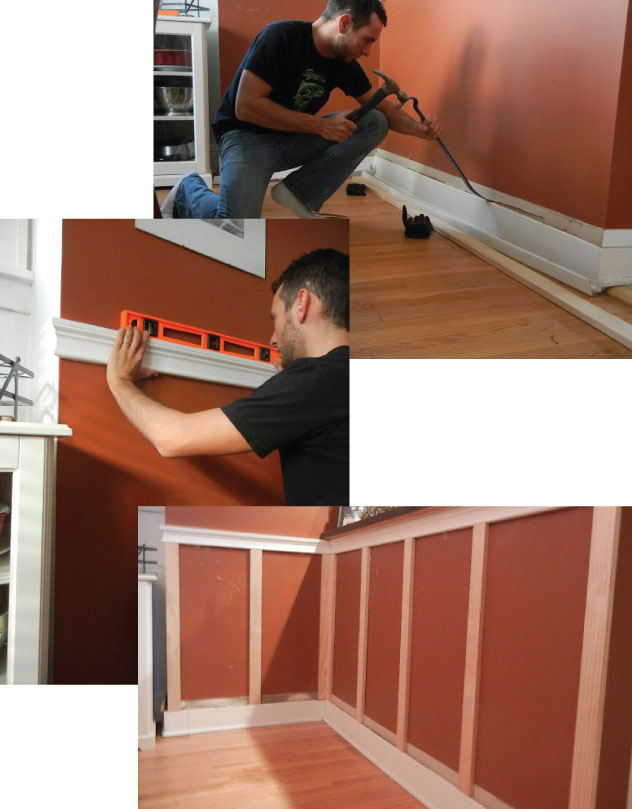
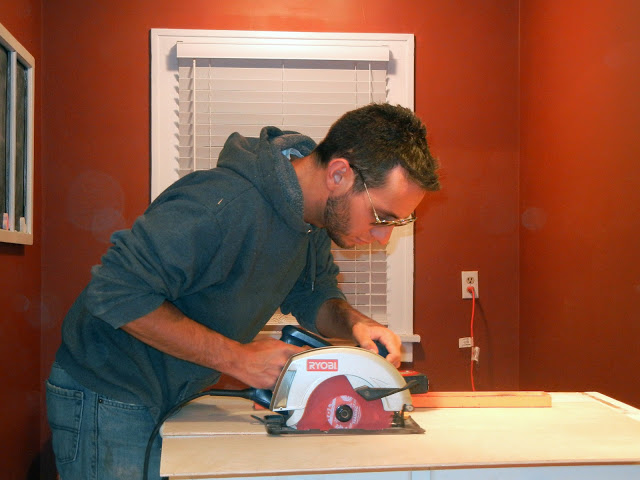
When it came to color, after four and a half years of dark red (Behr's Sequoia Grove) it was certainly time for a change.  Adding the new wainscoting last year helped brighten up the room a bit but we both agreed the red had to go...
The not too gray, not too white, not too taupe color of Behr's Wheat Bread turned out to be perfect!  It contrasted with the white wainscoting just right without being too dark, it's a great neutral shade!  We chose the Behr Premium paint option since we knew covering red might be a challenge and it seemed to cover nicely with two coats.
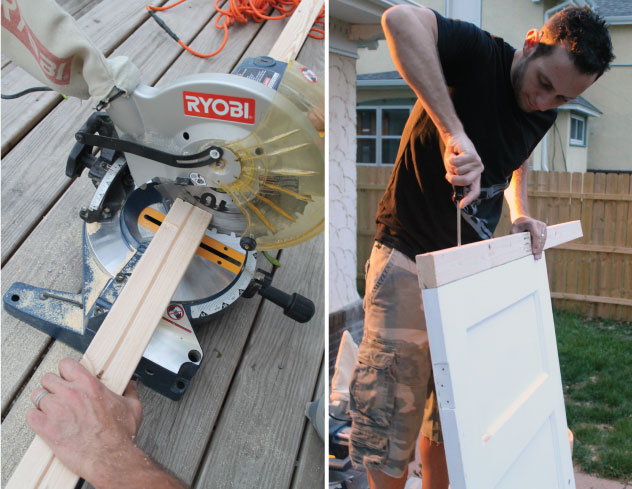
When it came to the light fixture, I had been looking at Drum Shade pendant lights for a while and began to wonder if we could just take apart the pendant light that was there and add a shade around it.  We had an old plain white large drum shade from Ikea in our basement so I thought we could toy with to see if it could work.  Turns out, it did!  DIY surprise!  Not sure if the same thing would work on other hanging pendant lights, but if they are similar to the style we have then it might!  Here is what Alex did to DIY our new light fixture....
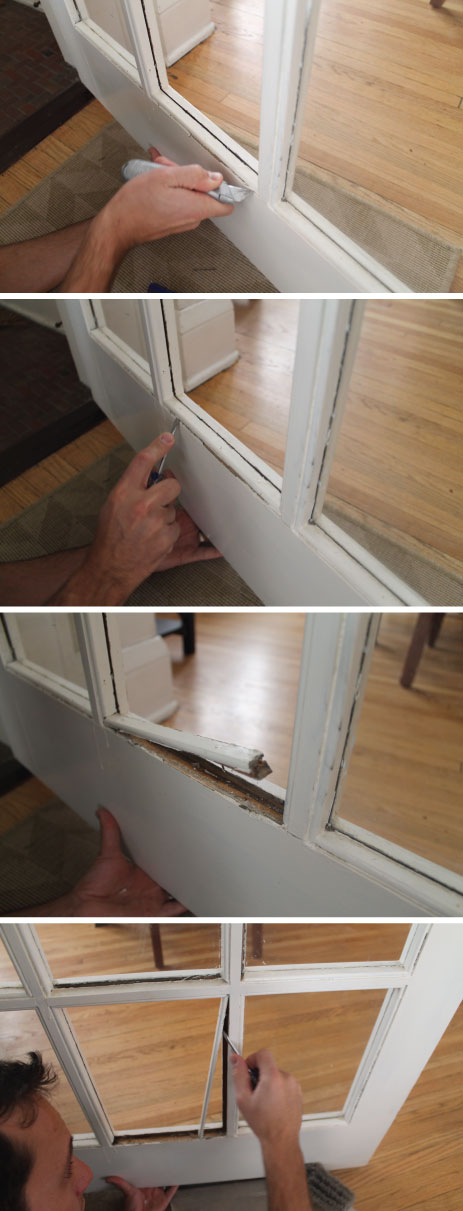
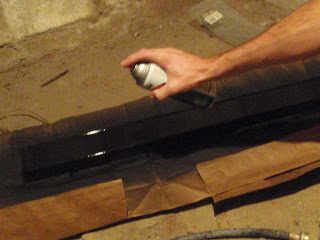
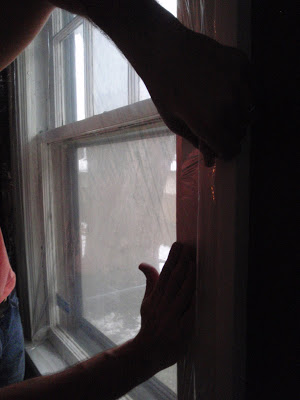
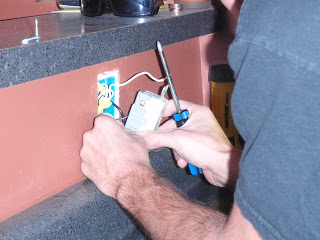
He started by disassembling the old light fixture since it came in parts when we purchased it.  The bottom bracket that held the bowl was the first step, then the glass bowl, and lastly the metal bars that accented the hanging rod.  All that was left was the rod and light bulbs.  Sorry I don't have photos of all the steps, I didn't think it was going to work so I didn't have the camera ready :( hope you get the idea still!
Alex then took the drum shade, flipped it upside down so the part that would sit on top of a lamp base harp could attach to the screw cap and bolt that the old bowl pendant had attached to.  So easy!  The only thing I need to add still is something to cover the bottom of the shade so you can't see the bulbs :)  Maybe when I figure that out I can post a better tutorial with all the steps and photos!

That's pretty much it for the bit changes, I guess the only cost to revamp the look was the $32 we spent for the can of paint! Crazy right?!?

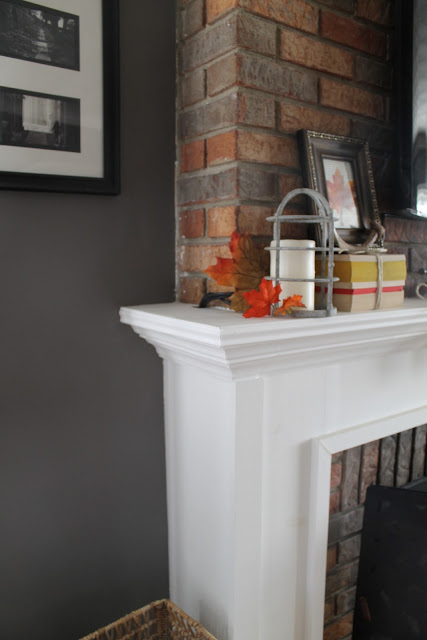
When I started putting the room back together I also updated a little bit of the decor.  I decided to add in some floral/foliage arrangements like I did on our mantle since I loved it so much (and they are FREE since it is just pretty foliage from our yard, love it!).
I also decided to add in a new table runner when I found this one during a Target trip for $17.99.  Thought the lattice print with the burnt orange border was cute for fall and not too themed!  It was so hard to ever find a cute table runner that went okay with that dark red paint, now I can decorate with any color scheme really, woo-hoo!  Oh, just think of the possibilities for Christmas decor!!!! 

Well, I guess that's it! 
So what do you think of the new look and new color?  Should I update the black and white wall art next since I'm no longer fighting that dark red color?  Let me know!

Alex and I are doing our annual Pumpkin Carving challenge tonight!  (hehe, I'm betting on me to win.... again)  Have a great weekend everybody!

August Head Over Heels Friday #2: "DIY-ikea" Creations

Kayd Roy2 Comments
As mentioned in a delightful little post earlier this week, my "DIY-ikea" was totally unplanned as it resulted from my HORRIBLE Ikea experience last Saturday. Since I couldn't take the Applaro Wall Panel home, I'm happy I was able to whip up my own version that provided the same function...
I am just Head Over Heels with how simple it was to make and with this completed, I'm pretty much finished with the last of my deck decor!  Here's a look again at my vertical planter idea and Ikea's wall panel that planted the idea (ugh, love a good pun).
Applaro Wall Panel: Ikea $39.99; with shelves $59.99

When I started thinking about decor for our newly finished deck, I had a hard time coming up with a way to decorate the outside wall of the house.  It's not like you can hang a framed photo like on the inside... although that would be kind of funny.  Anyway, the vertical planter was the perfect way to add some decor and I loved how Ikea displayed their panel with hanging planter pots (shown that way in the catalog, not online).

My line of thinking when making our own was that it needed the ability to hang little planter pots.  I quickly thought of all the lattice laying around our garage.  There was tons of it and I could easily hang plants from it!  DING-DING!  I grabbed a section, cut it down to fit from the deck to the top wood trim, and then spray painted it.  This is where my hubby jumped in to help :)  He pointed out that it needed a frame around each side in order to support the weight of each planter pot.... and unknowingly, he signed himself up to work on this project too, hehe!  Alex cut a piece of wood for each side and attached it to the lattice (shown with red lines below).

After that, I added one more coat of paint.  I decided to paint the lattice to match the color of the patio furniture to create a cohesive look with the accessories.  The last step was attaching the lattice panel to the house.  Alex used a concrete drill bit and created pilot holes for the screws first, then used screws to secure the lattice panel in place.
Once he finished, I happily added my little potted plants and squealed with excitement! 
 I used thinner metal pots/vases that I had from Ikea (they are kind of old),  I figured the lighter weight the better since I had to add a plant and soil.  To secure to the lattice, I used metal clips from an office supply store that had a small hook attached to them.  Who knew I'd use them for something like this but it worked!
This is how it is looking today, but I'm feeling kind of eager to add a couple more plants or flowers... it needs some more right?!?!  Keep in mind I am no expert on plants or flowers, so if they grow all crazy and huge I will move or adjust as needed.  The fact that I have had them for a week now and they are still alive is an achievement for me :)

What do you think of this DIY-ikea creation?!?!  Are you Head Over Heels for this one too?

I'll take the rest of the Deck-orating afters tomorrow morning when I have some pretty sunshine to work with!  Can't wait to share, have a great weekend everybody!

Click here if you want to see Week #1's DIY-ikea creation: Ladder Shelf Turned Bathroom Towel and Storage Rack.

Our Entryway Update Photos!

Kayd Roy9 Comments
Ready for some fabulous 'before' and 'after' action of Alex's latest project?!?  Let's check it out!

I know we mentioned how we wanted to freshen up the appearance of our back entryway a while back.  After thinking about different options (along with Alex's experience installing beadboard and wainscoting) we thought the casual charm of beadboard would fit perfectly.  Here's how it turned out....


I know it looks like a subtle change in the photos, but up close it sure makes a world of difference for the space!

The photo below kind of illustrates what I'm talking about....  
If you look closely at the wall & paint above where the baseboard cap was you can see  bumps, cracks, and ripples... Not to mention once the baseboard cap was removed you could see how many layers of paint that have been on the walls!
Basically, the walls looked just plain junky but only toward the bottom of each wall.  Maybe it was from the combination of thick layers of paint and exposure to moisture/ outdoor elements when people went in & out over the past 80 years?  Who knows!  But I think the fresh layer of beadboard trim really helped to clean up the look and give a fresh start!

I know Alex covered a lot of the process in his last post, but here they are in a flash!  First up, removing the baseboard caps.
Then he took measurements for the top rail & beadboard panels and started cutting.  Once the panels and top rail were ready to go, he used finishing nails and Loctite Power Grab to attach to each wall.
He then used 1"x3" select pine to frame in the corners in order to make a smooth transition from the beadboard to the bare wall.
Lastly, Alex finished up the project by adding a fresh coat of paint (Behr's Polar Bear White).
Here's a few more 'afters'.
I'm loving the updated look!  But as things seem to go with any update, I'm now thinking about sprucing up the decor.  You might have guessed that was coming?  I think I need a new rug that will add a little color/ pattern along with something new for the walls?  Hmmm.... the gears are turning. 

I'd love to hear storage and decor ideas!  Please let me know if you think of any!  Speaking of decor ideas, I still need to work on our deck decor.  That to-do list task kind of got shoved aside since I was prepping/packing for my work trip.  Ugh, don't you hate being behind on your to-do lists?!?  Oh well, back to the questions....

What do you think of the update?
What should I add or change in the space?
What other ways can we add storage to this entryway?

The Deck Is Dun-Dun-DONE!

Kayd Roy11 Comments
Take a look at our backyard deck refresh! 

Alex slaved away at it while I was in Michigan, then over the Fourth of July, and finished it up on Saturday!  We still need to stain it (ugh and pick a stain), but man it feels good to have the boards leveled out and railings.  It's a WHOLE deck now!
In case you are wondering about what or why we changed it, lets look back.  The first time we redid our deck was in the summer of 2010.  The boards were rotting and spaced too far a part (even little Sadie got her paw stuck between them once, so sad!).
 After that this was kind of how it looked ever since.  We hoped to have added the railing and stain last summer, but the tornado wrecked those plans (still breaks my heart seeing our backyard with those trees and shade).  Then over time we started to notice a problem with our first redo...
The boards were popping up unevenly as the nails loosened up.  It didn't take Alex long to figure out that he should have used decking screws instead of decking nails (remember we aren't perfect, learning as we go!).  He also determined that we needed additional support joists on the old frame. 
 So Alex started tearing up the deck again....
Deja vu?!?!
 Alex figured he should flip each board since they were faded before screwing them in. If you look closely you can see one of the additional joists he installed.  One things for certain, we will have to be more timely with staining this time!
After getting the base set, he began to install the deck railing.
 Alex picked the railing style knowing that the only thing I was against was the plain skinny railing sections that you can buy at Home Depot.  He picked up some 1 X 6" wood and created this on his own.  I think he did a fantastic job and I love the style!
To give the deck some flair he also built two wood planter boxes and a bench.  Yep, always above and beyond (even though it means more cursing and time in the hot sun, LOL!).
With the bench and planters in place the deck was done!  Hooray!
I'm loving this improved space right outside our door, just feels cozier!  Heck, maybe now we can finally enjoy our yard this summer?!?
Here's a closer look at the finished planters and bench. 
Hmmm... I am sure there's ways to decorate the deck and bench right???
Alex already said that I can remove those little trees (because they'll one day be full grown blue spruce trees) and add some pretty flowers so I might do that this week!


  Woo-hoo!  Well, we can almost check that one off of our Summer Plans list (still need to stain), but I love it!

What do you think of the deck? 
What kind of fun outdoor decorations should I add?

Decorating in the outdoors is still kind of foreign to me, if you have ideas let me know!

Our Completed Door Turned Headboard!

Kayd Roy19 Comments
  The door turned DIY headboard project is complete!  Check out the finished look (and click here for the full tutorial post showing how we made it from a salvaged door)!
Gorgeous right?  I have to say it actually turned out better than I expected, I'm sooooo happy with it!  Crazy to think it all started with this $40 salvaged door.
My hubby gets major kudos for taking that....
To make a rather snazzy looking headboard if I do say so!
I still can't believe how similar it looks to the Pottery Barn headboard for 1/5th of the price.
Am I right?!?! 
That makes it even more exciting!!!
Anyway, my new dilemma is our bedding.  I know I wanted all white in the beginning when I mapped out our Master Plan, but I am second guessing it now.
Should we have something with some color to break up the bedding from the headboard? 
Do you think the pop of red is still fun as the accent color?
What color or pattern of bedding would you add?

I'm all ears, really let me know what you think.  I've been online shopping for bedding for DAYS and I'm getting sick of it.  I think some fresh ideas or advice would be awwwwwesome :) 

A No Good Very Bad Monday Tubby

Kayd Roy4 Comments
Well, things in the Hammers and High Heels house are pretty crap-tacular today for two reasons. 

1- My poor hubby is sick (and slightly crabby)
and
2- An unsightly water damage spot in our Dining Room was caused by a water leak
 Now for the funny part-  reason #1 listed above actually caused reason #2.  Yep, the poor sick hubby caused the water leak... which may have lead to additional crabbiness :)

I guess I will back up and tell you the whole story now. 

I got home from a pretty standard day at work knowing Alex was home and not feeling well.  I shouted "hello" to which Alex replied "hi, I'm upstairs".  I put a few things away and then walked up to our bedroom expecting to see Alex laying in bed.  Surprisingly, no Alex and, each door upstairs was open.
For reference: our bedroom is not in the picture but it's to the far left, then our upstairs bath, built-in cabinets, and our Guest Room on the right.  The bath tub hides behind the built-in cabinets

 I called his name again and realized he was in the bathroom taking a bath in our tub- weird!  Why?  Neither one of us has ever taken a bath in our tub because it's pretty little... okay like SUPER little (and not very fancy).  Alex simply said, "I needed to soak in the hot water, I don't feel good".  I felt bad for my poor hubby and went to go make him some soup. However, I couldn't help but giggle a little bit at my hubby crammed in the little tub, ha I giggle again as I type this :)
Anyway, Alex's tubby took a sour turn when I discovered that water was leaking into our Dining Room below.  I felt like a real biatch screaming at him to get out of the tub :( Nothing like water damage to make you freak the heck out right?!?  Anyway, after Alex jumped out of the tub to investigate, he determined that he must have let the water level reach past the overflow drain and the coupler holding that pipe together wasn't tightly sealed.
 So the excess water didn't go down the drain, it soaked into our dining room ceiling and quickly onto the table, chairs, and floor.  Thankfully, the amount of water was pretty minimal.
The worst part is this gross spot on the ceiling of our...
...normally very sweet looking Dining Room.  Waaaaaa!  Why!?!?
We're kind of dumbfounded for how to even fix this.  The original texture of the ceiling makes it quite complicated. Grrrr.
For now it is box fan city around here. 
The most important thing is to do what we can to dry out the floor and ceiling. Ugh, the fine glorious moments of home ownership.
So, there you have it- a no good very bad Monday caused by Alex's tubby.

  I guess the nice thing I can report is that Alex went off to bed about an hour ago.  I'm hoping lots of sleep will get him back in DIY-ing shape! 
Before he started feeling crummy he finally got a start on our salvaged door headboard project! I can't wait to share it with you soon!

I hope your Monday was better than ours ended up :) Here's to a fresh start tomorrow!

Wainscoting Tutorial & Getting My DIY Groove Back

Kayd Roy11 Comments
I've been home for about a week now since my trip to Asia.  After doing some necessary cleaning, organizing, laundry (mountains of laundry), and spending some much needed fun time with my hubby, I think I am finally ready to get back into some DIY-ing!  Before I left, we were mid-way through our Master Bedroom Redo Project and I am eager to get moving again on that again.  Also, I realized I never wrapped up our Guest Room Redo (post tornado repair) so I hope to get some pictures taken and write up a quick post for that too!

For now though, it is time to wrap up the wainscoting tutorial and show you some more 'before' and 'afters'!  The whole idea of adding wainscoting to our Dining Room came after Alex read an "All About Wainscoting" article in This Old House magazine. It gave us a lot of ideas and information for the project and it inspired the crap out of Alex so much so that he put it as his #1 project during the time I was away.  
Now before I begin I thought I would include this image below from This Old House to help with the terminology for this project, however, their construction is a bit more complex than ours.  Alex did a few things differently since we wanted a more simplified look that would fit nicely in our home. Two examples: he used our existing baseboards and individual plywood panels between each stile instead of one on each wall.
 Did you know what a stile was?  Neither did I, but I do now!

 Let's get started!
First, Alex removed the base cap from our existing baseboards.  Then he measured and cut the chair-rail pieces for each wall (we used 1 piece of wood instead of the chair-rail cap and apron pieces in the image). After each piece was cut, he installed them with nails and nail glue. We chose the height for our wainscoting according to the height of the breakfast bar that separates our kitchen and dining room. 
After the chair rail was in place, Alex installed the stiles evenly spaced along each wall.

Next, Alex cut the 1/4" sanded plywood panels. Notice Alex opted for "Diddy" glasses again instead of taking the time to grab real safety goggles?
These are the panel sections that are installed between the stiles.
Alex installed them using nails and nail glue.
After they were all in place, Alex smoothed out the finish and saw lines using wood filler, caulk, and sand paper. Then it was time for the last step... paint!
Love that 'Before' and 'After' action!
It really helped to brighten up the space and make it feel a bit larger.
Now, I know a few of you are wondering why we aren't using my DIY Numbered Chair Covers (if you want to make your own view the sewing tutorial here and the painting tutorial here). We take them off from time to time, but Alex removed them from the chairs when he began working in the room.  Maybe I will put them back on soon... or make something new and exciting, hmmm?!?!
One last look, ahhhh I am in love with this change!
Alex estimates the project cost ended up just under $200 for the wood and small supplies.  That's it for the wainscoting!  Now I need to get our Dining Room decorated for Easter!
See you soon with an updated look at our Guest Room and progress in the Master Bedroom!

Dining Room Reveal! Alex Meets the Wainscoting Deadline!

Kayd Roy12 Comments
Hello everybody! 
I am back from my 17 day business trip adventure, hooray!  I am feeling well rested, happy to be home, and I am PUMPED to get back into my blogging routine!  Not sure if you've missed my posts but I have certainly missed writing them :)

Now, it was the big project I was waiting to finally see once I got home- our newly improved dining room with wainscoting.  Seeing the blog posts of Alex working on the wainscoting was such a teaser! Thankfully, all of that anticipation was worth it because I am SOOOO HAPPY with the final look once I got home!

So, are you ready for the big dining room reveal?!?  Of course you are, here it is...
This is what the dining room looked like before for reference...
Again, another 'before'...
And the 'after', looks so nice right?!?
Now, I know from the 'before' photos you can't see much of the walls, but that was because they were never worth showing much of in a photo.  I REALLY LOVE the formal feel the wainscoting adds to our dining room!  It also kind of gives it a more formal feel, don't you think?
My hubby certainly added something beautiful that made our home even more wonderful to come home to!  Nice work Alex! Oh, and he will be back posting later this week covering the DIY step-by-step post for this wainscoting project (complete with more gratuitous action photos).

What do you think? 
Are you loving the wainscoting too?

As for those other projects Alex wanted to tackle, well he didn't get to them... because he tackled a different project all his own which had nothing to do with our house.  Had more to do with this I guess...
Yep, that is Bill Murray from the movie Zombieland.  Curious? Stop by tomorrow to check out his "other project". He-he!!!

Head Over Heels Friday: A Parade of Projects in Honor of the Birthday Boy!

Kayd Roy7 Comments
Today isn't any ordinary Friday, nope, this Friday is extra super special because...

It is my hubby's 28th birthday!!!!!

In honor of Mr. Hammers and High Heels (I wonder if Alex minds that title?) I wanted to have a big ol' parade down the street!  But due to the "arctic blast" we are experiencing here in Minnesota, I wasn't able to coordinate the marching band, fire trucks, elephants, ponies, clowns and all the other parade floats as planned. 
Bummer I know. Elephants and ponies don't like negative wind chill temps.

So instead, I have arranged a little visual parade of Alex's DIY projects to honor his birthday here on the blog!  I think he will love this surprise feature and celebration of his hard work!  Oh, did I mention it is a surprise?  He has no idea I am writing about him for this Head Over Heel's Friday, hehe!  Links to the full posts included below each photo if you would like to view the tutorials.

Happy Birthday Alex!
I'm Head Over Heels for all of your handy hard work (and you of course)!


(PS- it makes me so sad looking at our yard and our neighbor's before the tornado, I miss all of those beautiful trees!)


Thanks for celebrating Alex's birthday with us blogger style!

Now, I'll have to keep my hubby out of trouble tonight.  What kind of trouble you ask?  I happen to have a great example from Alex's 23rd birthday.  Here's Alex...
  He is riding the penny pony at Meijers holding a stuffed animal and a case of beer.  A store employee warned him that there was a weight limit and Alex yelled back, "No, it's okay, I'm the Birthday Boy," and pointed at the "Birthday Boy" sticker I had given him.  Many onlookers found the exchange as hilarious as I did!  LOL!

But I guess I have to remember, my hubby is now 28, not 23, so really I am expecting a calm evening with a few friends. 
Be sure to send him some birthday wishes in the comments, I am sure it will make him smile :)

"Sadie Urkel" and Her Glass Bustin' Booty

Kayd Roy3 Comments
This post mainly features a simple DIY tutorial for a broken glass pane door.  However, since our ample bottomed pup Sadie caused the damage, I had to have a little fun with this post at her expense! WARNING: to understand some of the quotes/references you would have to be familiar with the 1990's sitcom Family Matters (and Steven Q. Urkel).

 Here it goes!
On a lovely Saturday afternoon, Sadie and our smaller pup Rocco were happily & innocently playing together. Then, the fun took an ugly and unexpected turn.... Suddenly, in a swift, sharp movement, Sadie swung her 65lb booty right into our beautiful (and original) glass paned door. "-SHATTER-" Alex and I quickly ran over to find our two pups and a broken pane of glass (sorry, no photos from the scene of the crime).

Sadie had this "Did I do that?" look on her face that totally reminded me of Steve Urkel (this is where the goofiness begins). Then she shot Rocco a "Look what you did" glance in hopes we wouldn't pin her as the culprit (nice try, but no dice considering Rocco's head doesn't reach the height of the glass).

We were bummed, but thankful there wasn't a scratch on either pup! Broken glass is scary!

After we assessed the situation, Sadie looked over at Alex and said "Hey, Big Guy"..."You could fix this!".  Alex obliged with a "No sweat, my pet."

**********
The Big Guy (Alex) started by taking out the wood trim around that once housed the now broken glass pane, using a box knife and screw driver. Alex made sure to be careful as he lifted each piece of trim in order to prevent further damage.
  He repeated those steps along all four sides of the frame.  With the trim removed from one side of the pane, we were ready to install the new pane of glass.

We picked up the new pane of glass at North End Hardware right here in North Minneapolis. They have a glass repair shop in house and they cut a 8.5" x 13.0" piece for me right there on the spot! No ordering, no waiting.... I highly recommend them if you are local and need any glass repair. Even better? The new pane of glass only cost us $3.00!!!  Alex added Dap's Clear Glass and Window Adhesive around the frame, then carefully added the new glass into place.
Lastly, Alex cleaned up any excess adhesive that ended up on the glasss and added the old trim back in.

This DIY fix is complete!!! 

Now I just need to get out some touch up paint and Windex :) Lots of finger prints and puppy nose smudges to clean up! Thankfully, the little door to our little entryway room/ space is now whole again!

***********
So, after the door was all fixed up, Sadie knew she was back in our good graces stating, "You love me, don't you," and "I'm wearin' you down baby.  I'm wearin' you dowwwwwwn!"  She was so overjoyed that she even wanted to play some Polka music and had the nerve to ask....
Okay, okay, no more Steve Urkel references- can you tell I was a TGIF fan back in the day (or that I may have spent too much time on Photoshop this weekend)?  Oh well, I loved Family Matters!

Hope some of you out there got a laugh out of this one!  Happy Monday!
Visit this site for a complete list of Steven Q. Urkel quotes.

Fence Panels Up. Concrete Slab Down. Just A Bit Closer To A Normal Yard

Kayd Roy1 Comment
Goodness, I feel like we have been juggling multiple projects for a while now.  Are you confused?  I know I am, but I am doing my best to stay on top of it!  We got a couple more things checked off the list over the weekend  though including the fence panels, some concrete, and some stucco.

It is crazy that it was over a month ago when we tore out our smashed chain link fence.  Then about 2 weeks ago we got all of the posts cemented in for the new wood privacy fence.  Well, we finally got around to getting the wood panels up. Talk about a snail's pace on this project!  Ugh! Due to the dwindling daylight hours we are stuck to just weekends now on outdoor projects.  But with the panels up at least we can now see what a difference a privacy fence makes in our yard!

Putting up the fence panels was a 2 man/ woman job (unlike the posts).  So I had to get my hands dirty and help out on this part with Alex.  We put each panel into place and then had to check to see if it was level. Hmmm, it would appear in this photo that Alex had a wedgie for the duration of this project but he assured me this assumption was inaccurate :) HA!
Once the panels were properly aligned and level Alex secured them to the fence post using decking screws.
We continued those steps over and over until the fence started to take shape!
Here's what Sadie was doing while we were working hard on the fence.
We got all the panels up except for the gates because we had the concrete work scheduled for a couple days later...

Mighty fine slab of concrete right? It was put in place of the chunk that was damaged after the tornado when 'Mega Stump' was uprooted.  The stucco on the corner of the garage is also in the works.
I'm just happy we don't have to walk through the dirt like we have been for the past 5 months!

Anyway, the fence project rolls on with only the gates remaining... and a mild weekend in the forecast!  I'm sure this weekend will be a real F-ing good time (get it? F for Fence of course!).

See you Friday for Head Over Heels! It will be a zombie-fied Halloween decor post! 
This one is a MUST-SEE!!!

Revisiting Our Fireplace DIY Projects: Building a Mantel For Under $100 & Mounting a TV to a Brick Fireplace

Kayd Roy26 Comments
  It was brought to my attention a couple weeks ago by one of our readers named Jackie (thanks Jackie!) that our posts on Building a DIY Mantel and Mounting a TV to a Brick Fireplace were leaving out a couple very important details.... like where the heck are all the cords, cable box, DVD player, etc???

REALLY GOOD QUESTIONS!  How the heck did we miss that???
I can only say that back in June of 2010, I was VERY new to blogging and I think I was better at confusing people with my typos and run-on sentences than I was at accurately describing our projects. Yep, even blogging takes a lot of practice! So, I'd like to revisit these projects and shed a little more light on how we got our precious TV working with all the TV accessories/gadgets.  Also, I think this is a challenge for many people that live in older homes. Heck, a 1920's home certainly wasn't designed to accommodate a location for a TV and all the necessary electrical outlets (another big challenge on this project).
Before I start I should give you a better idea of our Living Room layout.  
And just for fun- did you know this is what our Living Room used to look like?
The fireplace is centered between 2 windows on the left and the staircase is to the right.  At the end is a large window and then an archway where this photo is taken from.
With this layout, we were left with no other options for the location of the TV.  It had to go on the fireplace, but that was fine anyway since the fireplace is the focal point of the room. 

Here 's how we mounted our TV to the brick:
We picked up a wall mount at Target for $80 and the mason drill bit at Home Depot for $12. Alex measured out the location for the mount where he would need to drill, and marked each spot. Sadly, I do not have more pictures of this process, this was before our blog existed so I didn't document everything. The only thing I took a picture of was Alex wearing my sassy BCBG shades during the drilling since we didn't have safety goggles on hand :) It was hilarious and I didn't want to forget this moment! 
I bet P. Diddy or Dirty Money or whatever his name is would drill wearing stunna shades too....
Sorry, I couldn't help myself

It took Alex a while and a LOT of pressure to drill as deep as we needed for the wall mount.  BUT... we got the TV up!

 Then it was time to build a mantel so we could help hide all the crazy cords (and decorate it for each season of course)! In between, we also ripped out all the old icky white carpet then sanded and refinished the wood floors underneath... oh and we painted those peach walls gray too!

Back to the mantel... again, this is what the fireplace looked like before (and how crazy messy the house was, ick!).

Here are the DIY steps for building a fireplace mantel:
To start, Alex picked up 1x2's, 1x3's, 1x4's, to create a frame to stick the wood to. Alex used Loctite Power Grab construction grade adhesive to bind the wood to the brick.
Then he added 1x8's and 1x10's of pine as the face of the mantel. Note: pine chosen over plywood because it has a finished grade. He used the same adhesive and 1 and a 1/2 inch wood screws.
We both picked out the trim for the top of the mantel (which was the fun decorative part). Then Alex nailed all of the trim in, taped off the mantel, and then started painting it to match all of our white trim.
Here is the finished product!  Much better right?  So inexpensive too! we didn't tally up the cost for each piece of wood and paint at the time but we know it didn't cost more than $100, might even just be $75?
(photo from our Fall 2011 mantel decor post)

Now, where are all the cords for the TV?  Where's our cable box and DVD player?

Take a closer look at the left side of our mantel, notice anything new?
If you spotted this little notch in our mantel you WIN! Just kidding, but that is our little 'cord' secret.  When Alex built the mantel he carved out 2 notches for the TV cords, one at the top here and one at the bottom where they come out.
Now, this part is hard to explain since I didn't get photos back when Alex was actually working on it (again, pre-blog existence) so bear with me.  The cords come out at the bottom left side of the mantel where Alex drilled a hole into the floor to route the cables into the basement. They travel along the wall and come back up through another hole behind this big Ikea cabinet (I guess they don't sell this exact one anymore? Can't find it online)...
Behind this cabinet is also where the nearest electrical outlet was, so even if we had somehow put the cable box closer to the mantel there still would have been cords to run from the wall.  Inside the big Ikea cabinet on the middle shelf (behind the glass part of the door) is where our cable box & DVD player sit. The whole set up is nothing fancy, and we don't have a lot of other fancy pants TV electronics in there so that helped to make it easier (although I think Alex still wonders how he can get the surround sound to work in our house).
 All in all, it wasn't the easiest thing to figure out when we got the house, but happy it works for us!

******************

That wraps up how we were able to make a modern TV function in our old 1924 Dutch Colonial with a DIY built mantel and drilling into some brick!
It was kind of fun to take a look back at our house early on.  Reminds me that we have put a lot of work into it to make it special and our own!

If you are curious about the original Living Room posts from June 2010 here are the links. Be warned they are confusing and a bit messy!
Living Room: Before and Afters
Carpet removal, sanding and refinishing wood floors
Building a DIY Mantel for Under $100
Mounting a TV to a Brick Fireplace


Linking this project up!!!!


Goodbye Ugly Chain Link Fence, Hello Manual Labor (DIY Style!)

Kayd Roy1 Comment
As I mentioned in a post from last week, Alex and I are taking on the removal of our damaged chain link fence AND installation of a fancy new privacy fence.  Over the weekend we finally got down to business and ripped out the old 3' chain link fence that was damaged from the May tornado.  I admit, I was REALLY dreading the removal project because I assumed it would be really difficult and time consuming.  Oddly enough, it was pretty easy and only took about 2.5 hours, really!  Keep in mind we have a very small yard within the city, but it was not as bad as I imagined.

So, here is how we took this bad boy out...

Alex went around the perimeter with bolt cutters and cut the chain link from the posts they were 'wire tied' to. The top metal poles came off first, that part was really simple...just Alex and a Sledge Hammer!
As he freed and removed the metal poles along the top of the fence, he rolled up the fence (to minimize the mess and make it easy to transport to the big red dumpster). 
I guess the part that concerned me the most was taking out the metal posts that were cemented into the ground.  As Alex continued to cut the fencing off the posts he said, "I bet if we saturate the ground with water the posts will come out a lot easier."  I thought his idea made sense too and decided that we should at least give it a try. 

I grabbed the hose and saturated the ground surrounding one of the posts with water.  Alex then started to wiggle the post back and forth...
LOL's, we know this pic looks ridiculious!

Holy buckets!  Our stupid idea really worked! 
Alex wiggled, kicked, and loosened the posts to the point where he could just pull them and the cement out of the ground.

Our guess is (even though the fence was fine for the 3 years we have been here), maybe these posts weren't installed with the right amount of cement?  Yes... No?  They were buried maybe 2' deep with cement surrounding, maybe that was fine for a 3' fence?  It was crazy though to just POP those posts out the way we did.

After that discovery, we 'watered' the posts a bit so we could wiggle them out the way we did on our trial run. Disclaimer for environmental folks: Don't worry! We didn't use TONS of water, and quite honestly, we never did water our yard this Spring/ Summer anyway since the tornado killed everything.  It was crazy how little water the ground needed to loosen these babies up!
Alex even let me give it a try.  It took some serious muscle (and un-lady like grunting, ha), but I pulled that post out AND the cement myself!  Hammers and High Fives for me :)  Really though, I remember feeling that pulling pain in my back and thought I was about to injure myself.  I left it to Alex after that (and I was sore for 3 days after).
For kicks, here is the metal pole that went across the top of the fence where the GIANT Pine Tree landed after the tornado
Beneath that top metal pole where the tree landed, was this metal post (along with a cheesy/annoyed/ sarcastic pose from a physically exhausted hubby who always seems to wear the same yard project shirt).  It was driven very far into the ground from the impact of the tree.  There was just over 1' left of the 3' post above the ground. 
This is the ONLY post that remains.  Even the water didn't help to get this guy out.  Since I was the only DIY-er with him on this project, he thought it was best to wait for one of his stronger (male) friends to help him out with this one. 

The last post we took out (aside from the difficult one) was the one connected to the gate.  Yea, it isn't pretty or anything, but this is the gate Alex and I walked into from our garage to our house everyday for 3 years.  It felt sort of sad but triumphant to take it out.  I hated it (for 3 years), but it was still weird to see it go into the dumpster.  Alas, we must move on!

Before we can begin installing the new wood privacy fence, we have A LOT MORE yard clean up to do (boo).  But I can't wait!  I will share the style we picked soon along with all those pesky city codes/ rules we had to follow.  Thankfully, our contractor from Dry Tech helped inform us of those details/ rules, so that was pretty easy).

See you tomorrow for Head Over Heels Friday!

Radiator Cover Update: Painting Complete!

Kayd Roy6 Comments
I finished up painting the radiator cover today, hooray! If you'd like to take a look at how Alex built this cover, check our DIY radiator cover post.
So here is a 'before' look after I got the trusty blue painters tape in position.
Then of course an action shot... oooo... ahhhh!
Here is how it was looking after I got 2 coats finished.  I used Behr's Polar Bear paint from Home Depot.  Polar Bear is the shade of white we have on all of our trim and woodwork in the house. 
Now just for a look back, here is how the sunroom was looking before.
Here is how the room looking now with the radiator cover/ bench built and painted.

I can't wait to start the decorating now!  I plan to make a cushion and I'd like 2 pillows on each end.  Not sure if I will make them or buy them if I find something I like.  If you have any decor ideas let me know, I love suggestions!
---------
So where was Alex while I was painting 3 coats today???
Last night we went out to El Burrito Mercado in St. Paul for our friend Betsy's birthday dinner.  Alex found that the menu offered a burrito called 'Burro Gigante' that he just had to order.  The burrito was 2 feet long (as illustrated below). Boy was he geeked to see his odd looking dinner selection.
So anyway, my handy husband has been out riding his bike all day to burn off some of those 10,000 calories he consumed (that he is now regretting).  If you are wondering, he managed to consumed all except about 4 inches of that burrito before he called it quits.  In the case of Alex versus the giant burrito, the burrito won.

DIY Steps To Build Your Own Radiator Cover

Kayd Roy17 Comments
What a day!  Alex finished up building our radiator cover/ bench (minus paint)! Hooray!!!
  Check out the inspiration and Alex's first steps in this post.  I'm really excited to share this DIY project because it is a great way to add something unique and useful to older homes with radiant heat. 

 Again, here is what the space looked like before, it was the perfect spot to build a radiator cover and make a nice window seat.
Here's a picture of Alex's design. Note the 2 shaded rectangles. This is where he will cut openings and place decorative sheet metal to allow heat to transfer into the room.
Just to warn you, this is a pretty long DIY post detailing how Alex built the cover.  Also, we haven't finished painting it so we don't have official 'afters' yet (sorry, it's already been a long day filled with lots of F-bombs courtesy of my hardworking hubby). But don't worry I'll get on that this week!
So let's get to it!

To start, Alex had to pull off the floorboard trim to make room for the cover since it would sit flush to the walls.
Check out the lovely exposed lathe and plaster from 1924.
Alex attached 2x4 sections to the main wall using a strip of MDF board as a height guide, in order to create a frame for the back and sides of the bench.
Here's a look at one of the back and side 2x4's drilled into their level places.
Then Alex measured and cut a section of MDF board for the front facing part of the cover. We spent just $25 for the large sheet of MDF board that we needed for this project.

Also- there are 4 total 2x4 braces to support weight in the back of the bench (you can see 2 of them here). There are additional 2 up front as well.
Once he had the front piece cut to size, it was time to cut out the openings where the decorative sheet metal would be placed.  We spent $30 on one 3x34' piece of sheet metal.
Alex measured where the openings would be to a slightly smaller dimension than the actual pieces of sheet metal. He then used a large drill bit to make pilot holes in the corners for the jigsaw.
Here's a look once he cut out both openings for the cover.
Next he had to cut and measure the decorative sheet metal pieces to fit the openings.
Once he had his guide lines drawn he used tin snips to cut the decorative sheet metal.
Alex used a staple gun to 'pin' the sheet metal in place.
Then used small nails to secure the sheet metal to the MDF board.
The next step was adding trim over the openings.  We spent roughly $10 on the few pieces of trim we needed.  Alex used his miter saw to cut the trim to frame over each opening.
Then he nailed the trim in place around the openings.
After cutting 8 pieces of trim and framing them to the front of the bench/cover here is how it looked!  Awesome right?!?  Sadie was sure excited about it!
Then it was time to install the front cover board.
Alex slid it snugly into place flush with each wall.
He then drilled a pilot hole that would be used to anchor in the front board to the 2x4 sections he had previously secured to the floor to frame in the bottom section.
Here he is slowly screwing in the front board to the 2x4 behind it (He lost his Phillips driver bit so he had to go about it the old fashioned way....)
Next we went outside to cut more MDF for the top part of the bench (sorry I missed the picture of this, but just measuring and sawing).
Then we plopped it on top!
Here is a closer look as Alex slides it into place.
 The top sheet of MDF was then secured to the front and rear framing blocks using just 2 standard wood screws. This allows for access to the radiator should service be necessary and to bleed them in the fall.   
PS- we learned a lot about bleeding radiators through this project thanks to our blog friends- Hammers and High Fives for you guys!!! We're always learning here!
Alex then used a few nails to secure the cover trim to the front board. 
The last piece he had to add was a section of quarter-round at the bottom.  He measured and cut the trim, then used the PowerGrab to secure it in place.
 Yay! Sticking in that last trim section!
 Then he battened the hatches with a couple more finishing nails.
 Drumroll....
Here is the final product (sans paint) after building!  Total price on this DIY project $65.
I'm so excited, it looks beautiful in place, like it was already meant to be there.
I will get moving on painting this bad boy, and can't wait to break out my blue painters tape!  Then I get to buy and/or make some decorative pillows and cushions for this bench!  Yes! More DIY projects ahead!

Hope everyone had a great weekend, it was pretty cold here in MN (even snow)! But we made the best of it and got a lot done! Hope to see you tomorrow for an inspiring post about decor, you won't believe all the ideas!

*Update 4/23/11: The Radiator Cover is now painted, check it out here!

The Lettered Cottage

The 'Hottest' Seat in the House: Alex Designs a Radiator Cover and Bench!

Kayd Roy9 Comments
While I was away in Chicago and Grand Rapids, Alex got to work on a new surprise project!  I was soooo excited when I saw what he was working on when I got home!

We have a small room on the backside of our house that is adjacent to the living room. In this room sits a long radiator that is sandwiched between 2 walls.  Take a look...
 We always thought this would be a perfect spot to build a radiator cover/ sitting bench.  Here are a couple images to get an idea of what we are talking about...
Houzz
Isn't it an awesome way to add nice window seating and reclaim what would have been unuseable space!?!  It also means that I get to make some new cushions and pillows to style up this little space! Yes!!!!
PLS Custom Design
 So, here is a picture Alex took of his game plan for the DIY radiator cover/ bench.
We have all the supplies and Alex has been working away for a few days on the cover.  For now this is a little preview of where he is at, but we will have more detailed DIY post to come once we get finished up!
Just for fun, here is a shot of Alex's worker buddy (aka a gratuitous Rocco photo).

Working hard? Hardly working?  You be the judge :)
I'll continue to take photos along the way while Alex and Rocco work and the post should be up in a few days!
Happy Monday!

DIY Smoke Guard for Our Fireplace

Kayd Roy14 Comments
  When we woke up in the morning after we had our first fire in our fireplace, we realized there was a little soot on the ceiling above the fireplace. Which also kind of explains the big smoke stain on the brick (you can see in this before photo of the living room).  Alex did a little more research and found out that the hearth opening to our fireplace was too large in comparision to the opening on our chimney.  The dynamics of home airflow get a little confusing from here, but basically we needed to make the hearth opening smaller so that the smoke would have time to travel up the chimney (instead of into our living room).  

So we took a trip to Woodland Stove and Fireplace to see if they had a Smoke Guard we could install. Here is a link to what a Smoke Guard looks like, it's basically a steel beam that goes across the top of the fireplace that makes the opening smaller.  Woodland didn't have a Smoke Guard in stock, but said they could order one for around $100, but we wouldn't get it in time for Thanksgiving.  The gentlemen working there were really nice, and even taught us more about airflow and how our nearly 90 year old chimney system works.  They also planted the idea that we could likely make a Smoke Guard ourselves... DIY Project?!?!  We love them!

Alex went to the ol' Home Depot and got what we needed to make the Smoke Guard.  Here is Alex with the 2 pieces of steel construction joists. These joists will be sandwiched together to make the Guard.
Alex took measurments of the fireplace opening before cutting
After taking measurements, Alex retreated to his 'Gentlemen's Cellar' (did you hear? Man caves are out, Gentleman's Cellars are the new thing) in the basement to cut the steel.  Just an FYI, our basement is unfinished, Alex uses the large room with our boiler as his sort of Gentlemen's Cellar/ workroom. 
Alex had to cut the steel using a hack saw and some heavy duty metal snips.
Alex took the 2 halves and pressed one inside the other to make the Smoke Guard more rigid.
Alex used Rutland High Heat Silicone and guide screws to secure the 2 halves together.  Then used the black High Heat paint for a fancy finished look.
After he applied the silicone, he used a work clamp to tightly press the 2 halves together to allow for drying.
After drying, Alex applied the High Heat paint (because we didn't want a chrome Smoke Guard in our living room).
 He used Loctite Adhesive and the High Temperature Silicone to seal and adhere the Smoke Guard against the brick.
Then it was time to install the Smoke Guard!
He used a rubber mallet to wedge the steel smoke guard into place.
He used the Silicone again to seal all the gaps around the front and back of the DIY Smoke Guard- this is a must so no air/smoke can flow through.
Here is what the fireplace looked like before.  We featured the fireplace damper control in the last blog, but you can tell the difference in the 2nd photo with the Smoke Guard.
See the difference with the steel panel? Not a huge visual impact.
But with another fire, big impact!  So beautiful and no issues with smoke with the new Smoke Guard, love it!

Winter is Here! Taking Extra Steps to Save Some Energy and Cash

Kayd Roy7 Comments
One great thing about our house when we purchased it was that it had brand new double hung, tilt wash windows throughout.  Well.... except for 4 of the windows, WTF! (= Why The Face..... if you like Phil from Modern Family). Yes, of all the windows in our entire house there are just 4 that the previous owner decided not to update (which seems just plain weird, how much $ did that save anyway)?  The 4 windows are on the South facing side of the house, so maybe that was the logic?  Anyway, we assume the 4 old windows are original to the house, check out the below picture with the rope pulley system.  Has to be 90 years old right?

Here is an example of one of our new windows in the dining room, brand new, functional, and energry efficient, love them!

Since we have 4 old windows, we have to use the ol' Frost King Window Insulation Kit until we're ready to shell out some dough on new windows (and when we do, we'll get to do something cool with the old antique windows once they come down!).  We didn't insulate last year because we were so busy with all the other renovating (or we were too lazy to figure it out), and we regretted it with each and every gas bill we received.  The highest gas bill from winter (here in Minnesota remember) was just over $300 for ONE month!  Crazy pants for our little old house, right?
Here is a shot of Alex adhering and smoothing out the plastic film after he applied the double sided tape.
Next, he tightened and sealed using a blow dryer (seriously, who drempt up this 'technology'; Really, plastic and a blow dryer?). Oh well, it's weird but we hope it works.
Once he was all done with each window, we pulled our wooden blinds back down.  You can't even tell the plastic is there other than a little shine at the window frame.
 We plan to take a few other steps to make our home a little more energy efficient this winter. A couple ideas include weather stripping for our older doors as well as setting the timer on our thermostat to be on when we are home after work and set to lower temps while we sleep at night.  Here's to hoping we don't get a $300 bill at all this winter!

Circuit Overload! Adding Basic Electrical Skills to Our Renovation Resume

Kayd RoyComment
Surprise, surprise, something bad and inconvenient happened in our old house... electrical issues.  Alex and I are total DIY-ers, but there are two things that bring us slight fear when working with- Plumbing and Electrical.  Basic plumbing and electrical installation is no problem (like a sink, toilet, or light fixture).  But troubleshooting a mystery electrical problem is pretty scary.

We found this super helpful site called The Circuit Detective and after a little research, Alex was able to determine that the problem was a tripped GFCI outlet due to circuit overload. Who knew that running a sawzall through a kitchen outlet would be a bad idea? Turns out that when a circuit runs with a heavy load for too long the GFCI will trip because it can't determine if the power surge is being caused by a short or water hazard. It's a great safety feature, but it put three power outlets, two recessed lights and a dishwasher out of order (when the dishwasher is down in our house, it becomes top priority to get it fixed!)

NOTE: Even though the outlets weren't working, they were still hot! After Alex got a few good jolts and a tingle coursing through his hand and arm, we decided it was time to kill the power......I'd suggest you do the same if you tackle any electrical work.

Alex removed the faceplate and exposed the wires. He paid close attention to the schematics of the wiring and carefully removed the old tripped outlet
He made sure to check all of the load connections that will be running from the new GFCI and made any necessary connection improvements (a few were loose). 

With the connections re-established he was then ready to wire in the new outlet
Once the wires were properly attached and the power restored, the tell-tale light in the corner let us know that the system/GFCI was installed correctly and once again protecting our kithen outlets.
Once the power got started again, Alex moved on to fixing the dishwasher.  We had to pull out the dishwasher to disconnect the power when Alex fixed the electricity.  While pulling it out, the water supply line kinked near one of the fittings which resulted in a leak (of course). So then we had to get a new one and install it.  Good times.

Living Room: Mounting a TV to a Brick Fireplace

Kayd Roy5 Comments
Since our fireplace was the main focal point of the living room, it made no sense to put our TV anywhere else, it would just make the room unbalanced. So we decided to mount our TV to the fireplace brick.

All you will need is a wall mount for a flat screen TV and a brick drill bit.  We found the mount at Target for $80 and the brick drill bit at Home Depot for $12.  Once it was time for Alex to get drilling, we realized we didn't have any safety googles on hand. So, I grabbed the next best thing... my sassy BCBG shades! 

Doesn't he look fabulous drilling....

The drilling did take a lot of time and pressure, Alex had to throw a lot of weight into the brick to get the drill bit through, but it all worked out!
Sadly, this was all done pre-blog creation, so I missed getting a shot of the mount itself. But, here is a look at the TV after being mounted. (sorry for the blurry picture, this was also before we had a nice camera) 


  *** Update 12.15.2013 ***
I wrote a new post about this project with more details on the electrical and cable cords, check it out here:  /hammersandhighheels/2011/10/revisiting-our-fireplace-diy-projects.html

I thought I should also update this post with a nicer photo!  Here is what the TV looks like mounted today (during Christmas time I should note!).