Carla Like It Is

Thirty

Kayd Roy3 Comments
Can you believe it?!  I am THIRTY years old.... am I old or still considered young? Haha!  Guess it doesn't really matter, because it's happening (or happened) and just like on past birthdays since beginning Hammers and High Heels (click to see 27, 28, or 29), I am going to share my birthday list-  Not a to-do list, or a list of goals, or things that I want, this list is focused on the positives in life.  I know everyday life isn't completely perfect and I don't have everything figured out but... 

This is a list of the 30 things that I am happy about and thankful for in my life as it is right now- on this birthday.

At Thirty Years Old...

1.  I understand that I spent my 20’s figuring out and sort of setting up the kind of life I wanted to have.  I’m thankful for all of those experiences, everything I learned, and how hard I worked during those 10 years and in a way, I am very thankful to leave that time behind and move into my 30's with the knowledge I've gained.

2.  “Let’s see if Carla can fit in this”…. I’m still known for my hidden roadshow talent at work.  I suppose it’s always good to provide entertainment for coworkers.

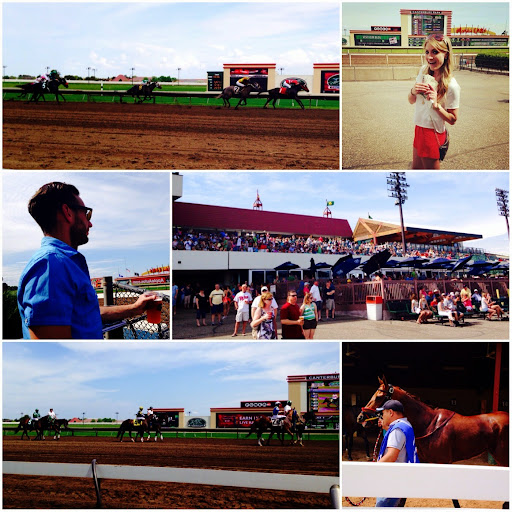
3.  My dad set a record number of visits to Minneapolis, 3 visits already and more to come.  Glad to see him living more life and having more adventures throughout the year.

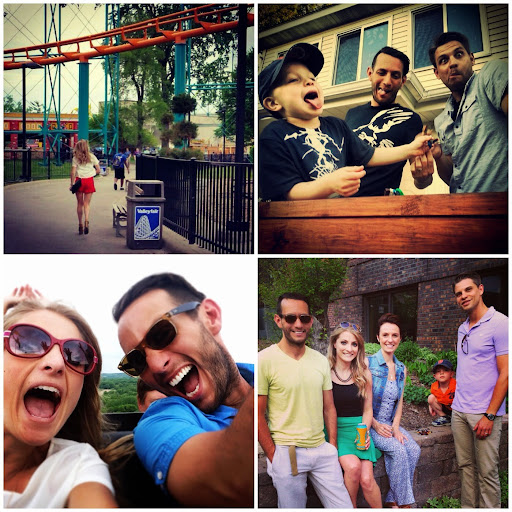
4.  Along with my dad, we've had just about everyone from our immediate family visit Minneapolis already this year.  Even with all the crazy prep for guests, I always love every second I get with our family, especially on our (new) home turf.

5.  I am named as an inventor for three patents filed with the US Patent Office.  I know many of my fellow co-workers have like 20 or 100 of these, but getting the news that these were filed felt pretty cool.  Maybe I'll have the real deal plaque on a future birthday list?!

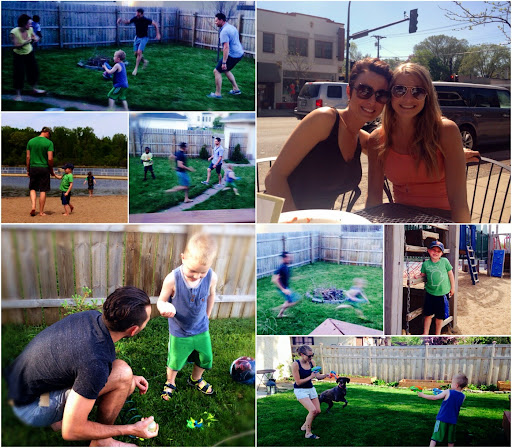
6.  I really love my role as auntie to these kiddos.  Despite the long distance, I think they like their auntie too :)

7.  After a 7 year strong hold against it, my husband finally joined the social network know as Facebook. 

8.  Thirty feels like a  kick-in-the-pants sort of, and I mean that in a good way, for me at least.  I've had this feeling about it that "well, no more excuses, you aren't in your 20's, time to REALLY get moving on all the things you've wanted to accomplish in life before you are too old to enjoy it."  I realize that some of you will think this statement sounds nuts since yes, I've got plenty of life left and I'm only at 30, but I hope you understand what I mean.  It's a different feeling than when you turn 20, 20 doesn't really kick-you-in-the-pants.

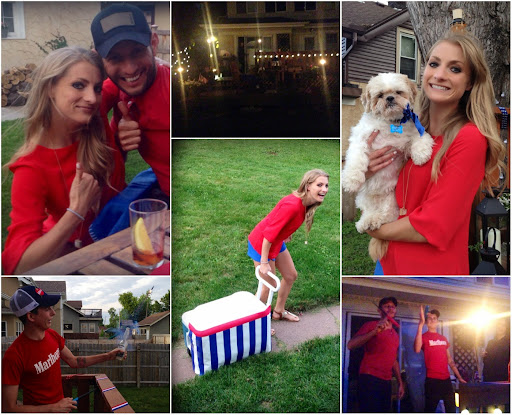
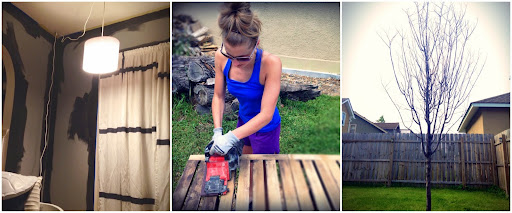
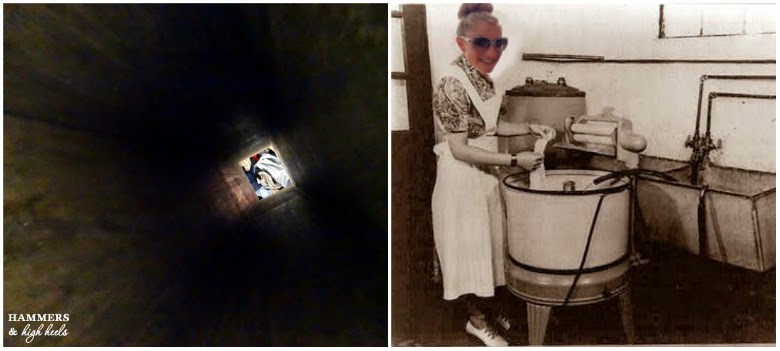
9.  As you get older, it's easier to laugh at yourself and heck, you get more comfortable being a weirdo in public... especially if it makes a friend laugh
How I entertain myself when I can't find any cute shoes.
10.  Alex started a new role at work that allows him to travel quite a bit.  Although I miss him when he is gone, I understand how exciting it can be when typically work becomes an adventure in some ways.  I am incredibly proud of my husband.

11.  I worked through the most challenging year in my career.  I learned a lot and also realized that in good times and tough times, one of my greatest strengths is to never give up- No matter the stress or struggle, I'm the kinda gal that wants to see things through to the end.

12.  I learned that #11 means I have "Grit"- a trait showing "passion for a particular long term goal or end state coupled with a powerful motivation to achieve their respective objective."  Never knew that before, but damn right I do.

13.  Rocco and Sadie.  Sure, they drive me crazy and are often a source of guilt when Alex and I are crazy busy, but I love these two pups so incredibly much.  They are my family and I can't imagine life without them.

14.  My latest business trip marks my 6th visit to China.  Funny to look back  at my 27 birthday list to see that was when the first one happened.  Always thankful for the experience travelling abroad for work and hope I continue to get these opportunities. 

15.  During my Michigan Spring Break visit earlier this year, I saw my (ex/old?) step-sister for the first time in over five years (our parents divorced, ex/old might have sounded confusing, you get it right?).  The 1 year old little girl I met 18 or so years ago is a beautiful young lady that is beginning her sophomore year in college.  It was amazing to see her and I hope to see her again and again.
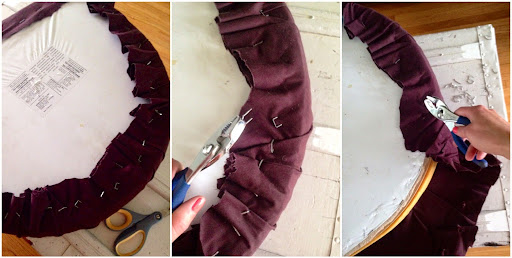
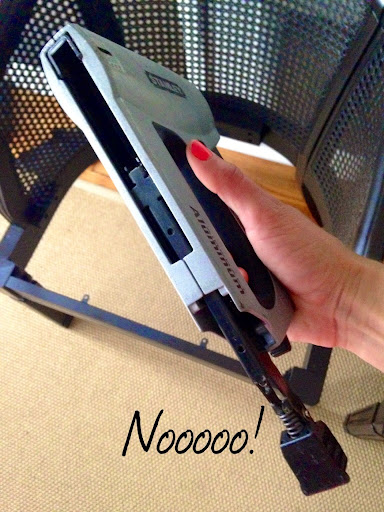
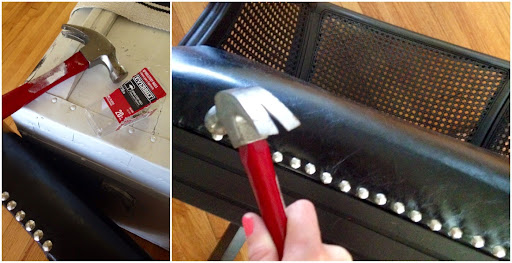
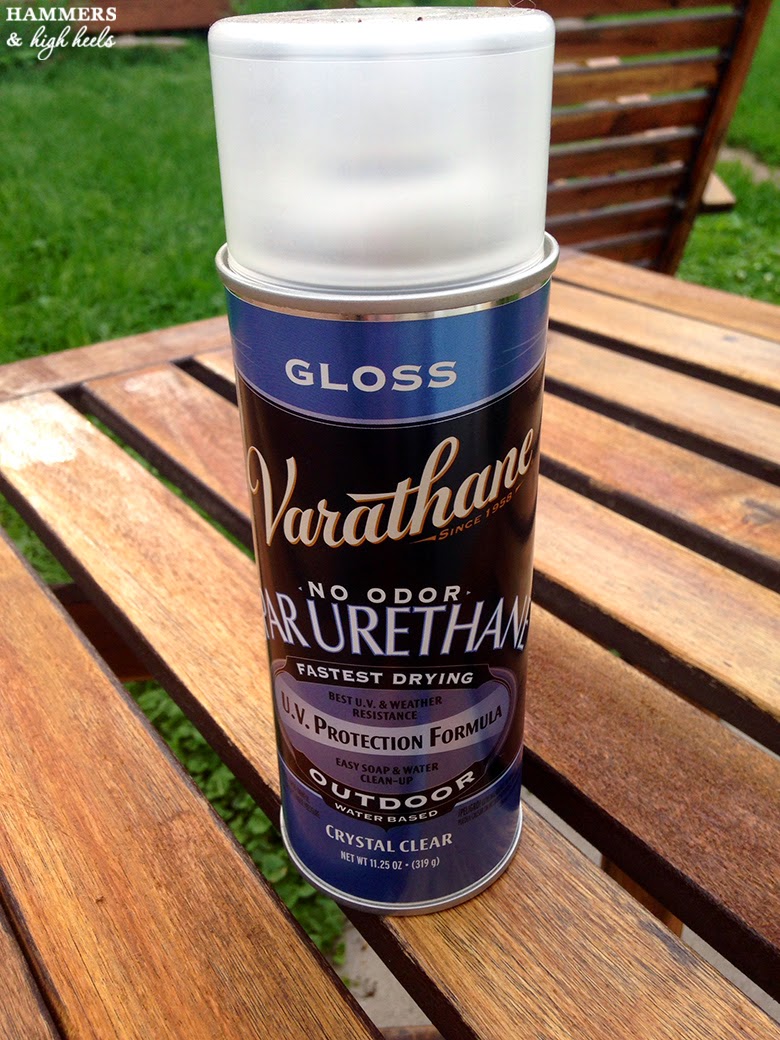
16.  A Dammit Doll comes in handy when a project goes awry.

17.  I picked out my own car for the very first time.  Might sound strange, but the couple before were either from my parents or jointly decided on between Alex and I.   I've always wanted to pick out my own car and finally got to do it!

18.  Now that I am four years into doing this birthday list tradition, I think it's the first time I'm seeing how fun it can be to look back at what I was thankful for at each age.  Sure, twenty-seven wasn't that long ago but looking back today I think some of what I said then was kind of silly :) I suppose that will keep happening year after year, but it shows you've learned more and you keep evolving.  I'm thankful that I'll keep seeing that.   (click the links if you are interested in reading previous birthday lists-  Twenty-Seven, Twenty-Eight, or Twenty-Nine).  

19.  My husband lived one of his dreams and got to see the Tour de France grand finale in Paris.  It is an amazing feeling when you get to see someone you love experience something they've always dreamed of doing.

20.  I finally realize that I shouldn’t always worry or think worst case scenario because if something bad does happen, you still won’t be prepared for it.

21.  With #20, I’m beginning to see the power of more positivity or keeping a positive outlook in all thinks in life.  If you envision things that way, they will be.  I'm going with that theory for this decade.
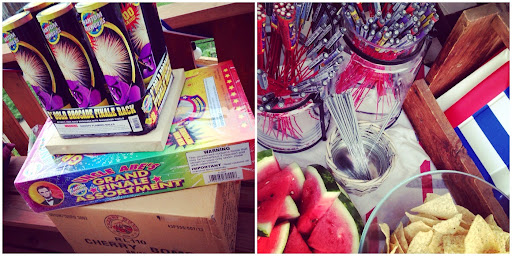
22.  Tombstone pizzas are still as good as they were when I was a kid.  No matter how many times I burn the roof of my mouth eating them, they are always delicious.  I repeat DELICIOUS.

23.  I have mastered the art of making the perfect dirty martini.


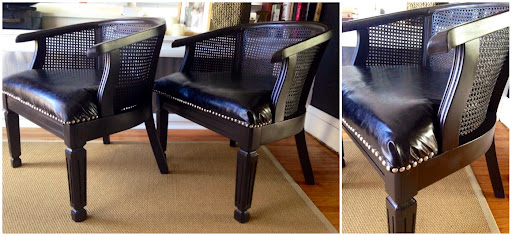
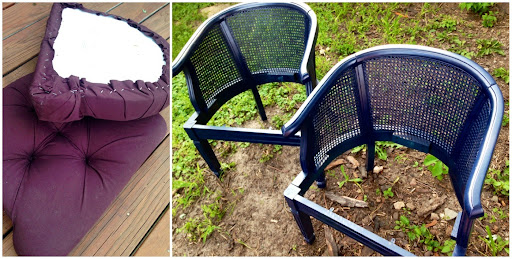
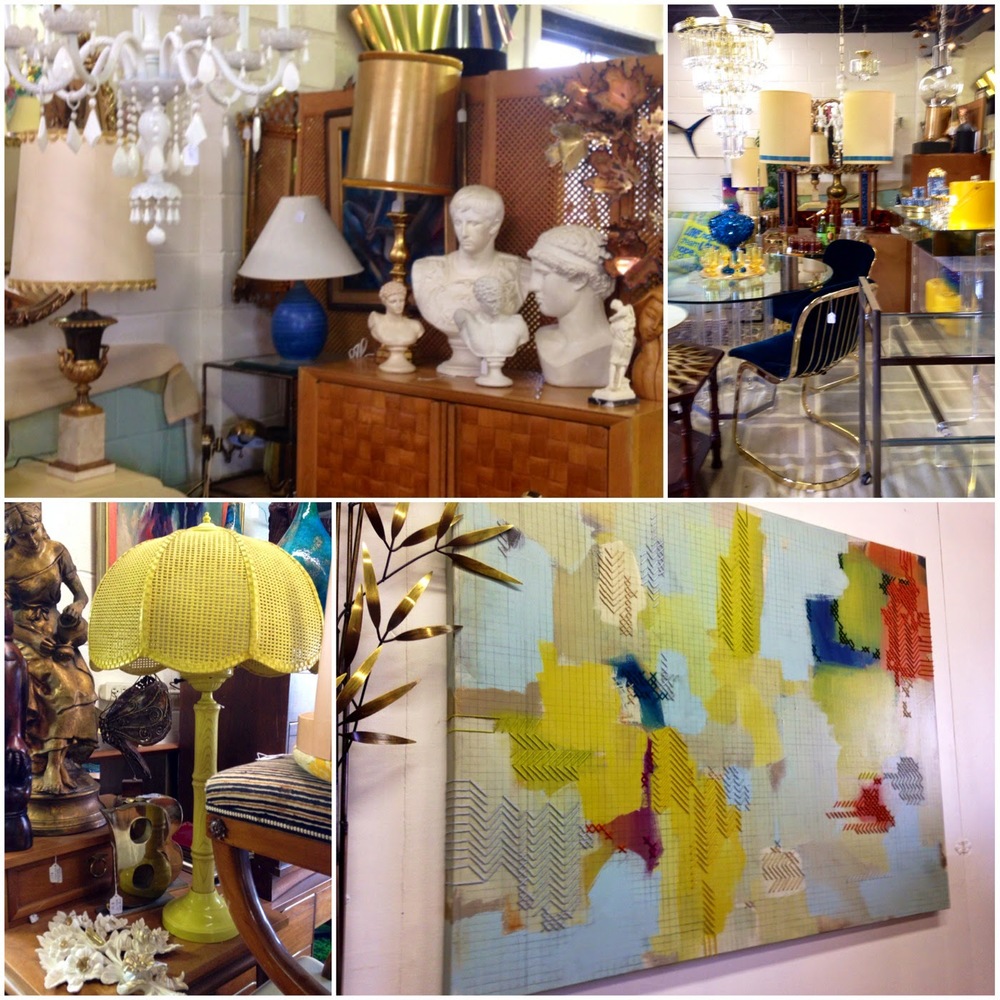
24.  Thanks to a gal named Marjorie finding Hammers and High Heels, we have a fun project that’s been in the works for a while now and we hope it will come to fruition during my 30th year. 

25.  I cut my hair for the first time in 5 years.  This was funny to me when I went back to read my 27 birthday list because I talk about how bad my hair looked when it was short...  still think I like the long look better but hey, change is always good and when's a better time than when you're turning THIRTY :)

26.  Alex and I moved away from Michigan and all of our family 7 years ago.  For the first time in 7 years, we now have family in Minneapolis.  My cousin Kerry and her husband Nick just moved here from California and it's been refreshingly wonderful to remember what it is like when you could just call/text family to randomly hang out.  I hope the Minnesota winter doesn't scare them away!

27.  Kerry and Nick have two dogs- Walter and Uno.  Needless to say, Rocco and Sadie are also excited about their cousins moving to Minneapolis too!  The pup-playdates are pretty b-a-n-a-n-a-s.

28.  I spent my big 3-0 with my husband in NYC.  A big scary birthday couldn't have felt more perfect and special.  Thankful my husband made that day so special for me.

29.  With #28, I still love blogging but I've allowed myself to enjoy being in the moment more and not pressuring myself to keep up with blogging when I real life fun is happening.  Hence posting this more than a week after my actual birthday :) 

30. I received this text from my dad on my birthday…  “Being 30 isn’t bad so enjoy it because you have a great life and there’s nothing you can do about getting older.”


Simple advice on a big birthday.  Wise words dad, thank you!
Sort of fuzzy, but a couple pics from my actual birthday while out with Alex in NYC
Here's to starting 30 from where I am right now, cheers!

When Travel Schedules Collide

Kayd Roy2 Comments
You may have noticed things have been quieter than normal so I figured it was time to give you the REAL deal going on around here.  Alex has been in Germany & France for work and little ol' me has been at home with the doggies for two weeks. Thankfully he's finally home! 
Alex at the Berlin Gate in Germany, riding his bike around Paris, and posing with his bike in front of the Notre Dame Cathedral
You'd think I'd be feeling refreshed after all the "me time" right?  Unfortunately it's been feeling quite the opposite because a travel schedule apocalypse of sorts is upon us!   *dun-DUN-dun*

I only get a few days with Alex and then I will be heading out to New York City followed by Hong Kong, China (Shenzhen), with a last stop in the most exotic of all travel locations- Toledo, Ohio- I hear it's splendid this time of the year (sarcasm font) nothing against Toledo it's just a random part of our business trip :)
Glad my Hello Kitty plane visual came in handy again :)
BUT WAIT, there's more!  Shortly after I return home, Alex will be heading out on another business trip to Europe.   The planning of all this has felt like a huge crazy fiery meteor is about it hit us.... or maybe just me?  KABOOM.

Alex said I was over thinking it all and sent me this visual.  Pretty accurate I suppose, my head does feel like it's about to explode.  Clever boy.

Amidst all this, somewhere in there I also have a BIG birthday on the horizon, maybe tomorrow's horizon already?  Crap.  Well, if you'd like to send an early birthday gift, I'd love to know...

How do you avoid feeling stressed/overwhelmed and keep everything balanced?
Are you an "over thinker" too? How do you deal with extra stress?


Hope you'll stop back for my birthday post (click to see Twenty-Seven, Twenty-Eight, and Twenty-Nine birthday "thankful" lists)!  That is if my head doesn't explode before that :)  Things might be wacky around here for a while!

A DIY Look That Feels Right At Last!

Kayd Roy5 Comments
Phew! what a week! Things have been a little crazy around here but I was finally able to make a trip to SR Harris yesterday to get some upholstery fabric for my chair seats!  I had been going back and forth on what I wanted to do with them, but finally made a commitment!  Also, I gotta tell ya- I think I need to stay away from any chair redo/ reupholstery projects in the future because this all feels like déjà vu!  (see past example here) I always get stuck on the fabric selection part and then a simple project takes weeks, so silly! 

Anyway...  They are DONE!!!!  Check out the before & after action! 
I  was inspired by the accent chairs that my friend Katie had in her house along with a few chairs I found at West Elm that had a brown/black thing going on so I settled on doing a dark walnut color for the wood and distressed black faux leather for the seat.  

It was surprisingly easy to find exactly what I wanted in their giant warehouse o' fabric.  There it was right at the top of the stack!  I looked for real leather but it would have been really pricey and let's be real, I change my mind all the time and I'm sure someday I'll be messing with these again :)    The normal price for the fabric was $19.99/yd but with the typical 50% off you get on everything at SR Harris it was just $9.99/yd!  I purchased one and a half yards to cover both seat cushions so only had to spend $14.99, awesome deal right?!
Once I got home I jumped right into action!   I started by tearing off the old fabric from the seat cushions using some pliers to remove the old staples under the seat.  Needle nose pliers would have been better to use for this part but someone used them and I was unable to locate them (ahem, Alex).
After that I grabbed the faux leather fabric & cut out a piece for each cushion.  With the full 1.5 yards of fabric laid out, I placed the cushions in opposite corners of the fabric and cut around them leaving about 4 or 5 inches excess to wrap around to the underside of each seat cushion and staple in place.
Then it was time to grab the staple gun and finish these up!  That's when the unthinkable happened- no staples...
Ugh!  It was Friday night and I knew I had company joining me for dinner so I called it quits for the night and headed to Home Depot this morning to get more staples.  

With my gun reloaded and ready, I wrapped the fabric around the edges and to the back of the seat cushions to staple on place.  Here you sort of have to fold & fuss with it to get the fabric to wrap cleanly around the edges of the seat.
My last step was adding some nickel finish nailhead trim.  It is kind of tedious because you have to add them one by one with a hammer... Boy my fingers and knuckles hurt! 

Once that part was complete I placed each seat back on the chairs, wala! 
Heavens! They look way better right?!  I still don't know what the heck I was thinking with the blue/purple look.  At least now I think I've right my DIY done wrong :)  Next up is just some finishing touches in the sunroom then I'll share the rest of the look! 

What do you think of the new look on the chairs?

Have a wonderful weekend everybody! 

Time to Right a DIY Done Wrong

Kayd Roy4 Comments
I'm still making decisions when it comes to my sunroom project but one thing I do know for sure is that the DIY redo I put these chairs through was a REAL bad idea because there's no way I can use them in the room as is...
(Shudder

Yep I admit it, I made these poor chairs look pretty fugly with that purple fabric and I should have just left the wood as is.  So stupid, ugh! 

I guess I can't say it was a total mistake though- The one good thing that came out of it was that I learned how to tuft a seat cushion, something I've never done before!  So it's kind of a bummer that I have to tear it all apart but in the end this look just ain't gonna fly anywhere in this house! Time to get to work! 

****   How would YOU redo these chairs DIY style?   ****

What color or wood stain for the chair frame? 
What type of fabric & color for the seat cushion?

More to come on these AND 
the sunroom soon!  See you then! 

A Darker Side of the Sunroom?!

Kayd RoyComment
Time for the last (current) project on my to-do list, the sunroom!  This was one of the three projects I mentioned taking on all at the same time a couple weeks ago.  Now that we have the tree taken care of and the patio set finished, I can focus on wrapping up a new look for our sunroom!

We've changed up the look of this room a couple times already, but I felt like it needed a BIGGER change overall- that change being the paint color.
I started growing really tired of that dusty muted gray/blue color.  I know we loved it when we picked it out about five years ago, but I just felt like I couldn't change much of the decor in that room because of that color.... or maybe I just couldn't decorate with it because I didn't want to?!

Whatever the case, I was ready for something new.... now.  Like, right now.  So, I made the spontaneous decision while Alex was traveling for work to JUST DO IT and used the gallon of leftover navy paint in our basement (same color we used for our kitchen update).  You can really tell it was super spontaneous because of my lack of paint prep :)
Ummmm, yeah.  Never paint a room with your window treatments, rugs, and other random textiles in the room... I consider myself a pro when it comes to painting though so our home goods survived my lack of paint prep at least and I did remove everything for the second coat which I don't have picks of yet :(

I know you might be thinking I'm going too crazy with the whole black/white combo, but I really love the simple, clean, neutral look.  Our sunroom also doesn't really have a lot of wall space, so the use of the dark color is pretty minimal in the end.  I still hope it doesn't end up looking too dark, but here's some of the inspiration I gathered up before whipping out my paint brush...

I'm thinking I need to change up some of the window treatments and get a new rug in there too, but it's a really tricky space when it comes to decorating since there are hallway arches/entryways on two of the walls, large windows and a radiator cover on the third wall, and then the big glass sliding doors covering most of the fourth wall.  Really doesn't leave much space for furniture and it's pretty limiting for wall decor too in those thin spaces.  All that leads me to YOU for some suggestions!

What types of window treatments would you use for the windows and glass doors?

What pieces of accent furniture would you use in those small corners?

Most of all- What would you put on the radiator cover? A way to give it purpose?!

That last one has always been tricky for me but if you have any ideas or suggestions I'd love to know!

Fourth of July Fun

Kayd RoyComment
Hey everybody, how was your Fourth of July?  

We had a whole-lotta fun hosting a little shindig with some family, friends, and neighbors and I wanted to share some of the DIY decor I put together beforehand but ran out of time to get it posted yesterday.  So although the Fourth is behind us, here's a look at some of the decor along with a few fun pics from our celebration! 

How did you decorate and/or celebrate the Fourth?

Some Serious Stripping... and Refinishing Our Wood Patio Set

Kayd RoyComment
I did a lot of stripping during the past three weekends- paint stripping that is!  Any other kind of stripping likely won't be my cup of tea :)  but the project I took on almost a month ago was to remove the paint from our old wood patio set so I could get down to the natural wood then sand it, stain it, and properly reseal it.
I thought it was going to be a one weekend type project (and you'd think I would know better by now) but they never are, or maybe our expectations are just way off all the time?  But it wasn't as simple of a project like I thought it'd be, but I'm so glad to finally get this one checked off the to-do list!

I wish I had better before photos of it, but here's a look at the problem we were dealing with because some idiot thought it was a good idea to paint our wood patio set.  Sadly, I admit that I am the idiot that painted them :(  Alex told me it was a bad idea and he was right.
It didn't take long for the chairs to look weathered, worn, and have the paint just plain chip off all over the place.  We used them that summer (2012) after I painted them and when we got them out last summer I thought they looked terrible so I repainted them, even had to touch them up mid-summer.  So this summer when we got them out of storage and saw the same thing I decided it was time to do the right thing and strip off all the paint so I could stain, seal and protect the wood look.

I kicked off my project using my trusty belt sander along with 50 grit sandpaper....  and that step alone took like six total hours of work over two weekends.  That is the main reason this not-so-little project took so dang long to finish.  That much belt sanding isn't fun at all but it is the easiest way to cleanly remove paint from wood and then the surface is ready to stain and seal.  I have to say though that I think it made my arms a little buffer!? :) 
Couple things to keep in mind if you use a belt sander on wood: 
1. Always go with the grain direction on the wood, if you go perpendicular to the grain your wood surface will be very rough.
2. Keep the sander moving, if you hold it too long in one spot you will dig deeper into the wood and your surface won't be level.
3. Keep the belt sander away from metal hardware, your sandpaper will likely rip off the belt if you run into screws/bolts.  Honestly, it happened a couple times to me on this project, just kind of startles you and then you have to stop and get another sandpaper belt.
4. Use gloves and protective eyewear!  If your sandpaper belt rips, it will likely hit your hand so always good to protect them and for eyewear, I know I don't have official goggles on but sunnies worked for me.  Stinks if you get wood dust in your eyes because it'll stick around and annoy you for a while!

Anyway, I did the best I could getting most of the paint off with the belt sander but in the spots where I couldn't use the belt sander I used Klean Strip Sprayable Stripper to remove the paint.  It worked pretty well, you just spray, let it sit for ten minutes, then scrape or wipe off.  
After all of that paint removal effort, I couldn't get into all the nooks and crannies of the table and chairs and sort of said f*** it.  The natural wood surface was showing for the most part and it already looked worlds better so I was happy with it.  Sometimes you have to just make a call on what you can and can't do in a project and trying to get in between all of those narrow wood pieces wasn't going to happen and I was cool with that.

Done with paint removal, finally time for a new step!  Before I could start staining the wood, I used Mineral Spirits to clean off all the wood dust and other debris from the wood.  After that, I used Minwax PolyShades One-Step Stain and Finish to stain and seal the wood.  It's pretty simple to apply using a paint brush going along the direction of the wood grain.
Click here for more info on Minwax PolyShades One-Step Stain and Finishes
Since Minwax PolyShades is intended for indoor use only, I also used Varathane Spar Urethane since our wood patio set is outside.  Alex asked why I didn't use wood deck type stain instead and I honestly just didn't think of it but that probably would work as well.  Either way I think spraying the Varathane weather and UV protectant whether you use indoor or outdoor stain.
Click here for more info on Varathane Spar Urethane Wood Protectant
After that dried, that was it!  I moved the set back up to our deck so we could sit and enjoy it once again.  I know it isn't 100% perfect but I am sooooo much happier with the look now and I won't have to constantly touch up the paint :)  Glad I got it done in time for another family visit this weekend and for the Fourth of July!
We have Alex's parents in town for a visit this weekend, I hope it doesn't rain so we can sit outside and use it!

One thing I know though, if it does rain all weekend I can imagine they'll be a glorious MOA (Mall of America) trip in our future :)  It is one of the Twin Cities finest tourist attractions after all.  Works for me because I need to make a stop across the street at Ikea for my next project (a new look in our sunroom!).  Hope you'll stop back next week for an update on that too!   Have a great weekend everybody!

Tree Troubles

Kayd Roy1 Comment
Alex and I got one project done over the weekend that we have been putting off for a while.  Well  maybe that isn't the right way to say it, I guess we had been in denial and it took us a while to accept the sad obvious truth in front of us- Our poor little post-tornado tree is dead and it's time to cut it down.
Alex and I happily planted this little tree after the 2011 tornado.  It felt really special to us because it was part of the rebuilding following the tornado and was sort of a sign of new beginnings.
See that excited hopeful smile?  Makes me sad seeing it now knowing our tree didn't make it, ugh!
I thought we'd get to watch it grow each year.  Might seem silly, but I am really bummed about it.

Once springtime arrived in Minnesota, I started watering it, watching it, and inspecting it.  Meanwhile, I watched all of the other little trees neighbors planted post tornado start to bloom, ours just sat there all sad and leafless :(  we aren't sure if the harsh winter did it, or if we didn't water it enough in the fall, or if we just planted it in a bad spot.  But it was pretty clear that our little tree wasn't coming back.
Alex had wanted to cut it down for almost a month now, but for a while I kept saying, "but what if it comes back?  Should we wait?"  He let me wait/accept that it was dead and finally cut it down yesterday.

We would like to plant another tree, so if you have suggestions on types (especially ones that will survive the crazy cold Minnesota winters) please let us know!  

We'll probably plant the tree in a different location in our yard, but any other helpful tree tips or ideas would be great!  I hope we have better luck with the next one, we'll see?

Aside from our tree troubles, I finished up our wood patio furniture this weekend too so I'll share that next!  So excited we can finally use it again, be sure to stop back to see it!

Back to Blogging and Breaking Project Rule #1

Kayd Roy1 Comment
Sorry I've been missing in (blog) action for a while.  Things have been busy for me at the office and we had family from Michigan AND California here for a visit last week.  Despite all that, I still couldn't stay away from a project or two (or three sort of?) when I had a moment to fit some work in.   Yes, sadly I broke the most important rule of all home projects- never take on more than one at a time.   I guess that's a bad thing that can happen when you try to attack smaller projects you've had in mind for a while... and then you find they aren't all that small :).   

Anyway, I guess you could say I had project ADD while I've been MIA - that is if you think my acronym use is clever :) -  Otherwise just roll your eyes at that part and I'll just get to the projects which include our sunroom, wood patio furniture, and sadly the tree we planted after the 2011 tornado..  
With all three in progress, I wasn't sure where or which to pick up on and start writing about but I'm sorting out the pics so I can get going on one soon! 

If one of those projects/topics sound more interesting than the others, let me know and I'll jump on that first! 

Hope everyone is having a nice week so far! 

House Tour

Kayd RoyComment
Welcome to our lil' 1924 Dutch Colonial fixer-upper!

Take a tour through a few of the rooms we have revamped so far (you don't even have to take off your shoes!).  If you want to get the scoop on the work done in each room, click on the links posted below the photos.  I also had a request to add the paint colors we chose for each room, so that is listed as well.  Enjoy!

*** Note: 6.10.2014 page under construction- trying to make it prettier :) ***

Front Entryway / Vestibule

Click here for all the details of our vestibule update


Living Room

[  Before  ]

[  After  ]


  [  Before  ]

  
After  ]


Paint brand/ color: Behr Amazon Stone

Master Bedroom 

[  Before  ]

Paint Brand/ Color: Behr Bitter Chocolate

Spare Room off Master Bedroom

[ Before ]
The Dining Room

[ Before ]

Paint brand/ color: Behr Sequoia Grove

The Kitchen

[ Before ]

[ After Part 1]

[ After Part II / CURRENT]

Cabinets, Countertops, Paint
Paint brand/ color: Behr Sequoia Grove 


The Kitchen Nook

[ Photo Update in progress  3.1.2014 ]
- Link to Kitchen Nook posts -
Paint brand/ color: Behr Sequoia Grove 


Back Entryway

[ Before ]

[ After ]
Paint Brand/ Color: Behr's Sandstone Cove & Polar Bear White


Stairwell

[ Photo Update in progress  6.1.2014 ]
Paint brand/ color: Behr Sandstone Cove


Guest Room

[ Before ]
[ Photo Update in progress  3.1.2014 ]
- Link to Version #2 (Lettered Cottage Redo) -
-Link to Version #4-
Paint Brand/ Color: Behr Cumberland Fog 


Upper Level Bathroom

[ Before ]

[ After ]


- Link to Bathroom Redo post -
Paint brand/ color: Behr Raging Sea 


Lower Level Bathroom

[ Before  & After ]


Paint brand/ color: Behr Cumberland Fog and Rustoleum Chalkboard paint 

 *************
Those are the rooms we have tackled so far, crazy to think we've been here about four and a half years and all that is left to tackle is our office- Stay tuned for that one!

We have even gutted our backyard!  This was by far our most back-breaking project. See all the details of our most painful, labor intensive project to date here!. (Still hurts looking at those pictures, to think it was that hard to just have grass!)

That's the tour for now, we will keep adding once we get these rooms flipped and looking fabulous!

Home Insider Look: Jon & Katie's 1924 Traditional Gets a Modern Mix Update

Kayd Roy3 Comments
If you caught my sneak peek yesterday then you already know that I have a VERY special treat for you today!

My very stylish friend Katie and her husband Jon had a housewarming party over the weekend and I was blown away by their stunning home, so much so that I begged her to let me come back and take photos for the blog.  Their home is too gorgeous not to share, I even have some before and after action for you too (squeal of renovation delight!)   Let's get to it!
Jon and Katie decided on their home after realizing they had outgrown their smaller loft in downtown Minneapolis and knew it was time to say goodbye to the city and hello to a bigger space-  still nearby the city though (Alex & I relate to that for sure!). 

They moved into their lovely 1924 traditional colonial style home back in September and transformed the space to fit their style-  and I gotta say after seeing the before & afters, they made some BIG changes rather quickly!
Katie said their style used to be more modern but after moving into their 1924 traditional space they've shifted to a more eclectic look mixing old with new.  Now it's time to take a look!  So I'll stop yammering on and let you ogle all the pics, then be sure to check out the little Q&A with Katie about their house and projects, enjoy!


PS- Since we're in their kitchen, I have to mention Katie's Whole Lovely Life Instagram which features great healthy living recipes including vegan, gluten-free, vegetarian, Paleo, dairy-free, grain-free, and I believe more healthy option recipe types!  Click the link to check out all the info, healthy never looked so tasty I tell ya!  If you dig it too, let her know in the comments!


Katie had the same old house small closet solution that I did- turn a small room into a closet!  
Couldn't resist throwing in a few pics of this cutie :) 


What would you say your home decor style is?
Katie: "It used to be more modern but now that I own an older home my style has shifted slightly more eclectic.  I loved the challenge of taking an older home and putting a bit of a modern swing on it while mixing in older pieces and accessories.  I like to mix high and low to a degree as well or do what I can to make a less special pieces seem more special either by altering them or in how I place or display them.  I also love to make things myself.  Especially art.  For me I want my art to either be created by me or someone I know.  We do have a few purchased pieces which all have a story behind them."

Do you and Jon agree when it comes to decorating? 
Katie: "YES!  Thankfully.  Decor is one thing we don't ever argue about.  He really let's me run with things and offers his ideas along the way.  The ghost chairs outside were his idea!"

What challenges did you run into when it came to decorating once you got into your home?  
Katie: "The biggest challenge for us was working around the spaces and all the windows.  In a loft you have much larger walls with less windows so can put things pretty much anywhere.  With this house we took lots of measurements and had to really plan thoughtfully for our large furniture purchases.  Once we had the pieces the fun part was decorating around them. Another challenge was knowing we wanted everything white with dark floors so we had to be patient while waiting three months just to paint!"

What challenges do you experience living in an older 1924 home?  
Katie: "There is always something to do or replace or a 'next' project.  We took the approach of working like crazy to for a few months to get it completed to where it is today but we still have a list of to-do's both big and small that we want to accomplish in the short and long term.  Also, yard maintenance!  Jon does pretty much does all of it and it's time consuming!  I really miss him when he is outside for hours on end :). You also have to be okay with your husband literally running to Home Depot nightly and sometimes two to three times on a weekend!  Jon is amazing at figuring out how to do things.  I am blown away by all the things he learned to do in such a short period of time.  Some of his projects saved us a ton of money so I will say if you are not adventurous and don't like taking a jump into a ton of different projects it could be challenging to budget everything in."

What advice would you give people when it comes to home decor/ home decor strategy?  
Katie: "I think it's important to find inspiration for your vision whether you look on blogs, Pinterest, retail stores etc.  When you have an idea it's important to find an image of what that may look like in a space especially for your large purchases.  It's also important to think about your budget and what you want to invest in.  Be okay mixing high and low.  There are great pieces that can be found on Craigslist, at Target and Ikea.  For example- the majority of our window panels are from Target and Ikea while the rods are from West Elm.  Also think about what items you have that are special.  So many people store their family heirlooms in their attic or basement.  I love mixing them in because not only are they special and probably have a story but they bring a uniqueness to your space that will be all your own."  


Thank you again Katie & Jon for sharing a look at your wonderful home!


*************************
I know I loved everything but the couple things that stood out to me the most were all the unique light fixtures and their artwork collection- and Katie made a lot of it!  Crazy awesome right?!?  And how fantastic does their wood look with the dark/almost black stain?  Love the fresh take for a black and white look!

Who's feeling inspired to decorate/redecorate now?
What was your favorite part of their home?

Katie & Jon's Home Sneak Peek!

Kayd Roy1 Comment
I've got a really, REALLY exciting post in the works and just had to share a sneak peek!

Be sure to swing by tomorrow for a look at my friend Katie and her hubby Jon's totally chic home- and some before and afters!  If you love old home redo action and/or high style decor ideas, you have to see all the pics!

***  Are you intrigued?!  I hope so!   ***

Many more pics to share, see you tomorrow!

Memorial Weekend Pics and My Next Room Project!

Kayd RoyComment
Ugh.  It's been hard getting back into the normal swing of things at work after a great four day weekend with our family here visiting.  As you can imagine, we didn't get to much on the house or other DIY'ing but I thought I'd share some pics of all the action from our memorable Memorial weekend- and when I say action I mean it!
We packed in a lot of fun in four days which included barbecuing, back alley kickball, sand+sun at the beach, the Walker Sculpture Garden, water gun fights, horse races, Valleyfair, restaurant visits, and the oh-so necessary Mall of America visit (my nephew could live in that Lego store :) here's a look! 
Random Power Tower fun fact- I had a one month "carnie" run operating the ride at Cedar Point Ohio, no joke! 

Man, I am impressed we (or maybe just me?) had the energy for all that, LOL!  

Anyone else still pooped from the long weekend?
Or is it the summer weather that makes it hard to sit in an office all day?! (Remember winter?!)

I know it's been a while since we've had any project action going on, so are you ready for what's next?! I'm getting started on something in our sunroom tonight!

Stay tuned for updated pics on this space, woo-hoo!  It's not going to look so "blarty-blar" anymore! 
PS- Blarty-blar is just more fun than blah :) 

Feeling Some Retro Wanderlust

Kayd Roy4 Comments
It's been a while since I've been able to get out and do some vintage/antique shopping but I got a chance to over the weekend and found a FANTASTIC local shop called Retro Wanderlust in Hopkins, MN.   I had heard about Retro Wanderlust back when I went antiquing in Hopkins with a few co-workers but the shop was closed the day that we were there.  After checking it out, I wish I hadn't waited a WHOLE year to get back there and take a look, the place is AWESOME!

The store's main focus is on 1950's, 60's, and 70's furniture, decor, lighting, and vintage clothes.  Here's a look at some of the goods!


Fun stuff right?  

I couldn't believe they had so many Curtis Jere brutalist sculptures but they were still pretty spendy.  The only items I purchased (surprisingly) were a couple vintage dresses, one of them being the yellow one shown in the above photo minus the white beaded stuff.  I have to alter it a bit but thought it was a cute little steal for $15!  Other than that, I LOVED that campaign desk with gold hardware and that little family of gold armadillos- so cute and quirky!

Which items were your favorites?
Would you go back to get the armadillo family?!  I keep thinking about it, ha!

Authentic Turkish Patchwork & Overdyed Rugs Arrive at Ikea... (Yes- Ikea!)

Kayd Roy6 Comments
Earlier today, I took an evil but necessary trip to Ikea to pick up a couple things I needed for an upcoming project.  Thankfully my Ikea experience wasn't pure misery like the last one, mid-day during the week is the way to go if you have to endure Ikea I tell ya!  But that isn't my point for this post, I have to tell you what I found in Ikea's little maze like marketplace- Turkish Patchwork & Overdyed rugs.  Yes, at IKEA!
I dropped my big ol' yellow Ikea shopping bag when my eyes met that gorgeous mountain of authentic, aged, antique Turkish rugs and I zig-zagged my way towards them through sheepskin & slow moving people to get a closer look.

Each one was unique and beautiful for different reasons- The color combinations, the patchwork layout, the faded vs. overdyed look, etc., UH!  They all looked stunning!  I still couldn't believe Ikea had mountains of these things, MOUNTAINS I tell ya!!!!
Sorry for the iPhone pics, I know they aren't the best for showing detail!
Now before you get too geeked and excited, I have to tell you that the prices weren't your typical Ikea cheap.  The range was $79 for a 2'x3', $499 for a 5'x7', and then waaaay up all the way to $2,500 - $4,500 for the largest (I think?).  Considering that they are antiques, I imagine the prices are as low as they can be and it seemed to be pretty fair especially when you consider the prices for some of the other rugs Ikea sells in the same space.  I tried to look them up online but it doesn't appear that they offer them on their website (yet?).

Anyway... I just HAD to share this new development in rugs with you :)  maybe I am being a weirdo, but I thought it was so crazy to see something like this at Ikea!  It's so un-Ikea like right?!

What do you think of Ikea's treasure trove of Turkish rugs?

Would you endure a weekend trip to Ikea to pick one up?

Can You Guess What's Behind Old House Style Door #1 and #2?

Kayd Roy4 Comments
A couple weeks ago I shared new photos of our Dining Room along with a view of the room looking into the kitchen and living room.  This was a view I haven't shared photos of before on our blog and I think it cleared up some questions we've gotten regarding the layout/floor plan of our home- but that led to a new question...

What's behind that skinny white door and what's in that smaller white door halfway up the wall?

Here's a look at the full question that Dayna wrote in the post comments:

What a great question!!!  I can't believe I've never talked about those little quirky details in our old house!  So glad you were curious about them Dayna!  Of course I'll share details about those mystery doors, thank you for the fun post idea!

Let's start with the quirkier of the two- the small door halfway up the wall.  Any guesses?!?
If you guess laundry chute, then you WIN!  That little door halfway up the wall is the laundry chute door on the main floor of our house.  I guess it's convenient if you have lots of dirty kitchen towels or table linens to deal with?

I guess we get more use out of the other laundry chute door that is on the upstairs level of our home which sits between the doors to our guest room and office Alex's winter cycling training room...
Because that is where all the wardrobe changes occur, take it off and send it down the chute!

Now back down to the dining room!
Any guesses what's behind that tall narrow door next to our staircase?  If you guessed the actual laundry chute then you WIN - well - you half win because it's also our coat closet.  Ahem, mini and kinda icky coat closet.  It's an odd space, so nothing too fancy about it.
Coats, two-tier shoe rack, wall mounted mail & sunglass storage, and upper shelf for bike helmets & hats, gloves, etc.
As you can see, the chute takes up a good chunk of what could have been (or still could be?) extra storage space for coats and shoes near our front entry.... but who cares!  (sarcasm font)  It's the high-speed highway down to our electric washer and garment wringer in the basement!
Never had taken a photo looking down the chute, so dark & dramatic, sort of like wearing sunglasses while doing laundry?!
Had to make a little joke with that one :) I can't lie, it is a total pain going up and down two floors several times on laundry day - BUT - I don't think I'd ever have the heart to tear out the old school laundry chute since it is an original feature in our little 1924 Dutch Colonial.  I'll just try to look at the upside- I'm doing loads of stairs along with several loads of laundry which seems like efficient multitasking!  

So there you have it, no more mysteries behind those quirky old house doors! What'd ya think?!

Did you guess that little door was a laundry chute?
What about the coat closet?  Waste of space?  
How would you improve the closet without changing the overall small/awkward storage space?

Planting Pretty Things

Kayd Roy4 Comments
It's been a gorgeous weekend here in Minneapolis so I was able to start working on some of my outdoor projects/ideas!  Nothing huge yet, just got some pretty flowers & greenery to plant around our deck and in a few planters...
Did you catch Sadie's camouflage action? She getting really good at those "Where's Waldo" moments! 

The little green touches are already making it feel a bit cozier!  I'm just hoping I can help make them grow faster, especially the mandevilla vine, we'll see!  I think my gardening skills are getting better at least considering I used to just kill everything :)  If you have any tips for the mandevilla vine growth let me know!

Did you do any gardening this weekend? 
What did you plant? 

Rainy Day Dreaming for Sunny Days Ahead

Kayd Roy1 Comment
I've been feeling some serious rainy day blues this week :( here in Minneapolis it's been chilly, rainy, gloomy, and gray since Sunday - wait - Oh-geeze-crap-no... Is it only Wednesday?!  Okay, sure it's only been four days but honestly it feels like a full seven day week should have gone by!  Time seems to creep by pretty slowly when the morning, afternoon and evening are the same kind of gray I suppose?

In an effort to shake off this rainy day funk, I've been looking for some fun outdoor landscaping, gardening, and decorating ideas.  We can only hope all these April showers mean May flowers and sunny days ahead, right?!  The hubby and I have spent the last few summers cleaning up the look of our yard and deck (along with a post tornado revamp & tree planting) so with all of that back-breaking work behind us, I'm hoping to have a little fun with getting it to have a cozier feel...
Images via Completely Totally Madly | Home Ideas | Real Simple | Flickr | Mrs Sunshine | Tansuo8 | Elle Interior | Randy Interiors
I'm mainly thinking we need more greenery on and around our deck, some kind of pretty outdoor lighting, and perhaps adding some more privacy with climbing vines?  I'm digging those slouchy vintage style chairs & planters grouped in varying heights.  Can't wait to get my hands dirty, come on SPRING!!!! 

I guess it's good to get a head start on my outdoor ideas/to-dos when it is rainy & crummy outside so that I'm ready to go when we get our first warm sunny day- also makes me shutter at the thought of how crazy Home Depot will be on that day but I know I'll still end up there, happens like that every year!   

***   What about you?  *** 

Feeling some rainy day blues too?
Have you started on any outdoor ideas or to-do's?
What other ways have you added subtle outdoor privacy screens/walls?

Our Bathroom's *Beastie* Twin?

Kayd Roy4 Comments
Since posting new images of our Mini Chalkboard Wall Bathroom last week, I discovered while doing some random Pinterest cruising that it has a TWIN!  Same size, shape, chalkboard walls (half for ours), and even the same Elfe sink!  Crazy/funny/weird right?

Turns out Mike D. of the Beastie Boys is the owner of this twin-like mini chalkboard bathroom and he shared it while touring the New York Times through his newly renovated Brooklyn Town House.
Loved the simple eclectic look and feel of his place!  Lots of beautiful unique light fixtures too!

Anyway, I found it because I had been noodling (I'm really into "noodling" now) on a paint change on the lower half of the walls.  I thought about making it all chalkboard paint or even doing some black and white striped wall paper.

What do you think?  

Is it time to ditch that baby blue color on the bottom half for all chalkboard paint?
Or should we try some stripes on the bottom half?

It'll be mainly a relaxing weekend for us, my dad's in town for a visit and we'll be catching some Twins vs. Tigers action :)  Fingers crossed my dad won't try to embarrass us- yep we're 29 & 30 years old but he usually reminds us that we're never too old to have dad embarrass us in public :) I'll keep you posted, ha!

Have a great weekend everybody!

Five Year Refresh Week #4: Our Mini Chalkboard Wall Bathroom

Kayd RoyComment
Time to finish of our Five Year Refresh week with our last room- Our "Mini" Bathroom!  But first, I must post a warning message regarding the chalkboard painted walls because I took photos of the room with whatever was left written on them.  Ahem, here's the official warning :)

WARNING: The following images feature content on bathroom walls that may be offensive to some readers... also could be hilarious if you are not offended by toilet humor - Anyway - it is not our intention to offend anyone and if you are, our friends did it.  Okay, end warning.

That warning probably made you too curious now, so here is an updated look at our "Mini" Chalkboard Wall Bathroom....

It's been a while since we've talked about it on the blog (sheesh, it was back in 2010!), but this is how it looked when we added the chalkboard paint to the top half of the walls....
I decided to take that empty ornate frame down and replace it with the large letter "Z" I picked up at Junk Bonanza last year.  I figured since that space is soooo teeny-tiny, it would be fitting to have a cartoonish-ly large piece of wall art in there :)
Other than that, nothing much has changed in that room other than the constantly evolving content on the walls :)

Well, that wraps up all the rooms from my Five Year Refresh week!  If you missed any, click the links to see our Living Room, Vestibule, or Dining Room.

Which room had your favorite updated look?
Which one made you miss the old look?
Did our chalkboard bathroom walls offend or make you laugh?

Have a wonderful Easter holiday!  I'm hoping to see our very own chubby Easter bunny again tomorrow!