Carla Like It Is

Upstairs Spare Room Redo

Decorative Accessories for the Ektorp Chair.... Green?!?!

Kayd Roy2 Comments
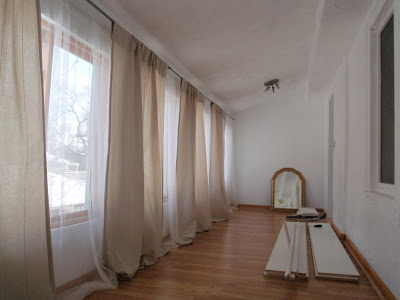
 I finally got a few things put together for the Spare Room! Check out my DIY pillow and the throw blanket I picked up at Ikea for $24.99.
 I never would have thought I would go for the color GREEN.  I have said before that the only colors you will never find in my house are green and orange.  I guess that is only true for orange now.  So what made me change my mind?  A couple things...

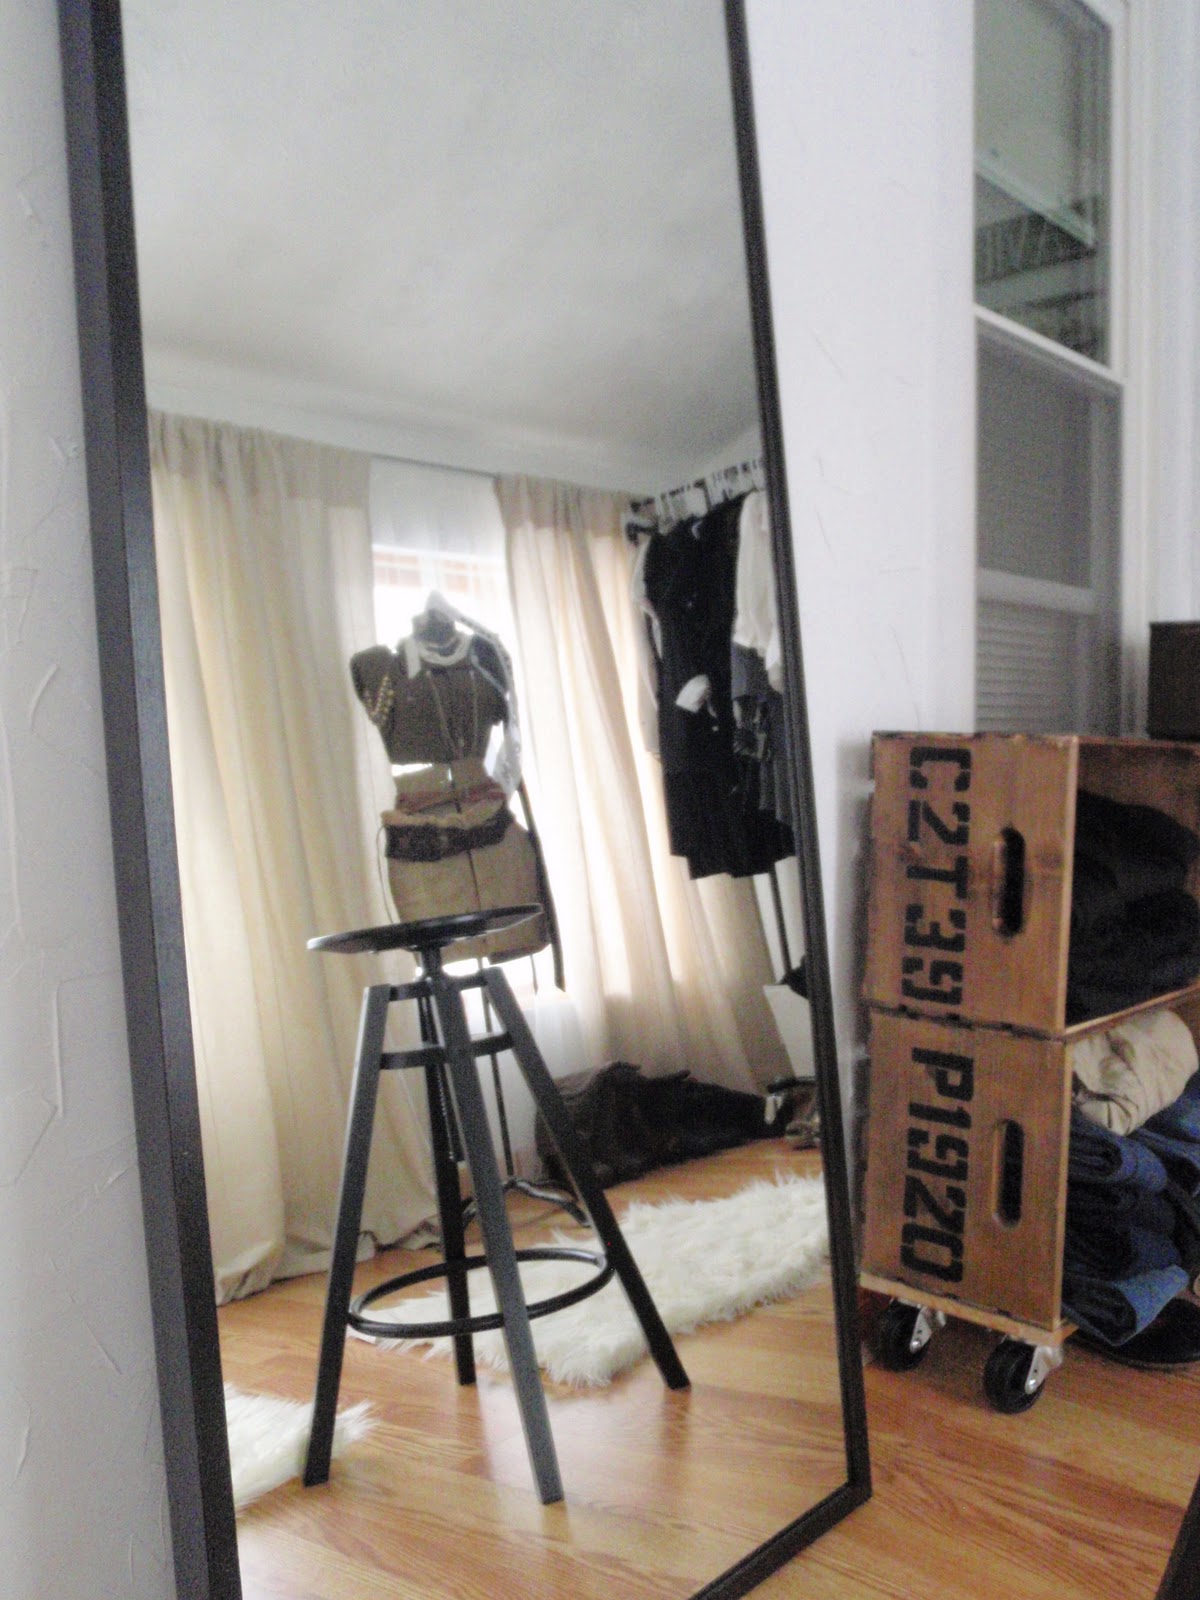
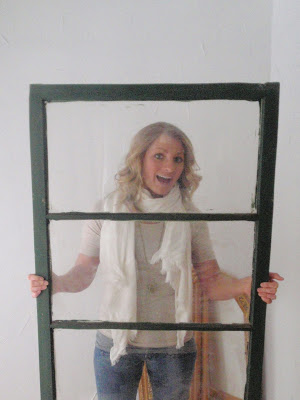
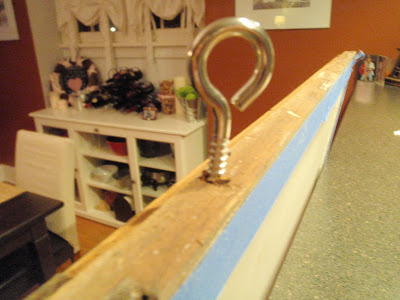
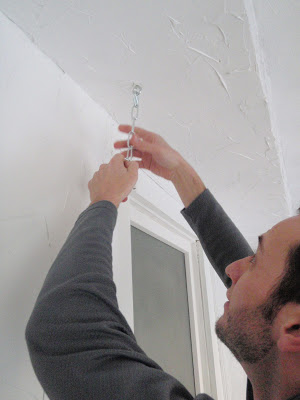
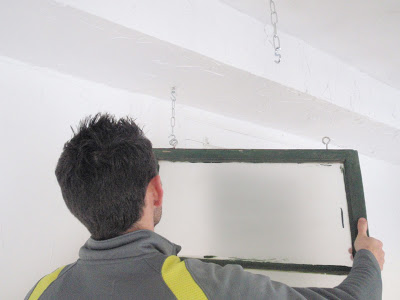
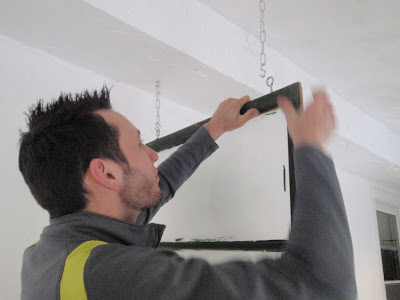
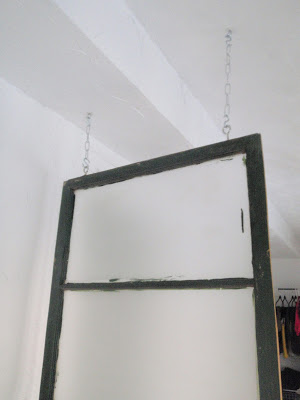
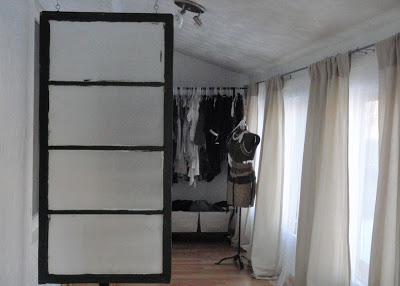
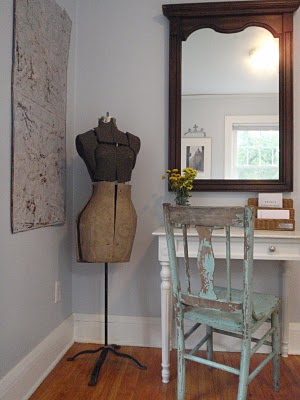
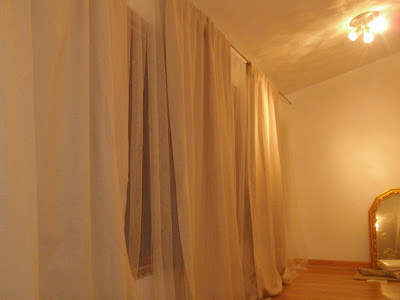
First, remember back when we hung this antique window (original to the house, found in our basement)?  It was hung in the Spare Room to divide the Dressing Room space and the Sitting Room space.  It has been hanging since February and it was painted a dark olive green.  I guess it has grown on me over the last few months? 
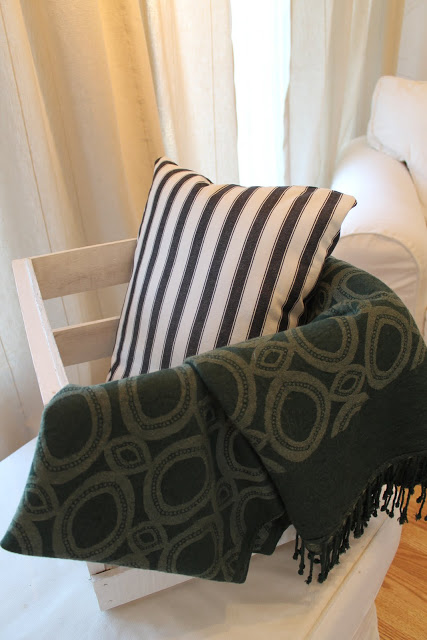
Secondly, I happened to stumble across this throw blanket at Ikea and just had to have it!  I think the pattern on it looks a wee bit vintage or even art deco. It was a total impulse buy, but then I thought it would look perfect on that chair in the sitting room by the antique window.  So olive green it is!!!  Who knew?!?!

Now onto my little DIY creation
I picked up a chair cover on clearance at Ikea for $5.00 since I thought the simple striped fabric looked nice.  I cut it into two pieces measuring 10" x 20" to make a decorative pillow with a non-removable cover. Then, with the right sides of the fabric placed together (wrong side showing) I sewed all 4 sides with my trusty Singer, making sure to leave a small section open to stuff the batting inside.

Once you are done sewing, flip right side out by pulling through the small opening you left un-sewn (for stuffing batting).

Here is how it looks pulled right side out.  I get extra points for lining up the pattern so nicely!  Perfect match on those lines!
Then start stuffing the batting in the un-sewn section.

Once you are done stuffing, hold the un-sewn section tight and stitch closed on your sewing machine.

Beautiful!
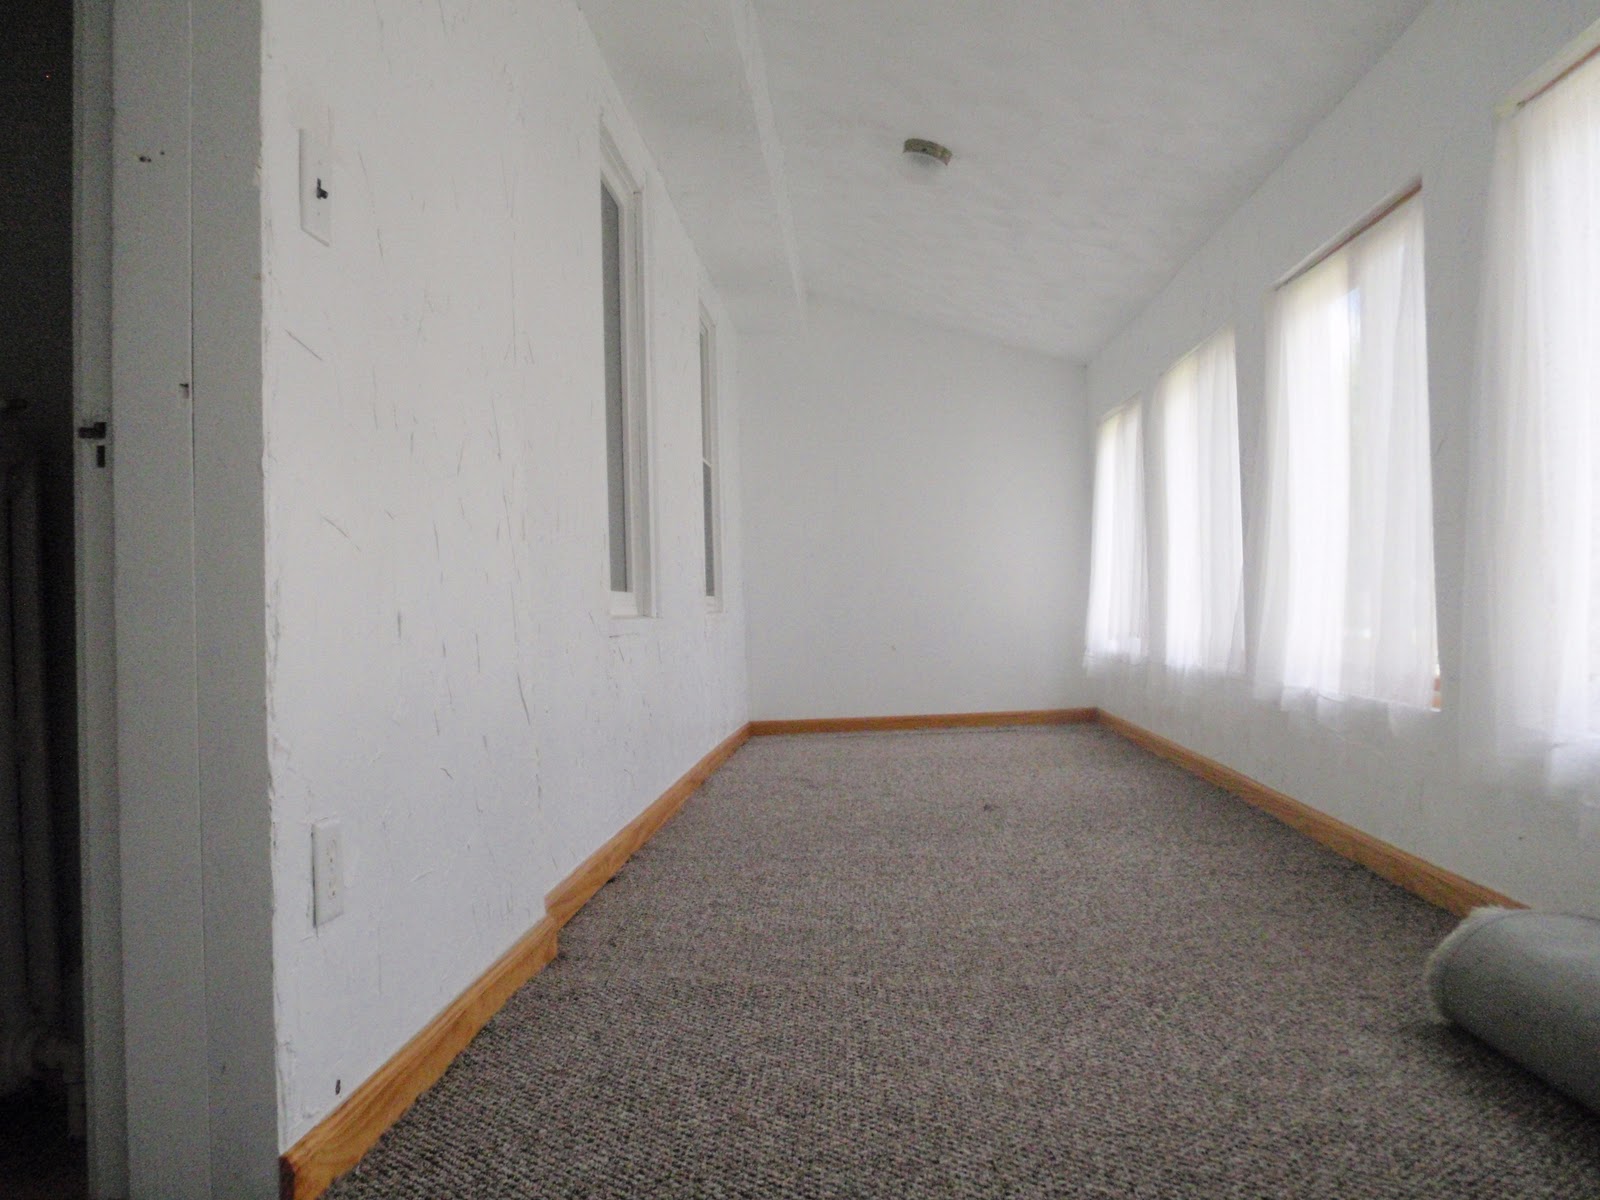
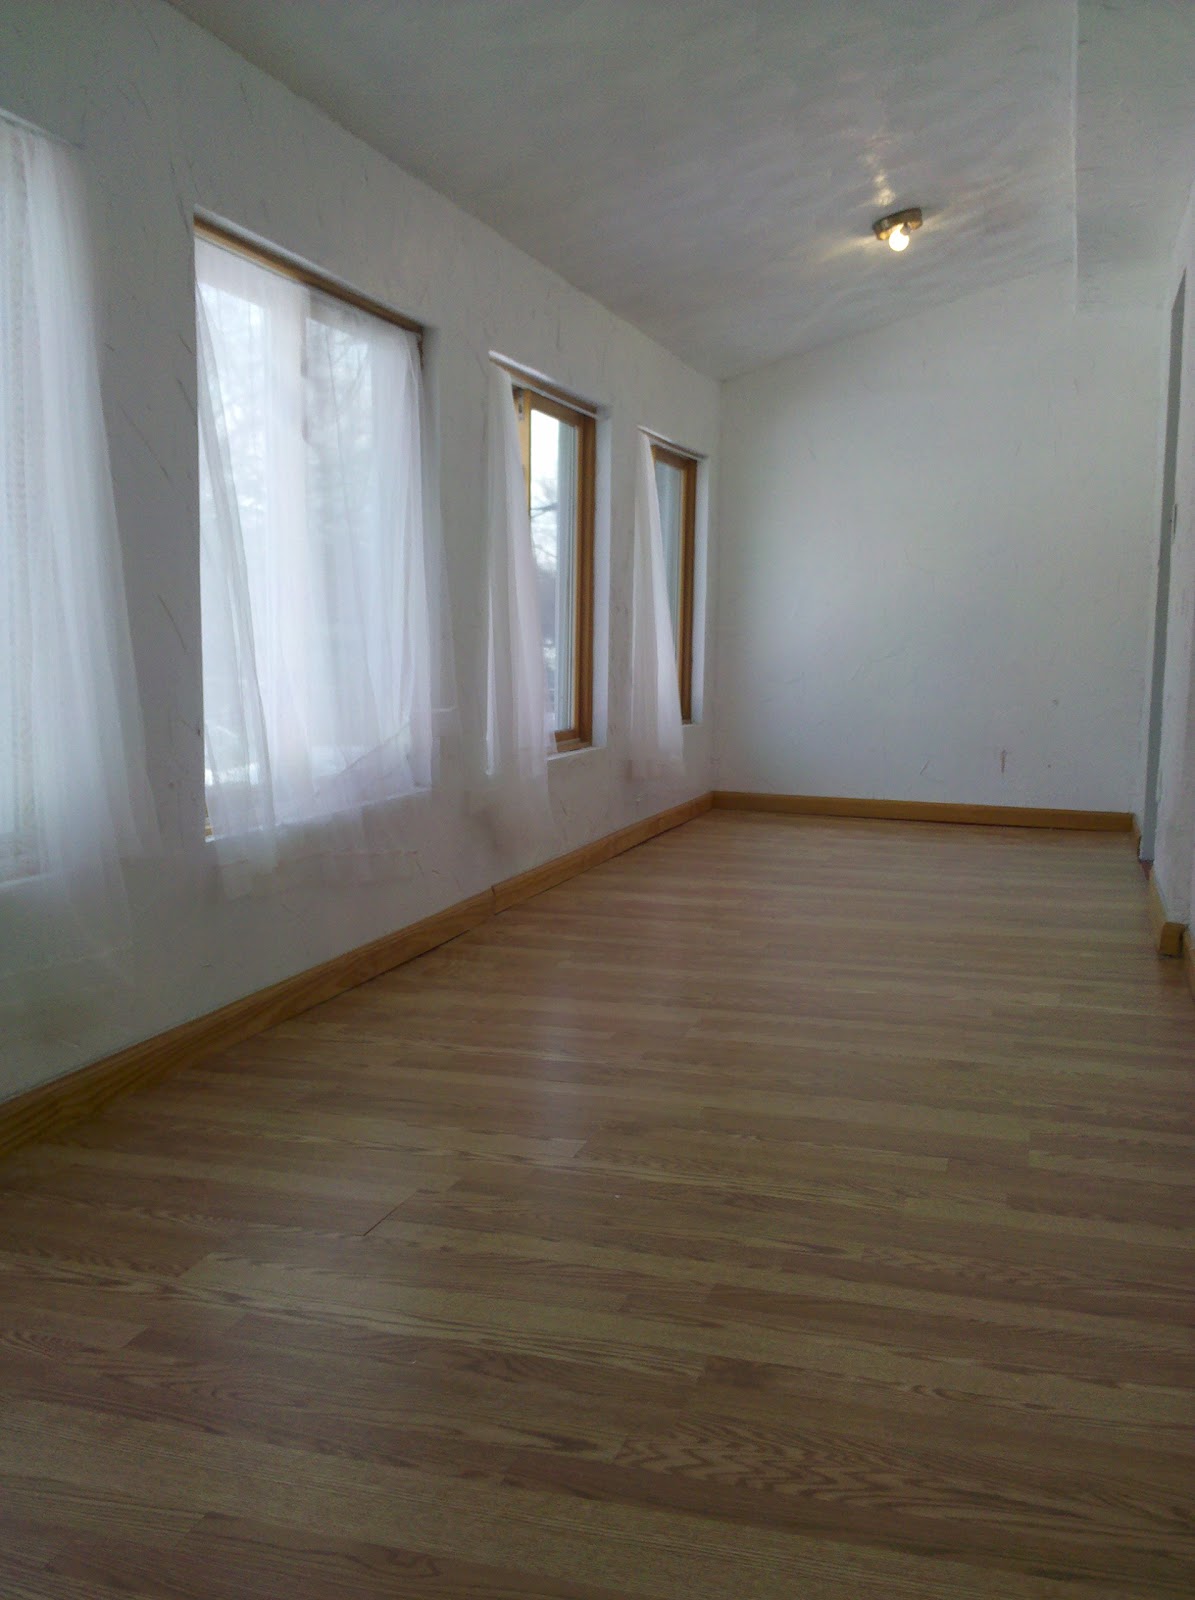
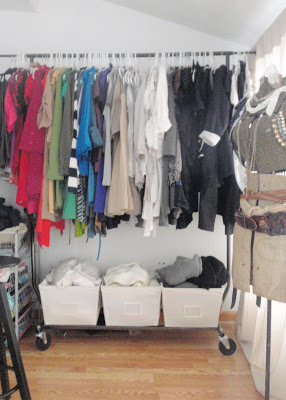
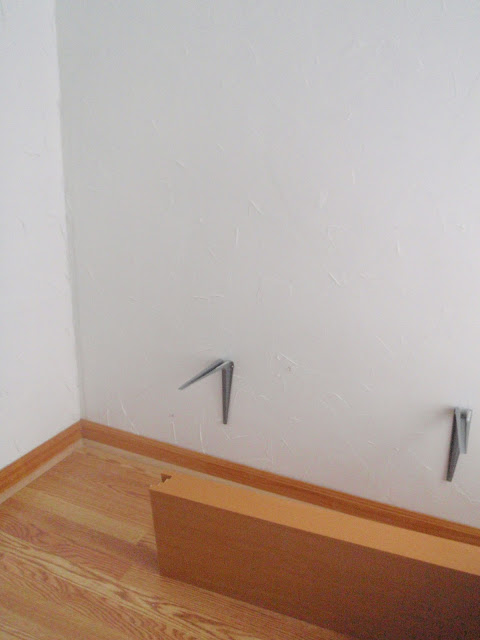
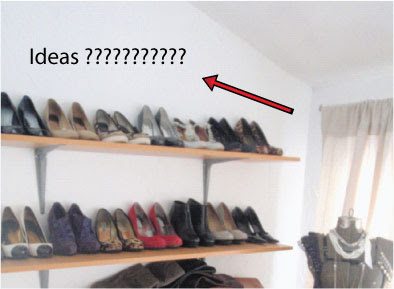
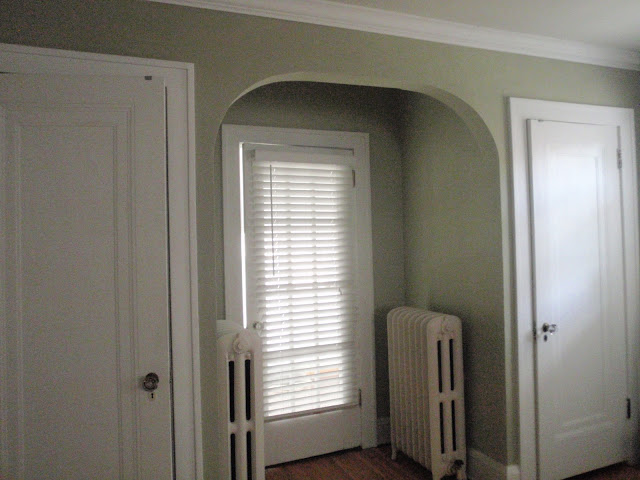
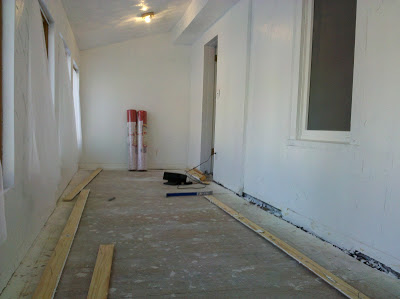
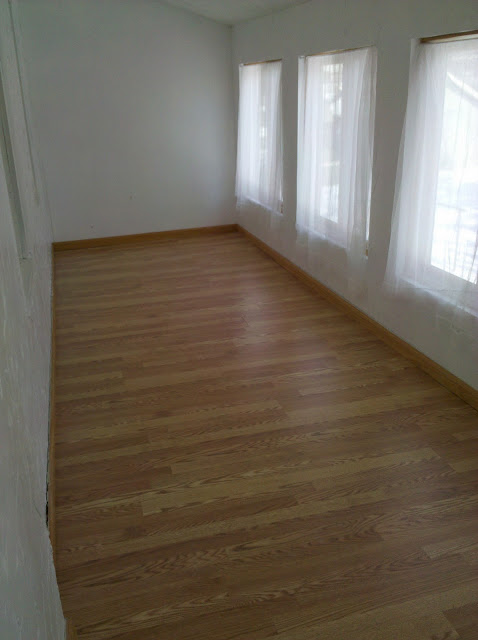
So I will continue to work on this blank wall space...

But here is a little preview of the Ektorp chair with the fancy new decorative accessories!  I love the mix of the patterns!

I have a fun idea in mind for the wall now and it might incorporate these fun little vintage maps I picked up for just $5.00 each at Posh in Chicago.  More color!?!?  Whoa, what is happening to me?!?

Hope to see you back tomorrow for Friday's Head Over Heels post!

200th Post and Craigslist Find for the Spare Room!

Kayd Roy5 Comments
Wowzers!  It is our 200th post!  That's a lot of jibber jabber from me!  Thanks for making it so much fun along the way!

Aside from our 200th post, we have another bit of excitement in the house!  Check out the Ektorp Chair and Ottoman for our Spare Room!
I bet you are wondering why that is so exciting, right?  Well, it is all because of the DEAL we got on this!  We only had to spend $80 for both...JUST $80!!!!  Crazy pants right?!?!  If you bought these new at Ikea the Chair would run $249.00, the Ottoman $129.00, and Covers for both $48.99.  So, brand new this set would have totaled $426.99!  So buying used (but in great condition) on Craigslist saved us $346.99... Hooray!

Now with the main furniture we needed to get the other side of the Spare Room finished up I can start decorating!  It is really a blank slate at this point, but I see so much potential to make it look special.

Here is another view of where the chair sits.  Again, the Spare Room is through a glass pane door off of our Master Bedroom.  I think it will make a sweet little sitting room.

I just love getting a great deal on something, it is that whole thrill of the hunt thing!  A tip for anyone else out there: If there is something you want from Ikea make sure you check Craigslist for it first.  A lot of times you can just search the name of that Ikea item on Craiglist and someone out there will have it.  At least that is what we find here in Minneapolis since there is an Ikea right in town.  Totally worked out for us with the Ektorp Chair and Ottoman, so glad I checked Craigslist!

My mind is spinning with ideas on how to decorate up this little space.  One challenge I see is that back wall, the ceiling slants upward (see red dashed outline), so I might be hard to figure out symmetrical decor.

If you have ideas, suggestions or examples of a similar kind of wall I'd love to hear/see them!  Please send me some comments, really need ideas on this one!

See you Friday!  My Head Over Heels pick for this week is something I know everyone is going to love!
So long 200th post... onward to 300!!!

What Ever Happened to the Rest of the Spare Room Redo?

Kayd Roy2 Comments
This is long overdue! What the heck happened to the rest of our Spare Room Redo?!?!  We have been wondering that same thing since we did our last post on the Spare Room.  I was so excited when we finished up the left side of the space- now called My Dressing Room back in March.
Once that was done, we kind of lost steam on finishing the other side of the room. I was kind of stumped for ideas so I left it alone for a little long while. Echo, echo, echo...
Oddly enough, with the tornado damage affecting most of our rooms upstairs (holes and water damage in the ceilings), this space is now the only one I can really play in. So it is time to finish it up!  Take that tornado- you can't kill my DIY spirit!

To recap (since it has been a couple months)
I wanted the other side of the Dressing Room to be a nice sitting area off our master bedroom (where the door to this space is).  This was our original plan...

 We did some big DIY projects on this space and it's decor (all links listed mid-way through the last post here).  One important DIY project related to this post was hanging that vintage window to divide the space.

Opposite of that hanging window is the empty space, just waiting for some Hammers and High Heels treatment!
??????????
We'll have a big update on this shortly...Stay tuned! 

PS- not sure if anyone keeps tabs on our project list, but we mentioned on our blog-a-versary that our next room redo is our Master Bedroom.  I am sad to report that this project has to wait until we get the rest of the upstairs repaired (wa-wa).  Our master is the other only room upstairs without any damage (at least that we know of for now).  I am guessing we might have to move the furniture out of the Guest Room as well as our Office and store it in our Master temporarily when repairs begin.  As a side note: we're now very thankful that we have a master bedroom that is a bit larger than most of the ones we saw while house shopping!  We also don't want complete chaos upstairs since some demolition will be happening in the other rooms (sad).  I know it stinks, and I am sooooo bummed!  I was geeked to get started on making our master bedroom a comfortable retreat for my hubby and I.  Just have to be patient for now.

What do you think we need in this space? I'd love to hear your ideas!

The Dressing Room Is Complete! Before and Afters, Clothes, Shoes, Decor, and More!

Kayd Roy15 Comments
I finally have a dressing room!  Kick up those Heels!!!  I'm just loving the new space!
Let's take a few closer looks and take a trip down memory lane...
Here is that antique crate I talked about in my last post now looking a bit more fabulous with some high heels!
Can you believe this thing holds 17 pairs of shoes?!?
It is so cute and serves a very big purpose for shoe storage!  Love it!
I love the way the crate also compliments the DIY vintage inspired crate shelving Alex and I made (sitting just to the left behind the Ikea mirror).
Here is a close up of the faux sheepskin rugs I picked up at Ikea.  My toes sure love them in the morning when the floors are a bit chilly!  Thankfully Sadie is finally leaving them alone too!
I think the addition of the Stave mirror from Ikea has proven to be way worth the purchase!  I love using the stool and mirror when I am getting ready in the morning. 
My antique dressform still amazes me! Best way to store/display my necklaces and belts!  Swoon!
Vintage feel with fashion and shoes... Sigh, I am so in love!


Now, let's take a trip down memory lane
Remember back in November (holy moly, can you believe we first started this process in November?!?) we asked what the heck we should do with this room? This is what the room was looking like back then, icky carpet and NO personality!
The majority of the comments we got said we should be turning the space into a closet, sitting room, or divide the space.  We obviously decided on all the above to suit our needs.  Check out the original plan and inspiration here!

Alex got to work ripping out the carpet since we knew that ugly stuff had to go!
He then installed some laminate wood flooring, sooooo much better! This part was the most expensive of our redo of course, you can check out that post for all the steps.
Thank goodness I don't have to deal with this anymore!  Alex happily took over both closets in our master. 
This is a lot more fun to hang around in, not to mention things are way easier to find!

What's next?!?!
If you remember from the beginning, this room is going to be divided into 2 spaces. Thus why we hung the vintage window...
We still have the other half to deal with. Remember, this room is right off our master bedroom.  The dressing room/ sitting area is the perfect idea to sort of create a Master Suite.
Our plan is to make a TV sitting room on the other end.  If all turns out right, I just may never leave this space!  A dressing room and TV!?!?  Talk about the perfect place for a gal to go relax in! 
We'll be posting about this half soon! 

For the all the posts on this space check out the Upstairs Spare Room Redo label.

***We just joined the DIY Showoff's Project Parade!  Link Up and join in!***

Vintage, Handmade, and Ikea Accessories for My Dressing Room

Kayd Roy8 Comments
I finally made some headway in the ol' Spare Room Project this weekend!  I was on a mission to get all the accessories and decor I needed to get my Dressing Room finished up.  Thankfully, I was successful!  There is quite the eclectic mix of decor in my soon to be dressing room!  Just the way I like it!

So here's what I got....

I went on a little antique-ing trip to Stillwater and picked up this awesome vintage crate for only $8.50 at Midtown Antiques.
I dont' have the exact measurements, but it was a really generous sized crate!  I love the handpainted 'Vine Ripened' label on the side. I am planning to use as decor/ storage.
In my inspiration post I showed this image from Arianna Belle, I love that she used an old crate to display shoes.  I am thinking I will do the same with this crate.
Now to my Ikea accessories! 
Last week in Houzz's Ideabook, I read a post about "Warming Up With a Sheepskin Throw".  I thought a Sheepskin rug would be a perfect accessory to warm up the space and give it a little feminine glamour.  I picked up 2 faux sheepskin rugs ($12.99 each), the real deal gave me the creeps since I didn't know if a sheep had to die to make a rug. The faux ones looked just fine.
The only problem with the rugs...Sadie was convinced that these were a toy for her (I guess I should have expected that, they are a little weird).  It took a lot of tries setting them on the floor and making sure she didn't run away with them.  She spent a lot of time 'inspecting' them.
I also picked up this AWESOME mirror name Stave from Ikea for $49.99.  I am soooo happy with this mirror, I love the way it leans on the wall and it is a pretty big size measuring 27.5"W x 63"L.  It really completes my room and gives it a glamorous feel!
The last item I picked up at Ikea was this Dalfred stool for $39.99.  I knew I wanted some kind of chair in the space that would be easy to move around and use.  I thought this stool was perfect and matched the style of the garment rack and antique dressform.
On to the handmade item! 
Here is the vintage inspired sign I made to hang above my garment rack.  It reads "La Vie Dans Le Talons" translating French to English "Life in High Heels".  I thought that was the perfect little saying for my Dressing Room. 
I have to add, the whole time I was painting the sign I kept doing my Nepoleon Dynamite impression and saying "Do the chickens have large talons?" Alex just loved that (JK), but I couldn't help it since le talons is French for high heels, such a weird word!
So here are some pictures making the sign. Before I got started, I just grabbed an extra piece of wood we had laying around in the basement and spray painted it black.
 Once it was dry I got ready to add the text.  I didn't have a stencil for the letters so I used a larger print out as a guide and freehand penciled in the writing.
Then I painted in the letters
Almost finished!
The cursive letters were a bit tougher to freehand.
Once I was done, Alex added some frame hangers to the back and hung it up behind my garment rack.  I love the fun personalized touch it adds to my space.
As you can tell I am almost done with this space!  I'm really happy with the way it is shaping up, I just have to get it a little more organized before I can post the afters, but that is next!  I can't wait to show you the room this week, eeeeek!

DIY Vintage Crate Shelving Unit and "C2T39"

Kayd Roy22 Comments
About a month ago, I wrote a post about our Vintage Styled Storage Solution for my Closet Room.  Again, here are a couple of my favorite images for the look I was going for...
 And I love the wheels on this little guy...
Since I finally finished the 5 remaining DIY Vintage Crates it was time to make a shelving unit out of all 6 crates! 

First, lets take a look at what we are going to make first.  This is what the base for the shelving unit will look like (after cutting).  We used left over wood that was in our basement from other projects and I picked up 4 wheel casters from Home Depot for about $5 each.
So to back up, Alex measured the length of the crates and did measurements on where to cut the wood.
Then used his saw to cut each piece.
Here is what the cut pieces of wood looked like when he lined them up as the base for the unit.
He used screws in each corner for a stronger hold.
Then hammered finishing nails into the mid sections where the crates sat next to each other.
Action shot: securing those smaller wood pieces that will act as the base for the caster wheels.
To attach the casters, Alex used liquid nails since we couldn't find any screws that would work with the casters (all of our spare screws were way too long or had tiny heads).
Then he stuck those suckers on!
Once dry, you flip it over, add crates to the top and this is what you end up with!  I plan to stain the rest of the base that we attached so it will look more uniform (just got to eager to see how it looked!).
Here's another look.  I did them lengthwise to increase the storage room. 
And here's a closer look at the 2nd DIY Vintage Inspired Crate (the top one) that I painted letters and numbers on. (click here to see the DIY steps to make your own!).

In case you are curious about this letter/ number combination and its sentimental meaning here is a crazy story about "C2T39". 
Back in 2005 I met Alex one day at work, 5 days later I found out he had gotten in a serious accident on his dirt bike. He had broken his neck, back, shoulder, shoulder blade, collarbone, sternum, a bunch of ribs, an elbow, and really, almost lost his life. He was out jumping sand dunes at Lake Michigan and hit a truck head on. C2, T3, T9 are the vertibrae that he broke. After he laid in a hospital bed for about 2 months, the next time I saw him he was in a halo brace and working on recovering from all the pain his body went through. He also had a brand new perspective on life. I spent a lot of time after that listening to his stories of what the whole experience was like, and overall we grew a lot closer. Hope you liked that crazy story!  Alex really is amazing!

Awkward segway back to the project...

I hope to get the rest of my Closet Room decorated this weekend, then I hope I can finally share afters! What do you think of the shelving unit?

*** We just linked up to the Lettered Cottage's How To's Day Linky Party!***

The Lettered Cottage

A Nice Surprise After Painting The Garment Rack

Kayd Roy6 Comments
A couple weeks back I wrote a post about spray painting that Commerical Garment Rack I found at Target for the Spare Room/ Closet.  Well, I got a nice little surprise once it was done.  After it dried and we got it back upstairs, I realized it matched the metal on my vintage dressform!  Totally unintentional, but wow, it looks so much better now that they coordinate!
So here is what it looked like before spray painting.
This is the after using Rustoleum's Oil Rubbed Bronze Spray Paint. So much better without the chrome look!
Originally, I just didn't like the chrome metal, but wasn't aiming for it to match the metal on the dressform.
But now that they are matching it helps to pull together my strange strategy in this room.
So here is where we are at now.  My clothes are off the floor!  I also have to add that while moving closets, I did a major purge of unnecessary items!  I filled 4 grocery bags of things that were hanging in my old closets that I hadn't worn in almost a year and dropped them off at Goodwill.   It felt good to get more organized and have less stuff to sift through!  I'm thinking I will put a vintage sign in the space above the rack to add some decor!
Next is getting my DIY Vintage Crates in there to add some shelving for storage!

DIY Project: Vintage Inspired Crates!

Kayd Roy18 Comments
I am really excited about this DIY post!  If you have checked out our blog before, it is very obvious that I am obsessed with 2 things: Chalkboards (here and here) and Antique Crates.  Turns out it is really hard and expensive to find 6 antique crates of around the same size for our Spare Room project.  So, I decided to make my own Vintage Inspired Crates!  Here is a look at the first little beauty I made yesterday!
This idea started when we failed miserably at making shelves in my new closet space.  I ended up finding a new idea after I found some beautiful inspiration that I wrote a post about here.  
 
 I ordered these crates from JoAnne's, they were only $9.99 each and measure 18"Lx12"Wx9.5"H.  I was so excited when I got them in the mail!  I ordered 6 total, here are 3 of them.
Just because I have to, here is a gratuitous Rocco photo in one of the crates- you know, to illustrate the size :)
I love the structure of these crates, but the plain unfinished look is NOT what I am going for. So we are going to take these plain crafty looking crates.....
and make them look something like this!

So Let's Get Started on the DIY Steps!
 The first step was staining the wood so they would have more of an antique look (because fresh from the craft store doesn't look very chic).  I used Minwax Wood Finish in Special Walnut 224.  I looked at a swatch of it at Home Depot and thought that the color had a gray-ish antique shade to it AND it was only $6.69. 
I used a lambswool brush to apply the stain in nice even strokes
I really liked the way the stain enhanced the wood grain detail, and made it appear more aged and unique.
After the stain dries, it is time to add your own letters/ numbers to the crates for a more personal vintage look (similar idea to what was in my inspiration photos).  I got these stencil packs at Home Depot for $1.99 each, a total steal and very industrial looking- perfect!
I wanted to use letters/ numbers that mean something to me (because I am a sucker for sentimental art and decor).  For the first crate I used "P1920".  The letter "P" stands for my grandma and grandpa's last name, Pierson.  The "1920" is the year both of them were born.  So, there's the special meaning!
I measured out where I wanted the letters/numbers to line up, then used a pencil to outline the stencils.
Next, I painted inside each number.
A tip for anyone that tries this, use a small tip brush. I started with something larger and it was very hard to make neat lines. So I switched to a small brush.

Once you're done letting it dry you'll end up with something like this!  Totally cute!

I grabbed a couple of my actual vintage crates to compare the look (old vs. new)
I totally think my creation passes for a vintage look! I couldn't be happier with the end result.
 Now, I just need to 'antique' 5 more, crazy I know!  But I think they are going to look great once I put all 6 together to create a shelving space.  I plan to use a different sentimental number/ letter combinations on each crate, but they'll maintain the same uniform look and placement.  I will definitely write another post with the photos of them all together once they are finished.  I hope someone out there tries this out and makes their own DIY Vintage Crates, it was really fun!


The Great Spare Room Divide: Hanging An Antique Window

Kayd Roy5 Comments
So last week we talked about our plan for this old original window from our house.

We thought it would be a perfect way to incorporate something original to the house and divide up the long crazy space in our Spare Room. 
(If you need some background on this project check out this post for the plan or this link to check out all the Spare Room posts).

In the last post Alex caulked around the glass panes and used Frosted Glass spray paint on the glass so it was no longer transparent.  He then screwed in some eye bolts to the top of the window.
The window was going to hang from the ceiling in the room. So we wanted to use something very safe and secure so that we wouldn't hear the window crashing to the floor and breaking. Alex picked out Cobra Driller Toggles which are "self drilling anchors that feature a unique and powerful toggling mechanism thereby providing maximum holding power for all your installation needs" aka some really tough anchors!
After he got the anchors in place, the rest was pretty easy. 
Just had to cut the chains to the appropriate length and hang the window in place.
Success!
So here is a nice little preview photo (sorry it is dim) of what we have going on in the never ending Spare Room Project.  You can see I am working on the garment rack and vintage styled shoe storage, slowly I am making progress! 
I hope tomorrow to post my update on the Garment rack, it turned out just perfect, I can't wait to share!

A New Look Through An Old Window

Kayd Roy6 Comments
I mentioned towards the end of my Super Spray Paint Sunday post that we had something fun planned for another antique window (see the chalkboard we made with another here).  Back when we landed on a plan for the room, we knew we had to come up with a way to divide the space.  One side would be my dressing room/ closet and the other a sitting room (for a complete run down on this never ending room project check this link).  Originally Alex planned on building in a shelving unit to split the space, but we think we have a MUCH better idea now thanks to our good friend Amber

She asked if we had anymore of the original windows to our house in the basement and I said we had plenty.  She suggested we divide up the space by hanging one of those windows...Brillant!!! We love repurposing anything that's original to the house so we can give it new life and enjoy it everyday (just like that chalkboard).  Here's a look at some of our inspiration and the first DIY steps!

This inspiration photo is one from our own blog!  I remembered I had first seen a hanging antique window at Bachman's Idea House in December. It was hung to divide the stairwell and landing.

I found this one on The Stories of A2Z. I love the washed out wood on the frame.
This one is a little on the crazy side, but I thought the image was so cool!  This was on Curbly , you can make a whole wall out of vintage windows!
Ready, set, DIY! When we got one of the windows out of the basement, we noticed that the glue like substance on the inside of the glass panes was worn, and cracking pretty badly. Some of the panes were even loose and rattly.  We decided that it would be best to cut out the old concrete like glue and use caulk to make sure the glass panes were secure.  Here Alex is using a razor blade to remove that weird brittle glue.
Once that mess was complete Alex caulked all edges of the glass panes (sorry I don't have a picture- we ran out of space for photos!  No worries though, we bought some more space and should be back in business tomorrow).  Then, I used my trusty blue painters tape to prep for painting.
What are we painting exactly?  The glass!  Since this is going to hang and divide the space, we wanted to make sure it wasn't transparent.  For this we picked up Rust-Oleum's Frosted Glass spray paint (about $4 a can at the ol' HD). Side note: I still have to share a little bit of my Valentine's decor, I totally forgot!
 Alex had some real skills with this paint.  If I had done it, it would be a stripe-y streaky mess!  He did a great job using a continuous back and forth motion to make sure it was coating evenly and didn't look like total junk.  As of now this baby is drying in the basement!
Our goal is to get this repurposed piece of 1924 hung this weekend if not sooner.  I anticipate the event will be filled with lots of adult language (courtesy of Alex) since any 'Alex vs Gravity' project usually requires a dash of this special ingredient.  Wish us luck!

PS- I found out my crates shipped yesterday!  I hope I get them soon, super excited!

Super Spray Paint Sunday!

Kayd Roy7 Comments
 Happy Super Bowl Sunday everybody!  For us, it is also Super Spray Paint Sunday.  Although I am looking forward to eating lots of junk food and watching the game after I get this post done!

In our last post I talked about my decision to change up the look of the garment rack.  We got started on it yesterday.  I  had to take apart the rack to start, then used 100 grit sandpaper to rough up the chrome surface of the rack (so the spraypaint will adhere better).  Then Alex took the Rustoleum Oil Rubbed Bronze paint and got to spray painting... 
Look at him go... 

 So the commercial garment rack went from looking like this 

To something like this (just a preview of course!)
 I will post better after pictures once we get it set up in the room with my clothes (which are also homeless now).  I am still anxiously waiting on those crates too!  Can't wait to get organized! 

I also have to mention, we have something really exciting planned for this antique window (can you tell by the look on my face?)!  We did some work on this guy today too, can you guess where it is going/ what purpose it will be serving?  
I will be sharing that in the next post! Have fun watching the Super Bowl today and all the goofy commericals to go with! Time to check out what Alex has bubbling in the crockpot!

A Nice Rack Is Hard to Find

Kayd Roy9 Comments
We're talking garment racks here people!  Just in case the title had you wondering :)  Finding the right garment rack was not easy, but we did succeed!

As I was searching online for garment racks and prices for our spare room (check out the plan here), I  felt a little more encouraged about my idea.  I discovered that a couple other ladies like the look of garment racks to display their lovely pieces of clothing...

Emily at Cupcakes and Cashmere keeps one in her office
Rachel Ashwell uses them to display her vintage fashions (sorry for the blurry photo)


 And I just loved this image from Marley and Lockyer (awesome blog by the way, love their style) and had to show it, how gorgeous is this antique wood rack?  I also love the steamer trunk and hat box....hmmmm more ideas!!!!
Now back to the search...

I wanted to find a vintage or used industrial looking garment rack.  Turns out, those are pretty darn hard to find. I searched for a new industrial type rack and those ran between $200-$300, and are a little too 'sturdy' for our needs.  I realized I probably didn't need a real industrial rack, I just wanted the look.  So we set out to find the right rack.

The first rack I picked up was from Ikea called 'Rigga'. I should have known better, even Alex said, 'Bet it's going to be a piece of crap'. Piece of crap indeed, I only got about 1/3 of my hangers on there and it started to collapse...
"TIMBER"

We also got a tip from our blog friends over at At Home Alterations to check out a used store fixture store here in Minneapolis called Accent Store Fixtures. But sadly no luck, they only had 2 of the REALLY big industrial racks.

Then, on a random trip to Target I was walking through the storage aisles and found.... wait for it.... a Commercial Garment Rack!!! Who knew Target sold them? I should have just checked there first since I'm always at Target.  I am SUPER impressed with the quality of the rack!  It supports the excessive amount of weight I have to put on it, and the wheels glide perfectly and even have that industrial look.

The price? Only $59.99, LOVE IT!  The one thing I didn't love so much, the chromed metal, so I'm thinking that might need a little makeover. 
During my search I came across a really cute garment rack on Etsy from Pipe Designs. I loved the look, it wasn't totally huge and bulky, but still industrial looking and somewhat antique with the black metal.

So, I'm now on a mission to ditch the chrome on the rack from Target and use spray paint to give it a darker, more antiqued look.  Alex just brought home Rustoleum's Oil Rubbed Bronze Metallic Paint, I think he picked a winner.
We're going to paint tomorrow morning, I can't wait to show you how it turns out!

***Update- If you'd like to see how the rack turned out after painting click here***
***Also- Click here if you want to see how the Dressing Room turned out!***

Our Vintage Styled Storage Solution

Kayd Roy16 Comments
I was pretty down in the dumps on Monday when I had to start all over in the Spare Room.  I spent about 3 hours that night searching online for a new storage solution when I came across some great inspiration that got my spirits up and creative juices flowing again!  I was also very inspired by all the comments I got regarding our failure and really appreciate the feedback and new ideas! Hammers & High Fives for everyone!!! ...too cheesy? Probably, sorry, but I got a laugh out of that and kept it in the post :)

So what did I find?!?  Wood Crates!  I guess it shouldn't be a surprise if you have read through my blog before, I am obsessed with using wood crates for storage, I can't believe I didn't think of this before!
I found these two images on Design Squish, I'd say they sparked my inspiration to use wooden crates for shelving.
This one from Ana White looked very clean and sophisticated
 I thought this one from Remodelista was neat, adding wheels makes it look a bit more industrial
 I also like this idea from Arianna Bell, just a different way to display and arrange shoes using crates.
I showed Alex all of my inspiration photos and the new plan I had drawn up.  He loved the new direction we had for the dressing room! 
The big problem though, where were we going to find 6 vintage crates similar in size?  I did a lot of searching on Craigslist, Ebay, and Etsy. I found some dealers that had lots of vintage apple crates, but they would have to be shipped.  Shipping 6 larger size crates was going to cost more than the actual crates!  Luckily, I ended up finding some nice crates on Joanne.com for only $9.99 each and free shipping!  They are a good size too measuring 18"L x 12"W x 9.5"H.

Yes, they aren't vintage (wa-wa), but that doesn't mean we can't do a little DIY magic on them to give them a vintage look (wink)! I just ordered them today, so we should have them by next Wednesday, wish it were sooner.  I have 2 options for how I want them arranged, so once we get them I will have to play around with the actual placement.  I really hope this one is a winner and we don't go back into failure mode, keep your fingers crossed for us!

*** Update- curious how we made those crates look old?  Click here to find out!***
***Update- we made a shelving unit out of the DIY crates we made, check it out HERE***

My High Heels Are Homeless

Kayd Roy14 Comments
It has been a rough couple of days in the Hammers and High Heels DIY world.  Our Spare Room redo hasn't been going as well as we had hoped. We were in the beginning stages of setting up my new dressing room.  Before we took our trip to Home Depot for the supplies we looked back at my inspiration post to get an idea of what we should look for.  We thought these basic metal brackets and boards would do the trick, they had a similar look to the metal and wood shelving I loved from the inspiration photos.  They also were pretty inexpensive (lesson learned; low cost DIY isn't always the best idea).
Once we got the shelves up we both just cringed, even Rocco had a look of horror on his face.  I imagine he was thinking something like, "Mom, you guys can do better than this, nothing in here looks cute but me" - yep I just quoted my dog, uggghhh, it IS a really lame day!

Even though we didn't think it was quite right, I started organizing my shoes on the shelves to see if it made our vision look any better and even put my antique dress form into place. Our concensus... a classic case of the shoe not quite fitting right.

It still looked like crap.  CRAP!  The two main problems were 1- the shelves themselves, they just didn't look nice at all; and 2- the awkward huge space above the top shoe shelf.  So maybe we didn't measure and place them as we should, but we are also thinking that this wall shouldn't have shelves on it anyway.
So, we are starting over with this one.  My heels and everything else are now in this lovely heap on the floor.  We get a huge FAIL on this one.
The good news is we have a new plan, and yes, we hope this one works!  So, thanks for following up with us on our room redo, and if you have any ideas for us please let us know!  Here's to hoping this week and our new plan goes a little better!

From Fitting to Function; A New Gig For My Antique Dressform

Kayd Roy6 Comments
The inspiration for this was right under my nose in my own blog!  I can't believe I didn't think of it sooner!  So, I was looking back through some older blogs and found this picture in my Sights From Junk Bonanza post.  I thought, hmmm, I could do that with my beautiful Antique Dressform (the one Alex surprised me with) and turn it into storage for my belts and necklaces!  Not to mention it would double as decor as well!

The only bummer meant we would have to take it out of our Guest Room.  It looked perfect where it was in our Guest Room, but I think it could only look better in our Spare Room since it goes along with the theme.  We also got some feedback from a recent Guest (aka my Mom), that the Dressform looked a little spooky when she woke up in the middle of the night, like there was a person in the room.  Point taken Mom.  So, we are moving the beautiful Antique Dressform from its spot here in the guest room to the new Spare Room.
There hasn't been anything fun about moving around our closests and all the stuff in them.  But I'm not going to lie, this was sooooooo much fun!  I was pulling out my belts and necklaces and accessorizing my dressform.  

 I loved the Dressform before as is, but this gave it some pizzaz and more of a purpose.  My necklaces sure look a lot nicer here than in a pile in my jewelry box.


Sigh, I just love this idea, and I can't wait to add it next to my shoe shelves!  It's shaping up to be a really neat space! 


We are finishing up the shelves and are in process of moving everything from both closets.  It is a colossal mess in our bedroom right now, but I'm super excited to get it all organized so I can take pictures soon!

Closet Confessions

Kayd Roy5 Comments
Oh dear, my stomach is kind of in knots thinking about posting this and showing the mess, but I think it has to be done.  Since part of our Spare Room project will be creating a closet space, I thought it was appropriate to show you what we are currently working with and why we desperately need the extra storage space.

Back when I wrote the first post about our Spare Room I showed this picture of the doorway to the Spare Room from our Master.  Those cute doors to each side are our 'his' and 'her' closets.  They are pretty cute because they are original to the house and should never be changed; except there is nothing cute about a closet that measures 33" x 40"!!!!  That is one of our biggest complaints about living in our old house, NO CLOSET SPACE!!!!
So we had to get creative, and here is where that 'knot in my stomach' feeling comes in.  I feel a little embarrassed to be showing where and how we store all of our crap stuff.  Why?  Because it certainly is not cute or organized- and I pride my self on my organization skills. 

So here is where we stand today with our existing closets, and thankfully we are currently working on a solution!  I will let Alex go first!  

He has all of his dress shirts hung on a very small bar (can you see that the right side of his closet has the Dutch Colonial slant/dormer, so his closet is even smaller than mine). Then he has Ikea wire baskets filled to the top on the left side, jeans stacked right on the floor so you can't access anything behind them, then old Yaffa blocks on the left (remember those.."Go Yaffa", I had a bunch from my dorm in college that have followed me since) holding all of his t-shirts and what looks like a messy wad of stuff towards the bottom.  I have not a clue how he finds anything- oh wait, I DO know.  When Alex can't find something I end up seeing him toss a pile of stuff (while swearing) onto the bed to sift through and find his 'needle in the haystack'. Sorry honey, you know you do!
Alright, now it's my turn!  So here it is, itty bitty closet #1 (I had to use 2)!  Notice you don't see the wall at all?!?!  I have all my clothes packed so tight in that little space.  I hang all my shirts on the hanging rod, sweatshirts and jeans up top, scarves covering the wall to the left, necklaces and belts on the back of the door, and tons of random things in the drawers below. Usually, when I pull something out another 1 or 2 things would come with, so annoying!
Now here is itty bitty closet #2 which is in our guest room.  There was no way everything could go in just one little closet, and it has been really annoying having to search through 2 rooms to put an outfit together!  So in this one, I mainly stuffed away sweaters, dresses, jackets, shoes, and purses up top. I always felt bad too if we had guest come that wanted to hang something up and they opened the closet to see this cluster.  Other than those 2 closets I switch out seasonal things (like swapping the sweaters for shorts in the warm months) in a giant storage tote in the basement, doing anything I can to maximize the space!
It truly was a sad state of affairs.  I am so glad to report that I am getting ready to move on out of of those 2 itty bitty closets, so we should have fun pictures to show soon!  Alex has been hard at work, I think he is also excited that he won't have to hear me yell "Avalanche!!!!" every morning. 

So, I guess I still think it is embarrassing, but I can't wait to show the 'afters' which should paint a much better picture!

Step Into The Light (And Airy Side of Our Sunroom)

Kayd Roy6 Comments
Phew, sorry I haven't posted in a while, I was in NYC for the past couple days (which means I might have some fun store photos to post soon!). Here are those before and after pictures of our Spare Room with the new window treatments that I promised. 

 Here is after we put up the window treatments. Don't the longer drippy curtains give the illusion that the windows are much bigger?  PS- you can see some of the supplies we are going to be using soon!
 Here's the 'before' from the other direction
And after. I still don't think it is quite perfect yet. I might have to add 2 more panels; one at each end.
This is a close up of the rod pocket I had sewn for the curtain. Oh, I should add that we hung the sheers on the old curtain rods that were there before. We hung them behind and a little lower than larger curtain rod (that was free, yay!).
 I think we will be replacing the white sheers soon (hopefully). Right now it is the cheap "mosquito net" curtains from Ikea and I would love to replace them with nicer sheers soon, maybe ones with a pattern or texture on them.  But so far the room is feeling a little more, well 'roomy' the curtains really helped cut down on the echo in there too!
Things have seen crazy busy for us since we have been working on this room and I had been traveling quite a bit.  Things should be calming down for a while, so I hope we can get started on the next steps soon... looks like Alex is going to be building something so we might have a good DIY post coming up!

Flooring? Check. Privacy? Yes Please!

Kayd Roy5 Comments
We blogged about installing our flooring a week ago and haven't posted anything about the Spare Room since.  Are we slacking??? No way! Nothing is stopping me from my new closet/ dressing room, hehe!  We were busy getting out and about picking out a few necessary items to continue our work on the space. I'm happy to report that we have gotten the window treatments installed and checked off our list! All on this very Tuesday night!  A little crazy? Yes, but I just had to share my excitement!

My inspiration for the window treatments came from Beach Brights 'Chain Link Fence Curtains'. They looked great in the very long and narrow space on her screen porch, and I thought it was a great way to add more fabric/ texture to the room and even cut back on the 'echo factor'.  
  We didn't get the same materials though, but went with the overall look.  Here is a picture of what we picked up from our favorite Swedish home store.
 
We picked up 2 of the Vagen curtain rods because they can extend to 12 feet and were only $9.99 each!  Since our room is so long (26ft total) it made sense to get the most bang for our buck and get the long curtain rods. For the curtains, I ended up choosing the Lenda ones from Ikea for two reasons. The first being that we already have a pair just like them in our living room and LOVE them, they are so neutral and have a nice texture to them (I never wrote a blog about them, but you can see them in this blog from November covering our slider doors).  The second reason- price, you can get a pair of these for only $14.99, steal!!! Also, they are pretty large, last time I had to hem them since our ceilings aren't very tall. I was even able to make decorative pillows with the excess fabric that I cut off, I added them in our Guest room...
We moved our Pottery Barn pillows that Layla used to decorate our guest room back to the living room (in case anyone wondered) 

Back to the windows...So our total for our window treatments so far came to about $50, not too bad considering you can spend that much on one window.

Then the measuring and mounting began, this was all Alex!
 Look at him go! The spacing for each bracket was about 6' apart.
I quickly made my measurements and got over to the sewing machine. That's right, my job during this time was sewing the curtains at the top to make them a rod pocket instead of a tab top. I'm not a fan of tab top curtains, looks like band-aids or something to me, just weird.
 
Then I cut off the excess fabric, sadly not enough extra for pillows or anything else fun this time.
Wait, I take that back!  After Alex got done hanging the brackets and getting the two curtain rods up, he was waiting for me to finish cutting, sewing and ironing the curtains.  So this is what he did with the excess fabric and time...
Yep, Alex did some Glamour Shots with Sadie.  Sadie got some sort of tie and skirt combo with the tab top part of the curtains... it was interesting, at least humorous while we were working on this room at 9:00pm on a Tuesday night.  I got him to focus again and he helped me get the curtains up.
Here is a peek at the room now, I didn't want to do before and afters yet because taking the photos at night doesn't really make for a good comparison (my camera takes crappy pictures at night if you haven't noticed).
Looking a little more fabulous?!?!  Getting there, oh, I forgot, we did pick up something on our trip to Architectural Antiques.  See that gold framed mirror on the floor?  That is what we brought home, thought it would be a nice glamorous addition to my dressing room space, and it was only $20!  I will get some before and afters posted this weekend when I will hopefully see some daylight! Hope to finally get my rolling racks too!
Well, it is almost 10:30, this working gal needs to catch some much needed Zzzz's, goodnight!

*** Project Parade at DIY Showoff!!!  Check 'em all out!

Spare Room Flooring is Done! DIY Steps to Install Laminate Wood Flooring

Kayd Roy9 Comments
 I just got back from China today and sure enough I came home to a nice surprise!  Alex finished up the floor in the spare room off of our Master!  So... that means we can get started on fixing and decorating the space, yay!

The last time we blogged about this room we wrote about our plan for the space, and in the post before that we removed carpet from the room.  We decided on using that laminate wood flooring we found when we went to Home Depot since it was budget friendly.

So here is where Alex started.  First he had to pull all the baseboards off of the walls so there was room to install the flooring. The flooring needs to be 1/4" from the wall so it has room to "float" as well as expand/ contract with humidity.
 
Here's a look from the other end from the room.   

Next, he cut and laid the laminate floor underlayment (the red stuff you see under the wood flooring). Then began cutting the wood laminate with a miter saw and piecing them in to fit. 
Here is the other end with only a couple feet to go. 

Here's a look with the floor complete!  

So much better than before with the icky carpet...
Another view...


Our next steps are going to be dividing the room into 2 useable spaces and looking for the right pieces to make my dreamy dressing room/ closet! I also need to figure out what window treatments we should use for the room, so sick of the cheap Ikea ones!  If you have any cute ideas for the window treatments let us know!

As far as the budget we spent $175.98 on the wood laminate flooring for the space (160 sq ft), $119.94 for the underlayment, and $9.97 for a flooring pull bar (which is used to tighten boards together in tight spaces).  So we spent $305.89 to redo the floor, we originally thought it would be less but the underlayment doubled the estimate when we realized we needed that too.  Overall the look is so much better and I know once we are finished we will be using that room a lot!  Can't wait to start decorating it soon!

***Check us out and everyone else in the DIY Showoff's Project Parade!

Spare Room Redo: Floor Plan and Inspiration

Kayd Roy9 Comments
It has been a while since we last wrote a super crazy confusing post about our plan for the Spare Room off our Master. Well, here is the official game plan for the space Alex and I have agreed on (I even made him shake on it to make it official so we can finally get started).

As you can see, we decided to break up the long space into a sitting room and dressing room. We are sort of trying to create a whole master suite, minus our own bathroom of course, we aren't up for that much destruction construction. But having a lovely sitting space off our master and a ton of new storage space is a major bonus! So now that we have shared the floorplan I wanted to put together some images of what we are thinking of for the dressing room. Well, really this is what I was thinking of, the dressing room will be all for me (lucky me, finally getting a dreamy closet!). Alex will get to take over the existing closets in our master.  So here is the inspiration for my dreamy dressing room/ closet- with the exception of the color schemes/ decor- that will come later.

This image was featured the November 2008 Domino Magazine (sad, remember Domino magazine?). It is Jenna Lyon's (SVP of Design at J Crew) dressing room in her lovely Brooklyn Brownstone. You can take a look at the entire home on Habitually Chic. I love that it still feels like a room and not a closet with built-ins covering each wall. Which might be a good idea for our room since it does have windows and doesn't feel very closet-like. I love the open industrial fixtures for her shoes and rolling racks for her clothing.
Here is another that feels more like a room and not a closet with the open industrial fixtures.  This image was found on Where the Style Things Are. It looks so fun, but again these pictures aren't my inspiration for the decor/ color scheme of the room (no thank you to the zebra rug)!
This one is from Desire to Inspire. I love the rustic wood trim attached on the rolling rack.
I really think the rolling rack and open fixtures will be a perfect look for that side of the room. Maybe I'm also drawn to the rolling rack idea because it reminds me of my college days, we had rolling racks in our apparel construction and design rooms.   

So...we are ready to get going now that we know our plan for the layout, flooring, shelving and rolling racks! Next we just need to figure out the decor and color scheme of our master bedroom since we want the whole space to coordinate. I can't wait to post our master bedroom inspiration soon, we have waited 2 whole years to do this!  So much to think about, I sort of go cross-eyed when I try to piece all the details together in my mind, but I can't wait to get started and make these ideas reality! 

*** PS! If you haven't noticed, we are on Facebook finally!  Check the top right corner of our blog and hit 'Like' to see our page!  We will try to update with our latest status in our home adventures!