Carla Like It Is

Tornado Home and Property Repairs

Is it Easier to Ask for Forgiveness Than it is to Get Permission?

Kayd Roy4 Comments
  I had to ask myself that question over the weekend....
My hubby (& DIY partner-in-crime) was in Traverse City Michigan this past weekend for the annual Iceman Cometh Challenge.  I had a plenty to keep me busy and a couple get-togethers with friends, but I couldn't keep my mind off painting the office.  Ever since the painters finished up the ceiling I have been DYING to get the walls re-painted.  Alex reviewed and approved the inspiration image I found for the room (click here to read the post), but we never officially picked the paint color.

So, I thought back to that age old question- Is it easier to ask for his forgiveness than it will be to get permission???

....I answered "YES"!
Waaahahaaaa (evil laughter)

Pretty excited about getting rid of that gray!  I'll let you know if I get in trouble, hehe! The hubby is headed home as we speak!

Stay Tuned............

A Tale About a Fence (and the Before & Afters!)

Kayd Roy3 Comments
It has been a long haul completing the install of our new wood privacy fence, but thankfully, it's finally done!  The last step was putting up the two entry/ exit gates.  Both were placed in the same location as the gates from the old chain link fence.  We have one gate near the front side of the house along the walkway to the backyard, and the other is near the garage door.

Alex used extra fence panels to create the gates.   He just measured out the length we needed for each gate and cut the panels with his circular saw.
Once the panel was cut, he brought it over to mark the drill holes needed to hang it from the hinges.
After marking the correct spots, he pre-drilled pilot holes for the screws.  Then he grabbed his screw driver and attached the hinges to the post.
After that I had to help him hold up the gate in order to add the screws through the hinges and into the wood panel. So, I don't really have pictures of that step since I was holding up a big gate, boo!  But after that we installed the other gate with the same steps and the fence was complete! Yippee!!!!

Now, ready for the 'before' and 'afters'?!?
I am super excited to show you! HOWEVER, in the process of looking back at older posts for pictures, I realized that a whole lotta stuff worth mentioning happened in order to get us to the completion of our new fence. Especially since we never planned on in the first place, mother nature made that decision for us.

So, let's take a dramatic stroll down memory lane...

In the summer of 2010, I snapped this supermodel photo of Alex while he and I were working on gutting our super f-ugly backyard.  See that big 60+ year old pine tree back there?
Well, fast forward to spring of 2011...


KABOOM!
I still can't believe how many mature trees were just plucked up like that, roots and all.  Makes you think about how powerful and scary a tornado can be!  Still miss all those beautiful trees :(

Anyway, once we were able to clear that remains of the big old pine tree (FYI insurance doesn't pay for tree removal from your property, only if it lands on your house), we found our old ugly chain link fence crushed underneath it as well as pulled out of the ground by the tree roots.
Fast forward again to September.... and yes, we had to live with a busted fence for 5 months, which wasn't fun with two dogs.  All goes back to the insurance and recovery process, it IS NOT a fast process.  They should call it the "the insurance and painful/ stressful recovery process", at least people would know what to expect! Okay, okay, back to the fence. 


PHEW!  After all that drama, stress, manual labor, and planning we now have a beautiful fence!!! We will still need to stain the wood next year.

Take a look at these 'before' and 'afters' from inside the yard looking out.  This is where you can see what a difference the fence makes for our yard and property!  Keep in mind, we live within the city limits in an older home, so our lots are small and we have an alleyway behind our house/ yard.  The 'before' was taken on the 4th of July in 2010, it was kind of the only picture I had showing the fence, alley, and our neighbor's houses/ garages (so ignore the game of ladders that is going on).
AMAZING right?!? Alex and I for sure think so!  The privacy is a vast improvement, especially when your neighbors are in a pretty close proximity.  Not having to look at the alleyway is also a big bonus!

Here is a look the other way, and the only good 'before' I had was from when the guys were cutting up the pine tree after the tornado.  You can see our next door neighbor's home/ yard, and the one next to them.  Again, not bad, and we like our neighbors, but everything is just very open.
Ahhhh!  Again, more privacy! Even though we are in our 'urban' setting, it feels more private now, like we have our own little oasis!  Also, that fence is just nicer to look at anyway than the chain link ever was! I also love feeling more secure when the dogs are running around in the back yard with the taller privacy fence.

We have enjoyed a couple bonfires in our newer yard and the fence really did change the feel we have when we are hanging out back there.  Less like you are out on a stage where all can see you kind of thing. 

As I mentioned before, we still need to stain the wood which will happen next spring.  I also really want to get outdoor string lights to hang along the fence so it will look cute at night!  Sadly, might have to wait until next spring too when it warms up again.  I can't wait to enjoy the yard then!

The End

Cast:
Evil Villian.... Tornado
Hero.... Alex
Helpless Princess.... Carla

errr... well I felt like I needed that after this LONG tale about a fence.  I hope you enjoyed the journey with us!  See you tomorrow for Head Over Heels Friday!

Interior Repairs Update: All Patched Up & The Ceilings Are Painted

Kayd RoyComment
 A couple weeks ago I was able to share that the hole in our Guest Room finally got patched up. Even though that was a HUGE step, we still had some work left upstairs that needed to be taken care of by the contractor before we got the house back in our hands.  Their work included removing and patching up the water damage on the walls and ceilings in the Guest Room, Office, and Stairwell/Hallway as well as getting them repainted. I was really excited about the ceiling considering I have had to paint some of the ceilings before and it is NOT a fun job!

Here's a look in the Stairwell/Hallway.  The walls were scraped and patched where the water damage occurred.


Then, the painters got set up to get the ceilings repainted.

It's been a really echo-y space for five months :)

Over in the Office they did more patching.


Then covered the room up to paint the ceilings as well.

The plastic got all loud and crazy once they turned on the fans for drying.

Lastly, of course is the Guest Room...

Here is how it looked after the hole was patched.

And now with the ceilings finished and painted.  I could barely believe my eyes when I saw this, the room looked normal again. Now this is kind of silly but totally true: When the two paint guys brought me upstairs to look at the work I actually started to tear up/cry when I saw the Guest Room. It was totally bizarre and awkward, but it just felt like such a relief! Almost like the whole tornado thing never happened! I managed to hold back from full on sobbing as best as I could because the paint guys looked really uncomfortable. At least it made for a funny story when I got to tell Alex what happened!

So now the house is back in our hands!  Alex and I decided to take on painting the walls DIY style instead of the contractor to save on cost and so that we don't have to figure out more timing to schedule work (it has been a pain with our dogs).  In the Guest Room, we have decided to keep the Cumberland Fog paint color.  I really thought I wanted to update it to a dustier blue but when I saw the room looking normal again I totally changed my mind.  I think it is special the way it is now.

Alex finished up doing some touch up paint and we were able to move the furniture back into the room. Although we still need to install the crown molding, it felt great to get the furniture out of the other rooms and back into the Guest Room (the clutter has been driving me nuts!). 
Stay tuned for more progress in the Guest Room, we are going to have some fun changes in store!
Notice the layout looking different?!?!

*************

See you tomorrow for our last cheesy fun Halloween post!  Rocco and Sadie are excited to show you their costumes!

Fence Panels Up. Concrete Slab Down. Just A Bit Closer To A Normal Yard

Kayd Roy1 Comment
Goodness, I feel like we have been juggling multiple projects for a while now.  Are you confused?  I know I am, but I am doing my best to stay on top of it!  We got a couple more things checked off the list over the weekend  though including the fence panels, some concrete, and some stucco.

It is crazy that it was over a month ago when we tore out our smashed chain link fence.  Then about 2 weeks ago we got all of the posts cemented in for the new wood privacy fence.  Well, we finally got around to getting the wood panels up. Talk about a snail's pace on this project!  Ugh! Due to the dwindling daylight hours we are stuck to just weekends now on outdoor projects.  But with the panels up at least we can now see what a difference a privacy fence makes in our yard!

Putting up the fence panels was a 2 man/ woman job (unlike the posts).  So I had to get my hands dirty and help out on this part with Alex.  We put each panel into place and then had to check to see if it was level. Hmmm, it would appear in this photo that Alex had a wedgie for the duration of this project but he assured me this assumption was inaccurate :) HA!
Once the panels were properly aligned and level Alex secured them to the fence post using decking screws.
We continued those steps over and over until the fence started to take shape!
Here's what Sadie was doing while we were working hard on the fence.
We got all the panels up except for the gates because we had the concrete work scheduled for a couple days later...

Mighty fine slab of concrete right? It was put in place of the chunk that was damaged after the tornado when 'Mega Stump' was uprooted.  The stucco on the corner of the garage is also in the works.
I'm just happy we don't have to walk through the dirt like we have been for the past 5 months!

Anyway, the fence project rolls on with only the gates remaining... and a mild weekend in the forecast!  I'm sure this weekend will be a real F-ing good time (get it? F for Fence of course!).

See you Friday for Head Over Heels! It will be a zombie-fied Halloween decor post! 
This one is a MUST-SEE!!!

A Whole Ceiling In the Guest Room, Attic Insulation, and Our Giveaway Winner!

Kayd Roy2 Comments
In case you haven't heard...
 Well, five months later I am so, so, sooooo happy to finally annouce that we no longer have a hole in our Guest Room!  AT LAST!!!
Even better?  We have insulation put back in our attic too! I was beyond happy to see the guys from St. Croix Insulation again.
The last time we saw them was back in August when they came by to suck out all the old/ damaged insulation.  Once this beautiful Summer like weather departs and the cold comes back to town we can actually turn our heat on without watching it all shoot out the roof.

It feels so good knowing our house is getting closer to 'normal' and I can't wait to have all of the repairs finished up.  We are now waiting on painting for the interior and sanding/ refinishing our floors.  Means I really need to get going on picking my paint colors, eeek!

Now, onto our

Thank you to everyone that left a comment to enter! It felt a bit scary putting out our first giveaway, but I am happy we got responses!  I will have to do another one soon!

Alright, drumroll..... the Pawmetto Pet Treat winner is...

Carol from The Polka Dot Closet! Shoot me an email with your address and they will get shipped out right away!  I hope Martin and Billie enjoy their fun new treats from Pawmetto!
For those that didn't win, you can get 20% off an order using the code (blogpromo9).

That's a wrap!  Happy Monday everybody!

Interior Repairs Begin!

Kayd Roy3 Comments
It's the day I have been eagerly awaiting ever since the exterior hole in the roof got fixed, we are FINALLY getting started on the interior repairs!  Which includes that other hole that ruined our guest room and a WHOLE bunch of other repairs that mainly focus on water damage (all of this stems from the May 22nd tornado). Our guys from Dry Tech came by to prep the house for all the work to begin.
So, now we have the best door decor ever! Our Permit Notice!!!! Weee-hoo!
Don't come a knockin' because our place be rockin' with repair work!

Now, I have mentioned before that the upstairs is a complete mess since we had to shift everything in the Guest Room into other rooms.  Well, most of it landed in our bedroom and the Office, here is what the Office is looking like today...
The construction team only needed to work on the front half of the room doing some sanding and resurfacing on the walls and ceiling where there was water damage.  So they were able to move everything back against the wall, which I found sort of funny, like they played Jenga or Tetris stacking all of our random stuff, ha!  But, once painting begins all of that will need to come back out, yuck!

Just next to the Office is the door to the Guest Room which is looking like this...
Lots of plastic wrap to contain the big ol' mess that is about to happen I assume?

Alex and I were of course curious what was behind all that plastic wrap and tape so we took a peek inside...
They carved out the plaster surrounding the hole and the rest of the room (walls, floors) was covered with protective plastic sheeting.
OH BOY!  I am sooooo looking forward to saying goodbye to tornado hole damage #2 on our house! Stay tuned!
********

Also, remember to stop by tomorrow for our FIRST EVER GIVEAWAY that I mentioned (and gave hints about) yesterday!  Hope to see you then!

We're 'Going Postal' Over Our Fence Progress! Plus, a Giveaway Annoucement!

Kayd Roy4 Comments
It was mid September when Alex and I ripped out our ugly (and smushed) chain link fence in order to prep for the installation of our new fancy wood privacy fence.  It took us a little while to finalize our fence style decision and make sure we were following the 'rules' (click here for Fence Requirements in the City of Minneapolis).  Basically, the main rule to follow in Minneapolis is that the fence can't be any taller than 6 feet in a backyard and that your zoning/ site plan is within your property line. Check, and check! (Thankfully, our team from Dry Tech also helped us with these details even though they weren't installing it, bonus!)

After we got the a-okay on our plan it was time to order the supplies.  We decided to go with the basic Treated Pine Dog Ear style fence.  The price was within our budget and honesty (as I said before) we really don't care what it looks like as long as it is a 6' tall wood privacy fence (goodbye alleyway and neighbor's garages!).
We found the best price at Menards, but we usually like to shop at Home Depot (Random Fact: Alex is an extremely loyal HD shopper, he worked at the pro desk there in his teen years) so we asked if they would price match... and they DID!  Yay!  Alex ordered the posts, cement, 8' sections of fence panels, and rocks.  We had everything delivered for only $50 extra, which wasn't bad at all for all the stuff we would have had to haul ourselves. 

Once the supplies were delivered, Alex knew it was time to start digging!
Ready? Here's Alex's 'going postal' fence post installation!

DISCLAIMER: I am covering the steps briefly and I didn't get tons of pictures- I actually didn't have to slave away in the backyard on this part of the project (I admit, I was happy about that!).  This was ALL Alex! So don't sick the fence police on me if I left something out :) Here we go...

 Sadly, the posts we removed from the chain link fence were 10' apart, and we needed our new posts to be 8' apart, so my poory hubby had to dig all new holes.  Sorry for the blurry picture!
PS- we learned that you can rent a post hole digger for around $50-$75 for a day. Alex learned this after digging most of the holes, so he just kept on going but just an FYI for others out there :)

 After all the holes were created, it was time to cement in the posts.

Before any cement could be added, Alex had to level each post.  He cut small planks of wood (measuring 1.5' in length) from scrap then nailed the small planks to the bottom section of each post.  With the small planks attached to the posts (sort of like a bike kick-stand) Alex was then able to use his level and adjust each post to ensure they were upright and level. 

Alex then mixed up the concrete to prep for pouring in the holes.

Next, in the concrete went to set the posts in place!
Now, we just have to wait for the concrete to dry!

We have a busy week ahead of us but the plan is to get the fence panels up this weekend, stay tuned!
**********
Announcement!!! Thursday we are having OUR FIRST GIVEAWAY...EVER!!!!  Please make sure you stop by to enter!  As a hint, these knuckle-heads might have something to do with it :) 
(Blooper Photo)
I love how Rocco managed to 'photo bomb' Sadie's picture like a darranged teddy bear! Haha!  Make sure you stop by Thursday if you are as crazy about your pups as we are about our little Rocco and Sadie!

Then, Now, and What's Next: The Guest Room and Office Edition

Kayd Roy6 Comments
We are (hopefully) getting closer to starting interior repairs on our house!  All of the interior damage caused by the May Tornado is in the upstairs of our house (see list of damages in this post). The rooms that will be having work done are the Guest Room, Office, Master Bedroom, and the Hallway/ Stairwell. 

The biggest repair will be closing up the hole in the ceiling in the Guest Room where the tree came in through the roof.  Other than that there is a lot of surface repair that needs to be done because of water damage.  The bonus with that is we have the option to change any of the current paint colors in those rooms.  We are still debating some of the color changes, so I thought it would be nice to look back at those rooms and share our design ideas. 

I wanted to cover all of them in one post, but it was starting to get really long.  So today I will review the Guest Room and Office leaving the Master Bedroom and Hallway for a separate post. Also,  if you have an answer to some of the questions in bold please send us a comment!

The Guest Room
As I have said before, the Guest Room was my favorite room in our house since we had the fun opportunity to work on it with Layla and Kevin from the Lettered Cottage.  But way before that, this was what it looked like when we moved in...
Loved it!  But then in May, this happened :(
So now the room sits like this today
Our contractor told us the hole will be fixed (obviously) and that the walls all needed to be repainted due to water damage.  I thought it was neat that we had the option to change the room color, but Alex and I are both on the fence about it.  I guess if we did change it I feel that I would keep it a light blue, but maybe dustier so it isn't so light and bright feeling?  Kind of like this room?
I know the colors are quite similar, and I still like Cumberland Fog, but if we have to paint it anyway it might be nice to change it up.....even just a little?

What do YOU think?  

Should we leave it Behr's Cumberland Fog or change it to a dustier blue?  

Do you have the name/ brand of a dusty blue paint color you can recommend? 

The Office
Our office hasn't yet made an appearance on our blog, so here is it's big debut!  It is pretty much a mirror image of the Guest Room, but a little bit smaller (the two rooms share the wall on the left side in this photo).
Just like our Guest Room, we found out that our little office is also eligible for a new paint job since the walls had water damage.  Here's a look at what the office looked like when we moved in (sorry for the mess!).  Note the carpeting and curtain instead of a closet door.
We did a little work on it, removing the carpet, adding a closet door and repainting the walls.  This is how it is looking today.  (The bed is in there because we had to move it out of the guest room when they removed the attic insulation)
(I guess it is an example of the whole upstairs being an unorganized mess, can't wait to get my home back in order!)

Alex and I both agreed that we weren't loving the color we chose.  The gray was too dark in that small room and it looked sort of purple to us.  I found this picture on Houzz and the shape reminded me of our office and it looked so nice!  I'm really digging the grayish/ brown color, the shelves, and the touch of black and white stripes.  Alex loved it too!  I think the walls in this photo have some sort of finish or texture to it, but I think we will just do plain ol' solid colored paint.
Library modern family room
We are pretty sure this is the direction we will be going with for the Office but of course with a desk and chair that have a vintage/ industrial flare in place of that couch.
Are you liking our Office inspiration too? 
Do you have any paint brand/color suggestion that look similar to this shade?

*************
That wraps up our ideas for the Guest Room and Office.  The Master Bedroom will be next! I'd love to hear what you think of our ideas or even if you have a better one for us! 
Please sound off in the comments :)
Alright, now time to relax! Who's excited for the one hour premiere of Modern Family on ABC?!? This girl!!!

Goodbye Ugly Chain Link Fence, Hello Manual Labor (DIY Style!)

Kayd Roy1 Comment
As I mentioned in a post from last week, Alex and I are taking on the removal of our damaged chain link fence AND installation of a fancy new privacy fence.  Over the weekend we finally got down to business and ripped out the old 3' chain link fence that was damaged from the May tornado.  I admit, I was REALLY dreading the removal project because I assumed it would be really difficult and time consuming.  Oddly enough, it was pretty easy and only took about 2.5 hours, really!  Keep in mind we have a very small yard within the city, but it was not as bad as I imagined.

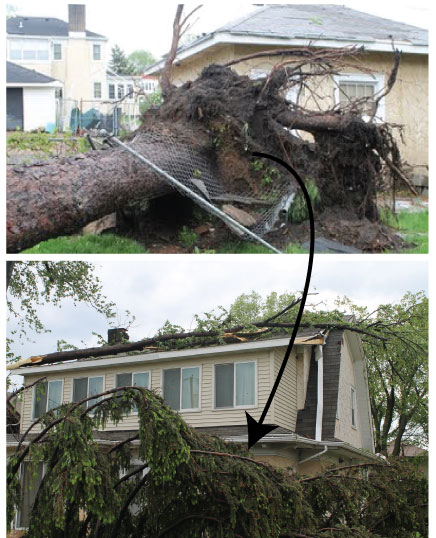
So, here is how we took this bad boy out...

Alex went around the perimeter with bolt cutters and cut the chain link from the posts they were 'wire tied' to. The top metal poles came off first, that part was really simple...just Alex and a Sledge Hammer!
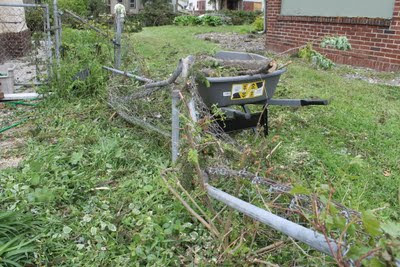
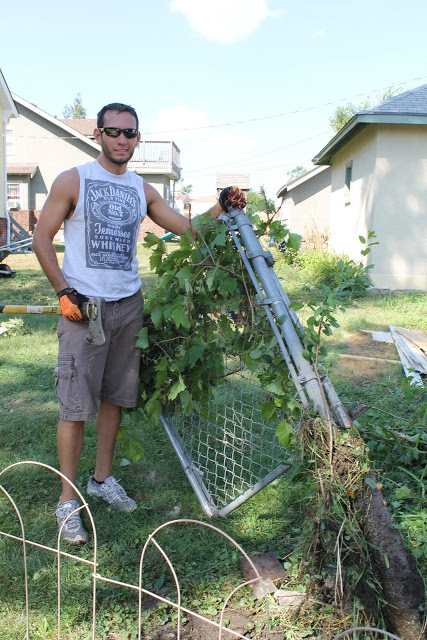
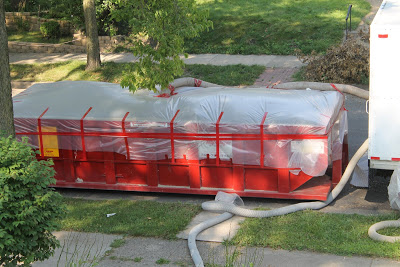
As he freed and removed the metal poles along the top of the fence, he rolled up the fence (to minimize the mess and make it easy to transport to the big red dumpster). 
I guess the part that concerned me the most was taking out the metal posts that were cemented into the ground.  As Alex continued to cut the fencing off the posts he said, "I bet if we saturate the ground with water the posts will come out a lot easier."  I thought his idea made sense too and decided that we should at least give it a try. 

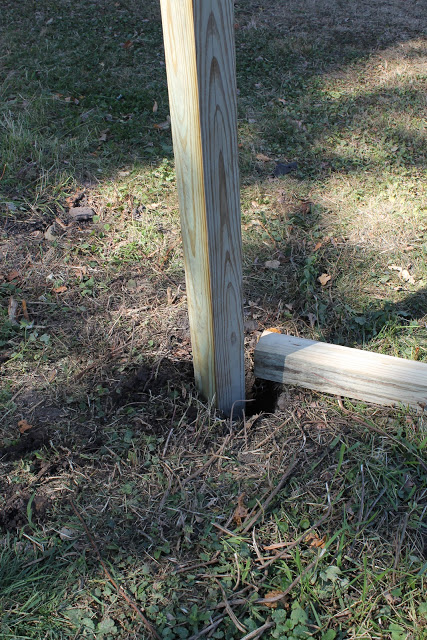
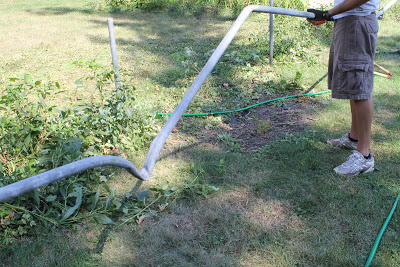
I grabbed the hose and saturated the ground surrounding one of the posts with water.  Alex then started to wiggle the post back and forth...
LOL's, we know this pic looks ridiculious!

Holy buckets!  Our stupid idea really worked! 
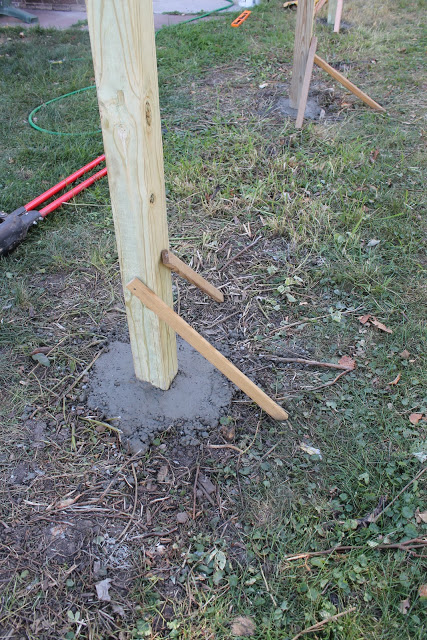
Alex wiggled, kicked, and loosened the posts to the point where he could just pull them and the cement out of the ground.

Our guess is (even though the fence was fine for the 3 years we have been here), maybe these posts weren't installed with the right amount of cement?  Yes... No?  They were buried maybe 2' deep with cement surrounding, maybe that was fine for a 3' fence?  It was crazy though to just POP those posts out the way we did.

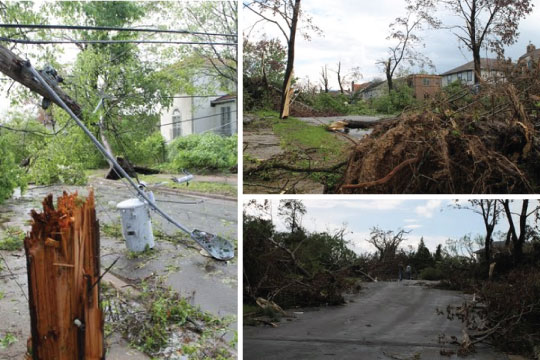
After that discovery, we 'watered' the posts a bit so we could wiggle them out the way we did on our trial run. Disclaimer for environmental folks: Don't worry! We didn't use TONS of water, and quite honestly, we never did water our yard this Spring/ Summer anyway since the tornado killed everything.  It was crazy how little water the ground needed to loosen these babies up!
Alex even let me give it a try.  It took some serious muscle (and un-lady like grunting, ha), but I pulled that post out AND the cement myself!  Hammers and High Fives for me :)  Really though, I remember feeling that pulling pain in my back and thought I was about to injure myself.  I left it to Alex after that (and I was sore for 3 days after).
For kicks, here is the metal pole that went across the top of the fence where the GIANT Pine Tree landed after the tornado
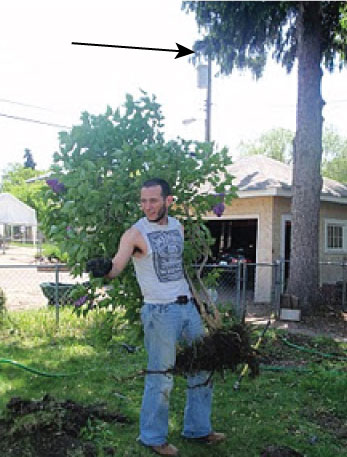
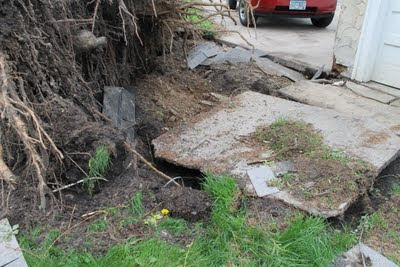
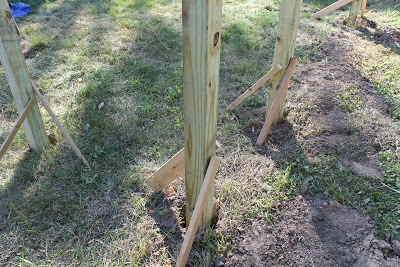
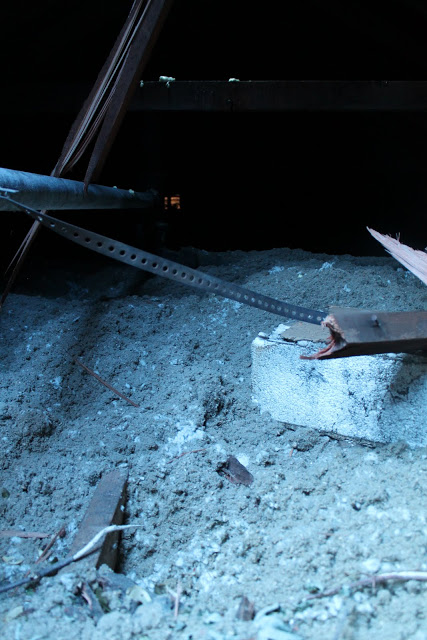
Beneath that top metal pole where the tree landed, was this metal post (along with a cheesy/annoyed/ sarcastic pose from a physically exhausted hubby who always seems to wear the same yard project shirt).  It was driven very far into the ground from the impact of the tree.  There was just over 1' left of the 3' post above the ground. 
This is the ONLY post that remains.  Even the water didn't help to get this guy out.  Since I was the only DIY-er with him on this project, he thought it was best to wait for one of his stronger (male) friends to help him out with this one. 

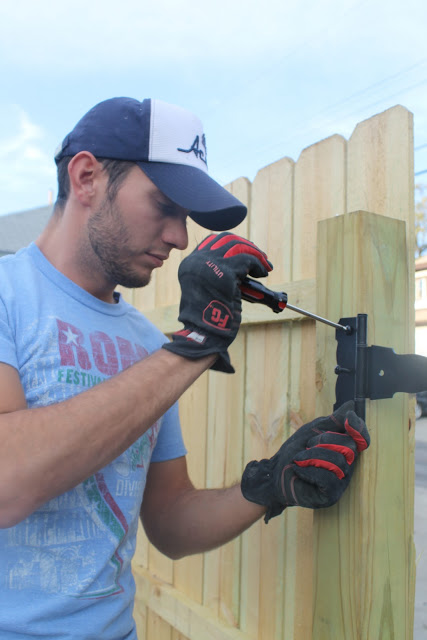
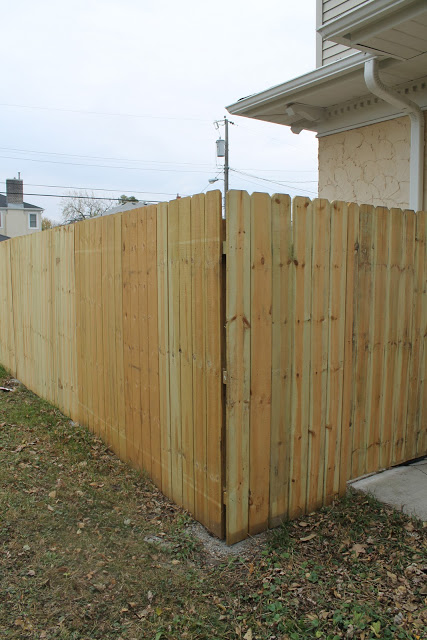
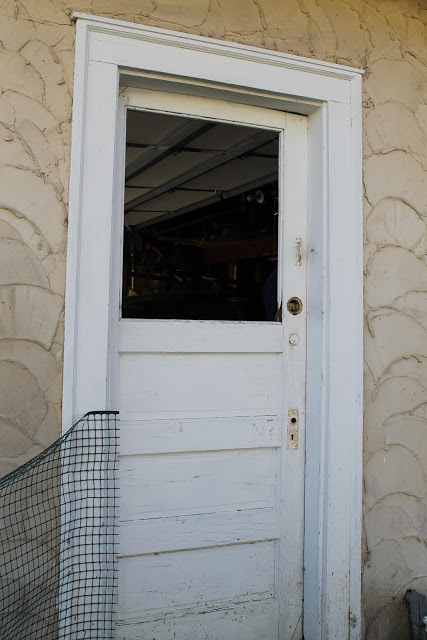
The last post we took out (aside from the difficult one) was the one connected to the gate.  Yea, it isn't pretty or anything, but this is the gate Alex and I walked into from our garage to our house everyday for 3 years.  It felt sort of sad but triumphant to take it out.  I hated it (for 3 years), but it was still weird to see it go into the dumpster.  Alas, we must move on!

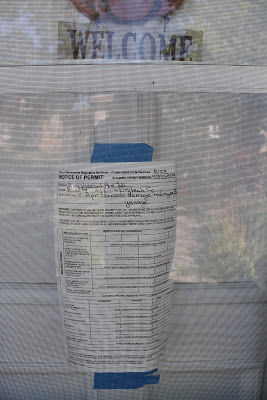
Before we can begin installing the new wood privacy fence, we have A LOT MORE yard clean up to do (boo).  But I can't wait!  I will share the style we picked soon along with all those pesky city codes/ rules we had to follow.  Thankfully, our contractor from Dry Tech helped inform us of those details/ rules, so that was pretty easy).

See you tomorrow for Head Over Heels Friday!

A Repaired Garage! Complete With Functioning Roof and Entry Door

Kayd Roy1 Comment
Our garage repairs were finally completed last week!  Woo-hoo!  We now have a roof on it that doesn't have tons of holes so the inside won't get wet anymore when it rains! You know, the whole purpose of having a garage with a roof :)

Here is the 'before' pic from all the tornado damage pictures.  I guess I didn't take many others (our garage is pretty ugly anyway).  But you get the gist of it, tons of shingles came off and some of the wood decking was damaged and left exposed to the elements.
Here is the 'after', ahhh it looks so much better! Well, the roof at least?
I got a couple shots of the Dry Tech guys in action.
 I wonder if they are sick of me taking pictures yet?!?

Another nice update that we got on our garage was a new side entry door.  When the tornado uprooted Mega Stump, it broke out most of the concrete by this entry and smashed the glass window out of the door.  My assumption is that it is the original door to our 1924 garage because it was in really rough shape to begin with.  There wasn't even a doorknob, just a lock, so Alex and I never used this door all that much.  It was also extremely hard to open since the door frame itself was crooked from settling over the years.  It was on our long list of future repairs/ upgrades for the house.
Insurance covered replacing the glass window on the door, but we opted to replace the whole door instead.  Our Project Manager from Dry Tech told us we could get a simple steel door that wouldn't cost us much at all out of pocket.  The door we got is similar to this door from Home Depot.  It is made of durable, galvanized steel and is designed to prevent water absorption, resist rust, and only cost about $100.  Quite a nice upgrade from the other door and we can actually open and close it!  You know, like how most doors are supposed to function :)

I mentioned how the whole door frame was crooked from settling, so that didn't make it very easy for them to install the door.  They had to add some new wood to frame it in so it would fit evenly... and add a lot of spray foam to fill the odd spaces.  Kind of odd looking from the inside, but hey, we have a door that opens, closes, locks, and is weather proof!  Totally awesome!

Overall learning from the garage repairs...
It is the simple, little things that make a big difference! 

Who knew how excited we'd be when we walked into our garage from that new door?  Yep, kind of stupid, but true!

Hope everyone had a great weekend!  We got down and dirty with a big DIY project in the backyard....
Tearing out that awful, smashed chain link fence!  Oh yea!  More to come later this week on that experience!

I'm... Dreaming... of a Nice... Privacy Fence

Kayd Roy6 Comments
The title was to the tune of I'm Dreaming of a White Christmas, just in case you didn't catch that :)
As we move along with all of our home and property repairs, Alex and I are eager to get started on our new wood privacy fence!  We currently have a lovely 3 ft tall chain link fence around our backyard.  It was never the nicest looking thing, but it was very nice for us with our two dogs.  Ideally, we always wanted to tear it out and replace it with a nice, tall wood privacy fence. 

As it turns out, the May 22nd Tornado got us much closer to making that dream a reality.  'Mega Stump', as we called it, got completely uprooted by the 140mph winds and pulled out a nice section of our chain link fence. Ka-boom!
On the other side of our yard, the top of 'Mega Stump', aka the rest of that giant pine tree, landed on a couple sections of the fence smashing the posts and bars into the ground. Crunch!

Thankfully, insurance is covering the damage and gave us the full amount to replace the chain link fence.  But why replace something you don't want anyway?  The wood privacy fence is obviously going to be more expensive than chain link, but this is where we feel like paying a little extra out of pocket is totally worth the upgrade!  Also, to keep the 'upgrade' cost as low as possible, this is one project we are going to take on ourselves instead of having our contractor install it.

We have been looking at different styles of wood fencing for our yard. Here are our two favorites...

Wood Framed: I like the flat boards across the top, looks very neat.

Standard Dog Ear: Likely to be lower in cost, and I still think the look is nice.

Overall, I guess I don't really care how it looks, I just want a privacy fence that will look nicer than the chain link! We're thinking Cedar instead of Pine, which costs a bit more, but it's typically the lumber of choice for fencing.

Of course before we can get going on the new fence installation we had to do some clean up (boo).  In the summer time we let vines grow into our chain link fence.  The vines would at least hide the ugly fence a little bit and make it nicer to look at.  But now that we need to yank the hole fence out, we had to cut out all the vines, which was no fun at all (and sadly this was before our trip, so we have to do a little more again, really BOO!).  Alex also had to finish up cutting some wood that was hanging out in our yard since the tornado. 
Oddly enough, most of that wood is from the section of the tree that fell into our house.  I can't wait to burn it in a fall bonfire, grrr!  It took us about 4 hours but we got the yard all cleaned up. I was out there sweating and cleaning too even though I'm not in the pictures.  I ended up getting blisters on my hands from cutting and raking... Alex said, "Well that's what happens when you avoid manual labor your whole life." HA!

We're hoping to decide on fencing this weekend and get it ordered.  Perhaps we will start ripping out the rest of the chain link fence too. Wish us luck!

*********
So, what style of fencing do you like better? 

Do you have any tips for us Alex on installing a wood fence?  If so please comment away!

A Completed Roof, Gutters, Soffit and Fascia!

Kayd Roy4 Comments
It feels like it has been a pretty long time since my last update, but our roof is finally complete along with our new gutters, soffit, and fascia! We also got a few other little problems fixed up (more about that towards the end).  Check out those gorgeous new shingles topping our lil' Dutch Colonial!

Now for a trip down memory lane...
The guys from Dry Tech cut open the hole...
Here we are today!  No hole, new roofing, life is good! 
(sorry, I realize sunset wasn't the best time to take this picture).

Along with the new roof came our gutters, soffit, and custom bent fascia.  Oooo, ahhhhh!
Alex and I were both pretty jazzed about the gutters.  The new gutters and downspouts seem to be a lot bigger and wider than the old ones and they just look a lot nicer than the old ones.
Here is a closer look at our custom bent fascia.  This was one of the things that took a really long time to sort out with our insurance.  That fascia is covering our home's original woodwork.  Normal flat fascia that is on most homes today would have covered the original wood, but we would have lost a lot of architectural charm.  Of course, custom bent fascia is quite a bit more expensive than the flat stuff you can get at a store (hence the insurance hold up).  Anyway, doesn't it look shnazzy?!?!?

In my last post I also mentioned this lovely looking problem.  After removing the old soffit and fascia we discovered a lot of the original woodwork was completely rotted and needed to be replaced.
While we were on vacation this also got repaired.  The rotted wood was torn out and replaced, then the new soffit and fascia was installed.  So much better!

One other problem we found that I didn't mention in the last post was this flat landing on our roof above our slider.  When they tore the roofing off they found more rotted wood.  This likely happened due to the surface being flat and water being able to sit on top of it. 
Our project manager from Dry Tech suggested to correct this problem now (since they were redoing the roofing anyway) by adding a piece of plywood and framing it in to extended the pitch up to the side of our house.  Problem solved!  No more areas for water to sit and seep in!
Nice to see our house in better shape on the outside!

We still have a WHOLE LOT left on our Tornado Repair list.  Our garage roof is scheduled for it's repair and new roofing tomorrow!  I'm looking forward to seeing new shingles on that as well (also for the inside of our garage to stop getting wet when it rains)!  I hope to do a 'before' and 'after' post once that is completed.

I hope everyone had a great Labor Day weekend!  I'm planning on getting to that little DIY project with that vintage wood caddy this week so I hope to share that soon too!

Roof Repair Part III: Tearing Off The Old Stuff...and Finding Some Problems

Kayd Roy3 Comments
Last week, we thankfully got that hole in our roof reframed and closed up.  Next up in our roof repair list was tearing off the old roofing in order to put up the new roofing we picked out.  In any situation when even a small portion of your roof is damaged the WHOLE thing has to be redone. 

I guess it is a nice deal that we get out of this situation, especially after seeing this picture Alex took while up on our roof.  Hmmm, those shingles appear to be in really bad shape up close, right?  Which I guess made me a little shocked considering the Truth In Housing information listed the roof being "aged 8 years or less".  Weird, but at least it is all coming off now!  Let the tear down action begin!
As the crew from Dry Tech continued to tear away at the old roof, they began to discover a new issue that would need to be addressed before continuing with the roof.
Given the age of our home and large number of repairs it needs, we knew that we might run into a lot of things that would need to be brought up to code.  For instance, our roof's decking...
The guys from Dry Tech knew right away that our decking was not up to code.  The gapping on the original decking was too large, current building codes require that spacing on decking must not exceed 0.5".  Those spaces are WAY larger than 0.5"  They also informed us that some of our 1924 decking had evidence of water intrusion.

In super speedy fashion, they were able to get some new lumber delivered and started to redo the decking. It had to be brought up to code before they could starting installing the new roofing.

The crew also had to remove our soffit, fascia, and gutters before we get the new ones installed.  Here is where they discovered another isssue. When they pulled away the aluminum surfaces, they discovered that it was covering a LOT of woodwork that was completely rotted through. Yuck! Did we buy a haunted house?!?!
It was a real bummer for Alex and I to see this :(

I guess that's the reality of owning an older home though.  You might never really know the complete inner workings until something needs to be taken apart.  Who knows if it was rotting when the current soffit and fascia was put on or if it happened while it was covered over time?


Thankfully, this also needs to be addressed now.  There is no way they can install new soffit and fascia into rotted wood, so we will be seeing their carpenter out at our house.  Which also means we need to put in a call to our insurance adjuster...boo! At least I feel like after all this our house will really be better and safer for us and who ever might live here after us.
 

On the bright side, the Dry Tech crew kept working throughout the day on the roof after they got the new decking installed.
They were able to get all of the ice and water shield up and most of the roofing done.  It is fun seeing the new look of our roof (and house) starting to take shape!  I think I can hear a roofing stapler in my sleep now too, ha!

Well, the repair adventure continues on!
***********

Has anyone else out there made some scary/ sad discoveries when owning an older home?

Roof Repair Part II: Adios Hole!

Kayd Roy4 Comments
Attention Ladies and Gentlemen...
I am pleased to finally announce that we no longer have a hole in our roof!  Yippeeee!

Thankfully over those 3 months, that tarp did serve it's duty to protect our home from further damages, even after all the severe storms we've had this summer.  So yes, I hated that thing, but Dry Tech certainly did a nice job securing it on our roof!

Wednesday morning, it was time to remove that tarp and close up that hole! Just the day before we had had all the attic insulation removed before this step could take place. 
I forgot how awful that hole looked after we had the tree removed from of our house. Sort of thought to myself, "Wow, that is what we were living under each day for nearly 3 months?!?!"

The guys from Dry Tech got to work bright and early on a beautiful, sunny day (thankful for the nice weather too!).  They needed to tear out all the damaged rafters and decking in order to replace them.
Just in case, here is an illustration of rafting (also called trusses) and decking.  I really had no idea what these were until that tree fell on our house, now I feel like I've learned a lot since then!
The trusses/ rafters form the triangular shape of a roof.  The decking is what lays over top of those wood beams (rafters/ trusses).  Got it?  Okay...

So, the guys cleared the affected area and then with a lot of big saws and tools cut open a large section of our roof.  They next removed any sections that were damaged and got ready to re-frame this section of our roof.
Up went the new rafters...
You can see the crossbeams in place in this photo.  They also had to cut open a new section of roofing during this step.
Then the decking started to go up!
Looking better!
Once all the decking was in place it was covered with ice and water shield.  No more hole!!!!  That tarp is covering some of the roofing that was only damaged on the surface and side trim which will be addressed when the new roofing is installed.
Our roofing is scheduled to be done next (check this blog post for the shingles we picked out!).  After the roofing is done we won't have ANY blue tarps around at all! 

I have to say, it is a huge relief to not have a hole in our roof anymore.  I think it weighed on my mind a lot, especially if it rained.  Very excited to get started on the brand new roof!

Stop by tomorrow for a goofy Head Over Heels post!

Roof Repair Part I: Attic Insulation Removal

Kayd Roy4 Comments
Today marked the first day of work at our house since the May 22nd tornado damaged our home and property.  I was sooooo overjoyed to see some progress starting!

As I have said many times before, the damage in our Guest Room was the worst!  It was truly sad because this is the room that Kevin and Layla from The Lettered Cottage came and redid for us last September (also check out our Junk Bonanza & filming experience with Kevin & Layla!).  The tornado sent part of a large silver maple tree through our roof and into the Guest Room.
Having a big hole in your house = not good; having a hole in your house for 3 months = very not good and unsettling.  So, our contractor's first order of business for repair out of all the damages is obviously the roof. 

So, welcome to Part I of our Roof Rebuild!
Here is how our once beautiful Guest Room is looking today, sad right?

Before they can tear off our roof and framing to rebuild it, they need to suck out all of the old attic insulation.  Here's a look at the blown insulation that exists today (broken rafters too)...
 Most of the insulation got pretty wet when the storm rolled through after the tree punched through our roof.  So aside from the need to remove it for a complete rebuild the moisture was also a concern.

Now, how do you remove tons of loose blown insulation?  A giant vacuum of course!  Our Project Manager from Dry Tech came by with St Croix Insulation to start sucking out all the insulation.
Those big vacuum tubes went up into the attic...
Down and out of the closet...
 Out the window...
 And finally out to a big contained dumpster.  Can you imagine the mess if that blown insulation was flying around outside?  Ick!
It took about 4 hours to complete, apparently the tubes kept getting clogged by chunks of debris from our roof and the tree.  But finally, the insulation has been removed!  Here's a look of the attic space now (the blue-ish tint of color is from that lovely blue tarp that has been covering the hole).

Part I complete! 

Tomorrow is going to be a BIG day!  Weather permitting the roof will be torn off and re-framed.  The lumber was just dropped off for the framing!  Eeeeek!  It is so exciting!

Shingle Samples and a Start Date!?! Oh Boy!

Kayd Roy8 Comments
Guess what?!?!  Our Project Manager Curt from Dry Tech gave us the news that our building permits have been approved from the city!  Finally, we have a start date for our home repairs!!! Yessssss!!!

This Tuesday, the action is scheduled to begin in our sunroom attic. All of the insulation has to go before they start tearing things apart.  Which made complete sense to us, that blown insulation is messy stuff!  Cleaning this up after the tornado sent a tree through the roof and ceiling wasn't fun at all.
That blown insulation might as well be piles of dust, it took 3 shop vacs and killed 2 of them!!!

With a construction plan in place, our contractor informed us we needed to make a decision about the shingles for our new roof.   Then we got something fun... SHINGLE SAMPLES!!!!  Who the heck knew that would ever be fun (or that I would get so excited about it)?
The shingles we are choosing from are from Timberline- a line from GAF Roofing.  As we researched the brand we found that they have quite a few awards for their quality, look and value.  I was most impressed when I read that it won't need replacement for 30 or 40 years!!!  The product also comes with a nice warranty that can be transferred over to the next owner. 

I've never really thought about the look of our roof really.  I mean it is gray and looks like a roof, big whoop right?  Now that practically all of my neighbors have been getting new roofs I have started to notice their differences as far as shape, style and color. 

Here's the shape and style that is currently on our roof.  This was take just after the tornado with the tree still on our house, but you get the idea.
Pretty basic plain gray rectangles, right?  Again, never thought about it much before, but this is pretty darn boring looking when it comes to the new roofs I have been seeing up all around the neighborhood.

So we are pretty excited to be going with something that looks like this:
It is an "Ultra-Dimensional Wood Shake Look"- I'm loving it!
Since it imitates a 'wood shake' look I think it will give our home an extra touch of 'old' style that will fit our little 1924 Dutch Colonial much nicer than what is up there now.  We're going with Pewter Gray (the sample on the right in the 2nd photo in the post).

So there you have it, we start Tuesday and I hope to have some crazy pants demolition pictures to share next week!  I think Tuesday is going to feel as exciting as Christmas morning for us!  I can't wait, WOO-HOO!

Permits and an Introduction

Kayd Roy4 Comments
 I was able to share the good news that we had reached an agreement with our insurance regarding the repair amount for the damages our home sustained on the May 22nd tornado.  Nothing too exciting has been going on at our house since then (execpt a new wet wall), but I thought I would just give a little update. 

On Friday we reviewed our millionth revised estimate with our contractor and finally signed a contract to begin all the work (see damage list here).  Hooray!  It was pretty exciting!  Since we took that big step I think it is finally safe to stop saying "our contractor" and share who we have been working with.  We are pleased to introduce you to Dry Tech Restoration based in Hugo Minnesota!  
Dry Tech Thumbs Up!
We have been working with their General Manager Kevin and now our newly appointed Project Manager Curt. After the tornado, one of the hardest things we went through was choosing and trusting a contractor and we have been very happy with Dry Tech since the first day Kevin came to look at our house. We've also been thankful for all of Kevin's help educating us along the way regarding the repairs needed and the insurance process. So for a while blog friends, you will be along for our ride with Dry Tech Resoration until this house is whole again.  Alex and I will be taking on a few (smaller) projects on the repair list that we will share, but we certainly can't rebuild our roof, that would take some mad DIY skills :) After it's all done we swear to get back to our DIY ways!

*** Also (just in case anyone is wondering) we informed Kevin about our little blog here and got the a-okay to share this experience and their company with the blog world***

So where are we at now in the rebuild process? 
Permits, permits, permits!  Before any work can start we must have approved building permits from the city of Minneapolis. Note: Permits are necessary to regulate construction, maintenance, and remodeling so that the buildings will be safe; and to be certain that the work is done in compliance with city ordinances.  Just today our Project Manager went to the permit office to review our project with the city (hopefully it will all get approved) but, should they have any concerns they can also decide that there's a need to come out to our house to inspect the site/scope of work (I hope they just approve it of course).  So again, we are players in a new waiting game.

Side note: Does anyone else think of that goofy scene from Wayne's World 2 when you hear permit applications?  Or am I just a weirdo?
So....
Will the permits get approved?

Will the work start anytime soon?

Will Roco and Sadie ever stop going berzek when the Dry Tech team comes over?
 (It's super embarrassing for us)

Only time will tell as our Home Repair Saga continues...

See you tomorrow for a more fun post Head Over Heels Friday!