Carla Like It Is

Home Holiday Decor

Holiday Inspiration and Ornament Frustrations

Kayd RoyComment
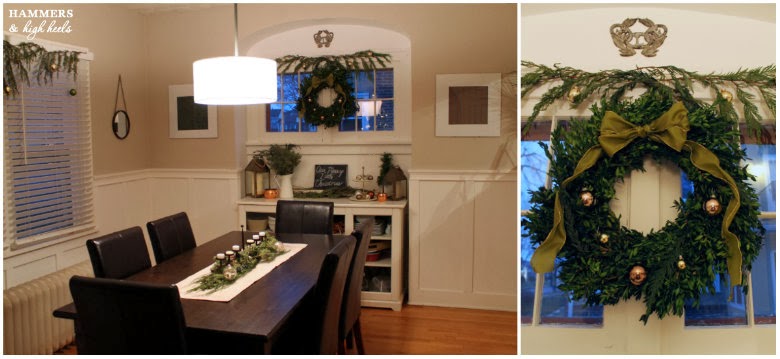
Hey there!  I've been working on some finishing touches with my Christmas decor this week.  I thought I'd be done with it already but I had to spray paint a slew of ornaments- more on that in a minute!  But I figure before the big reveal, I thought I'd share a few of the images that inspired this year's style!  

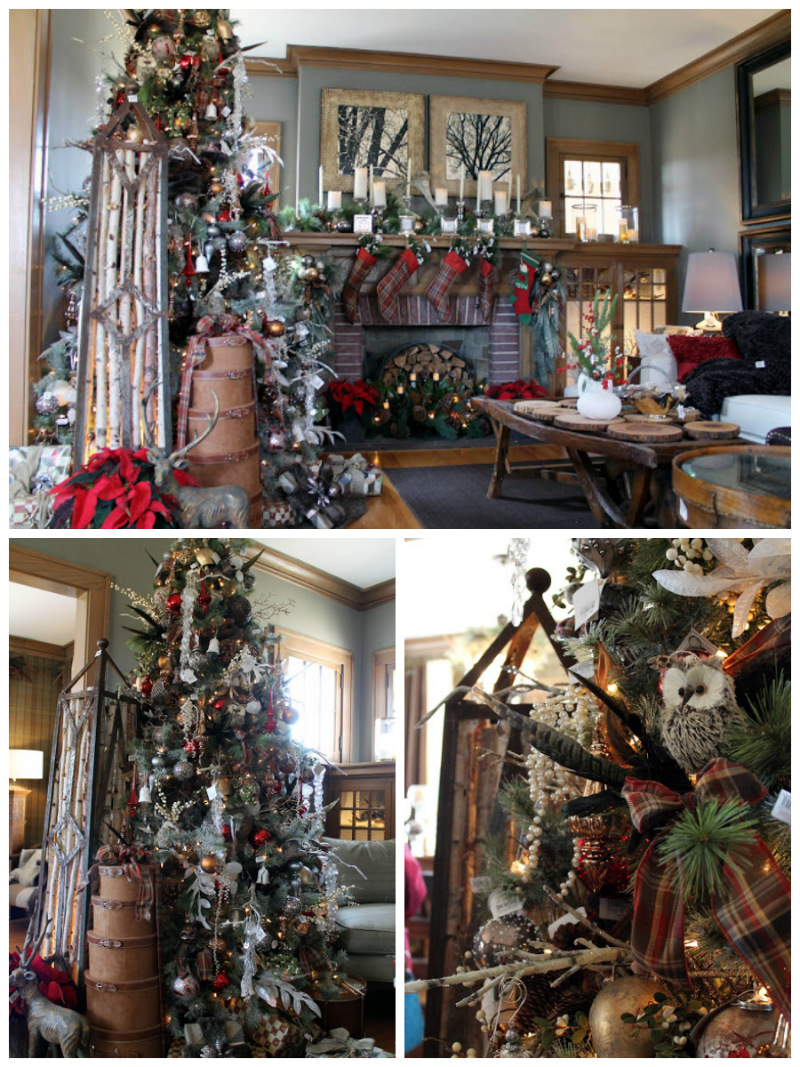
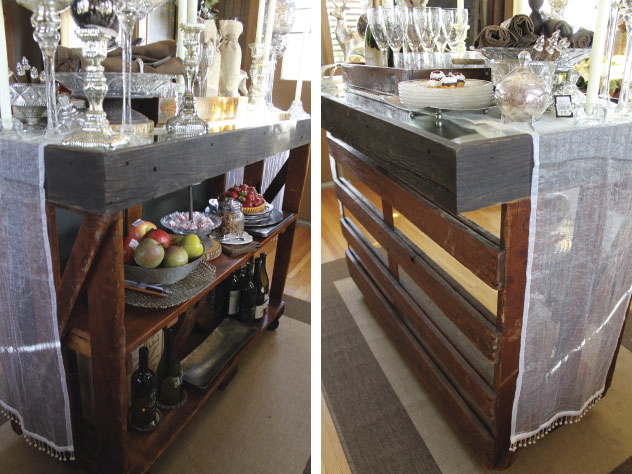
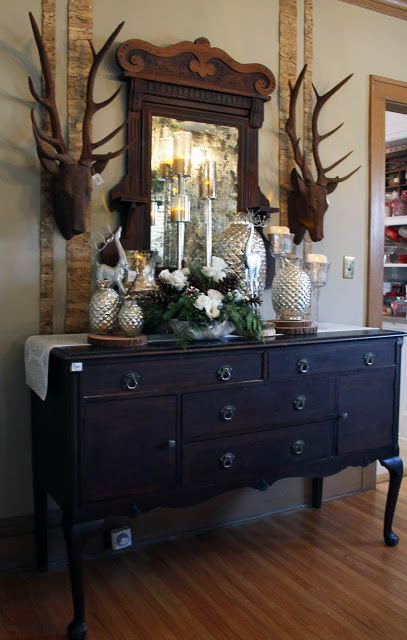
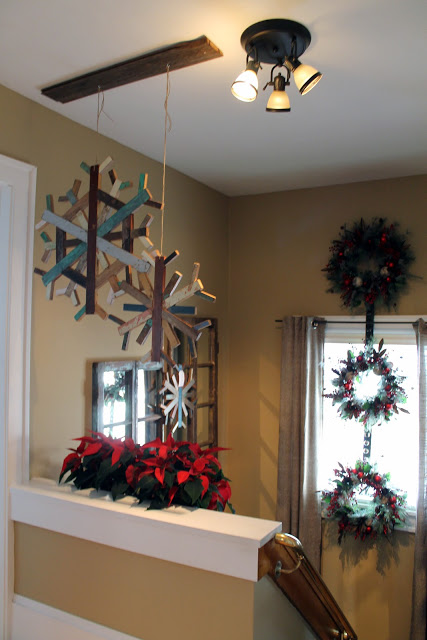
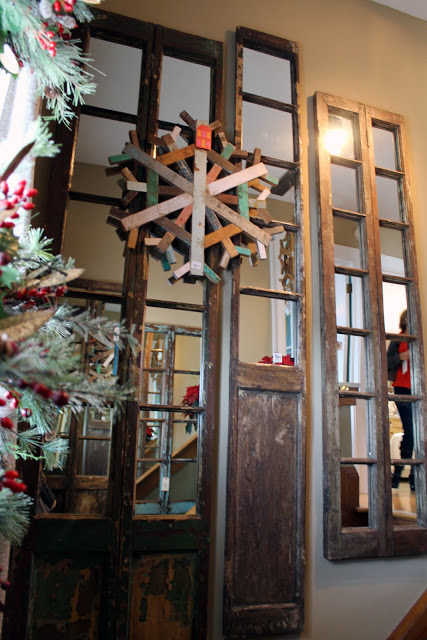
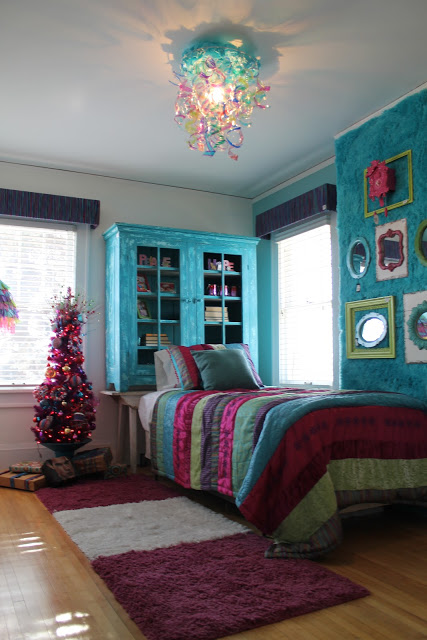
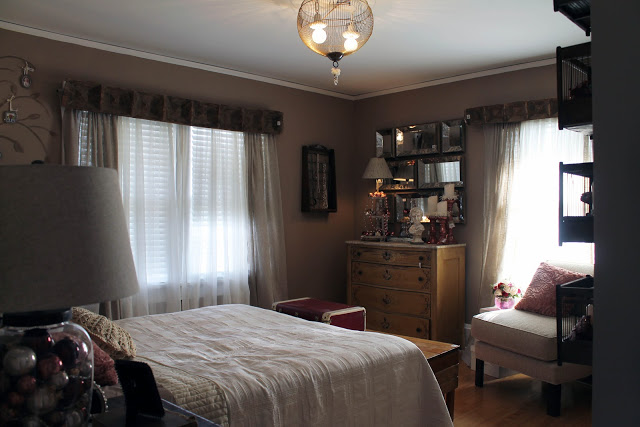
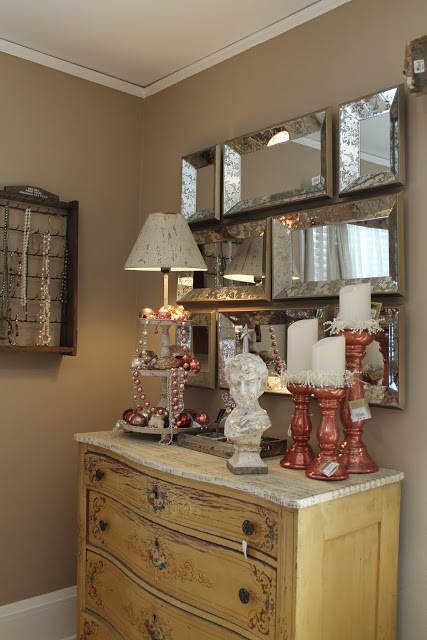
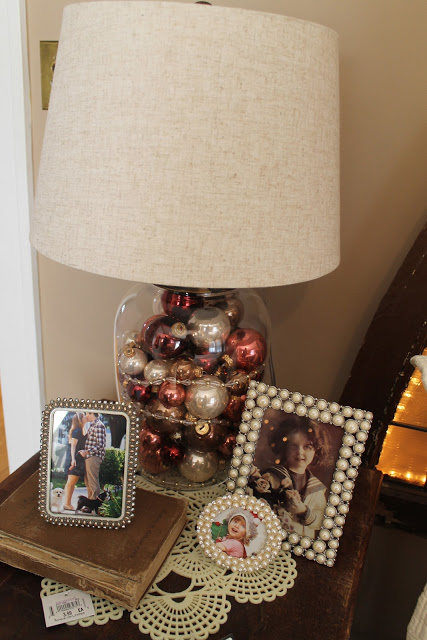
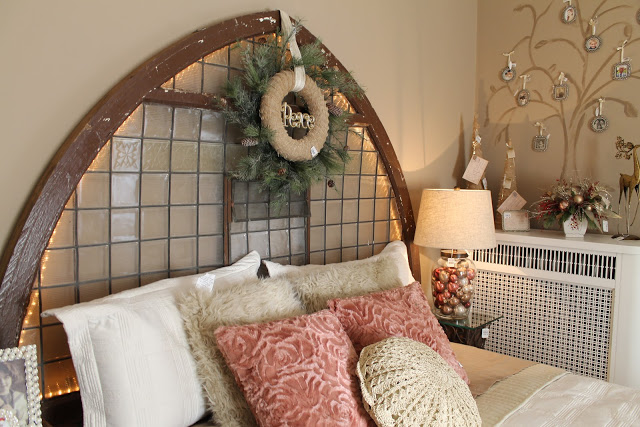
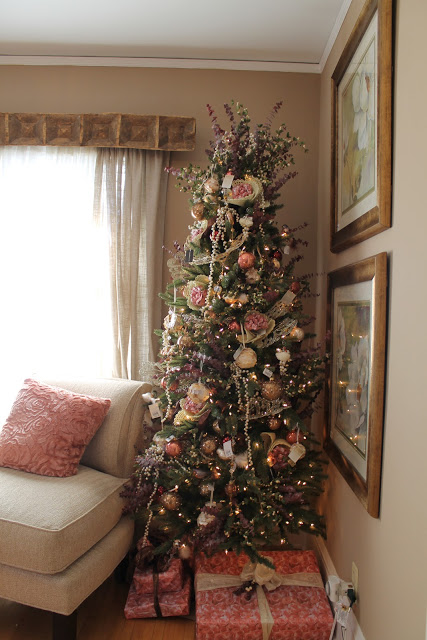
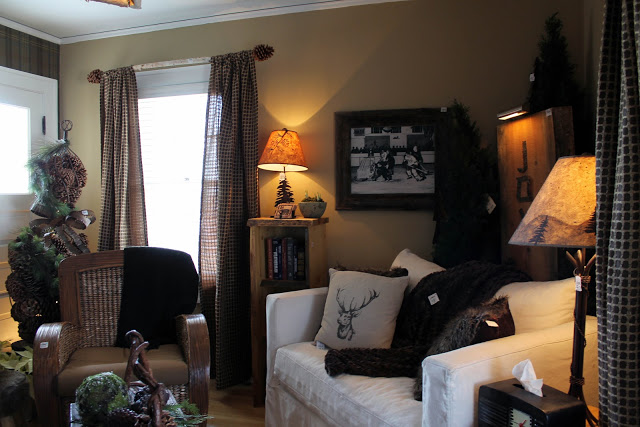
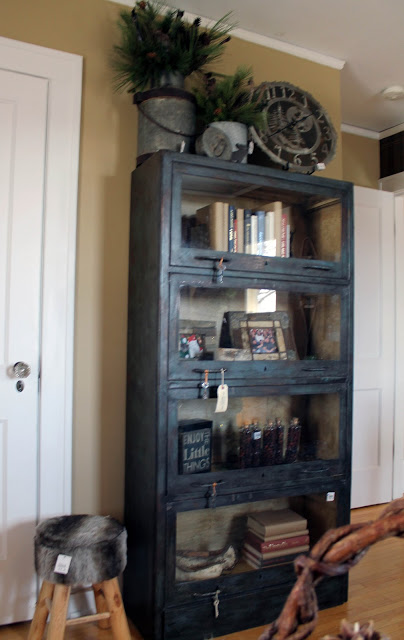
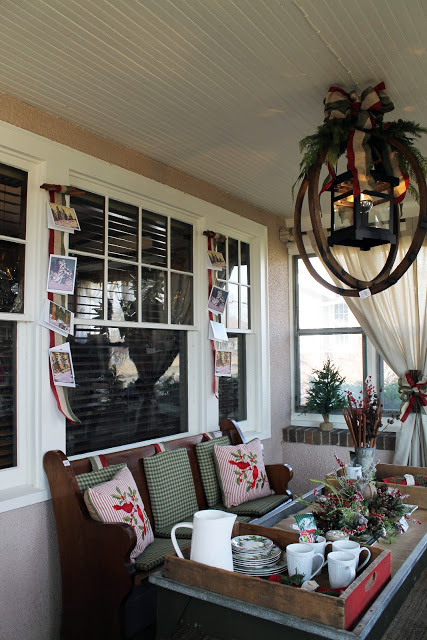
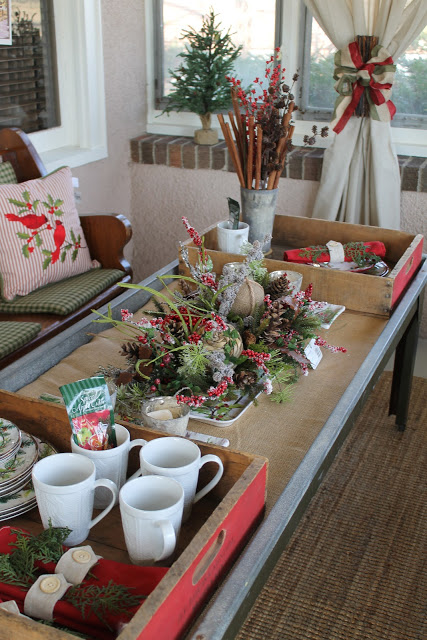
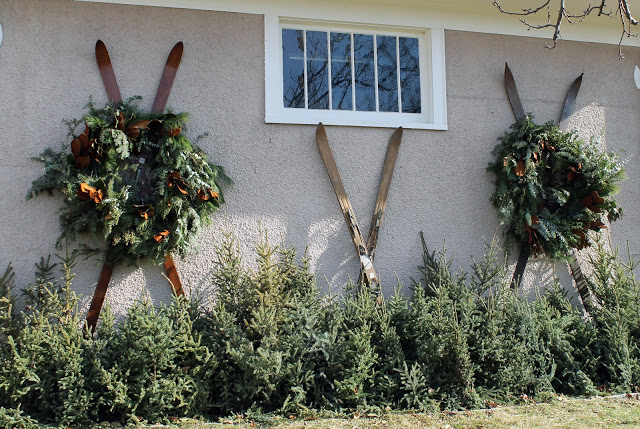
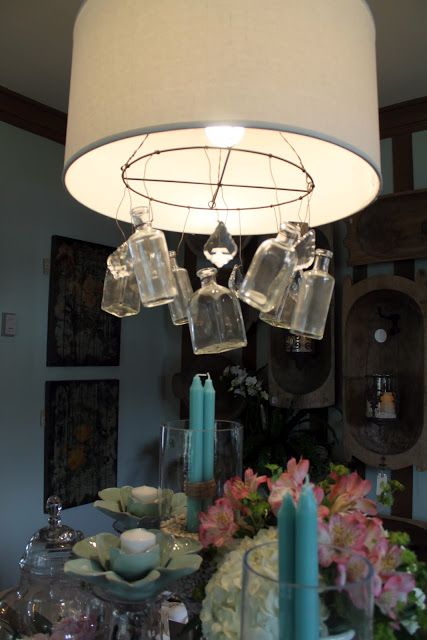
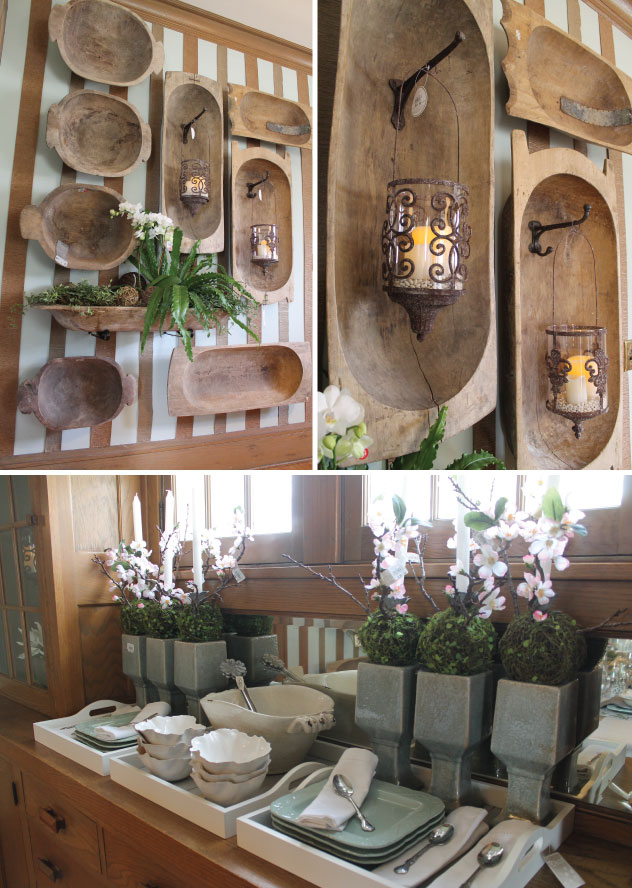
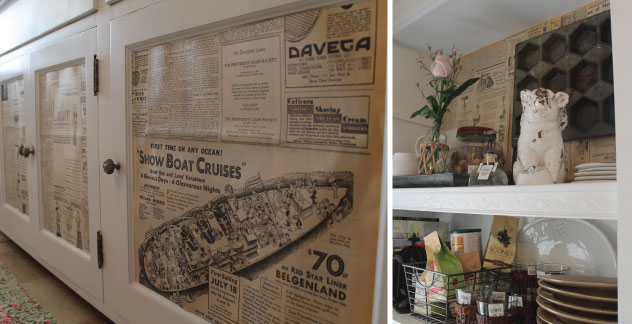
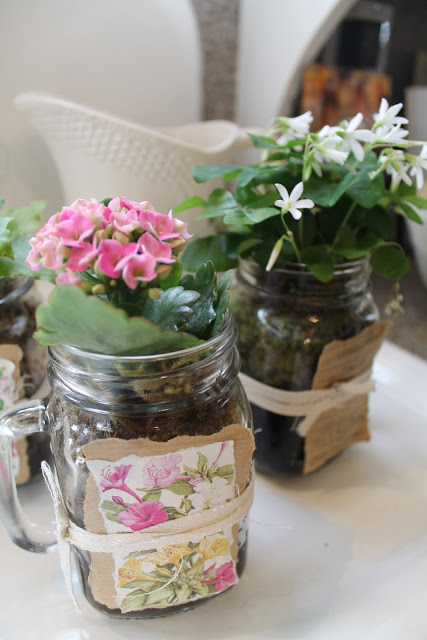
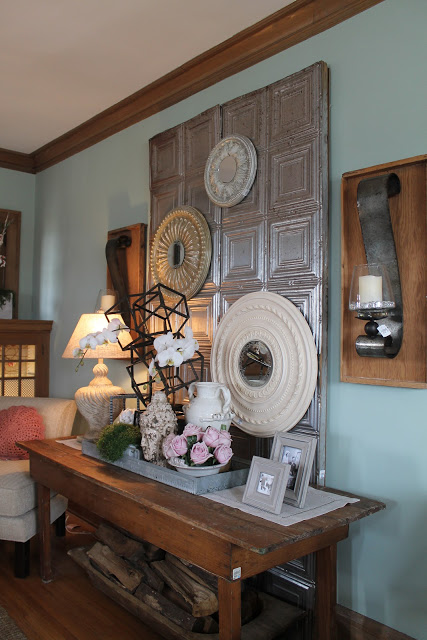
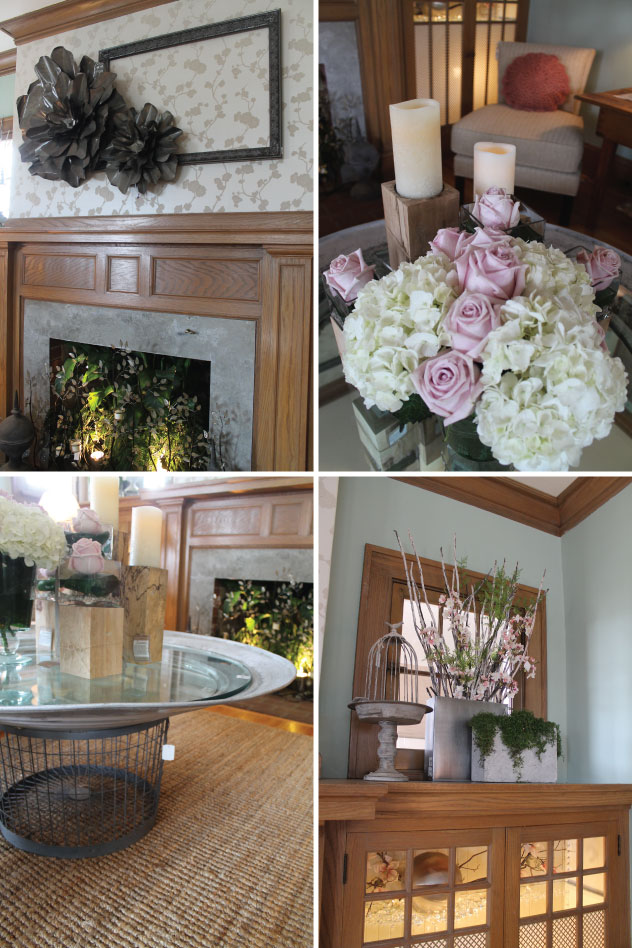
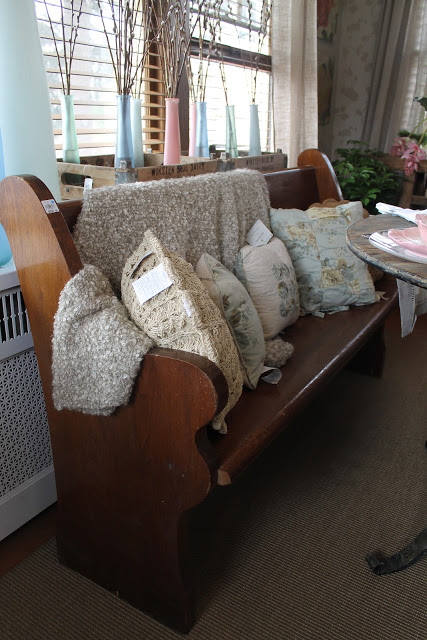
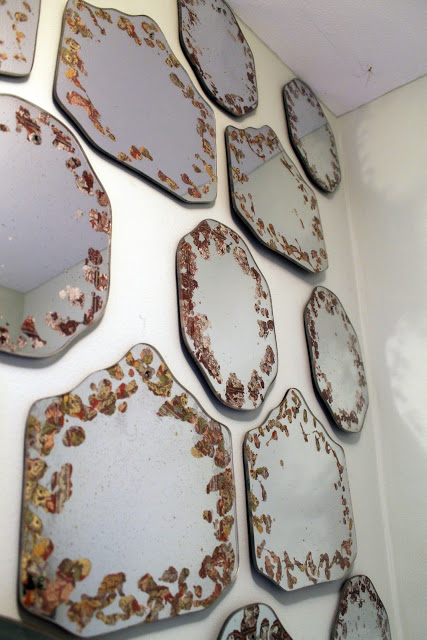
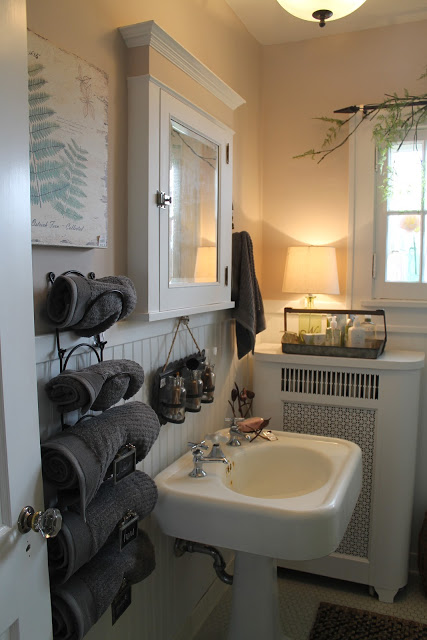
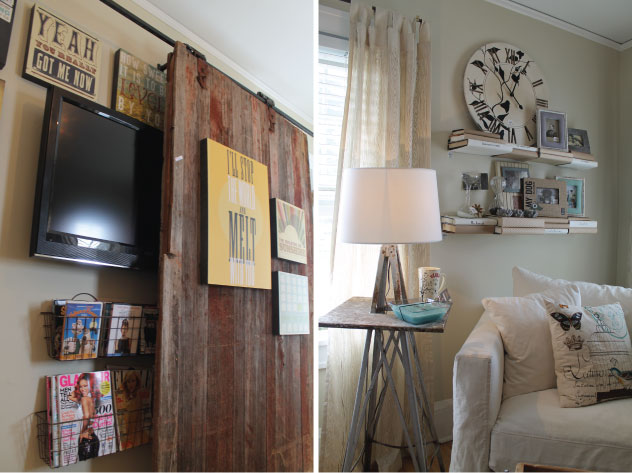
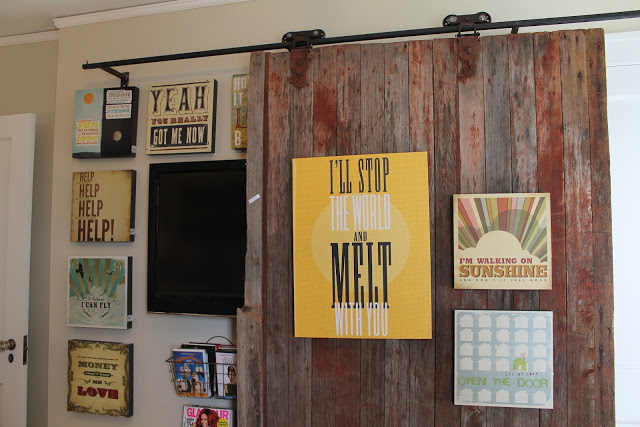
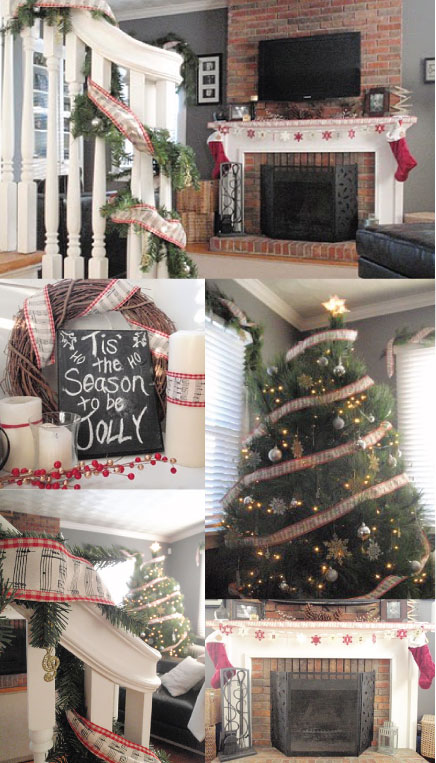
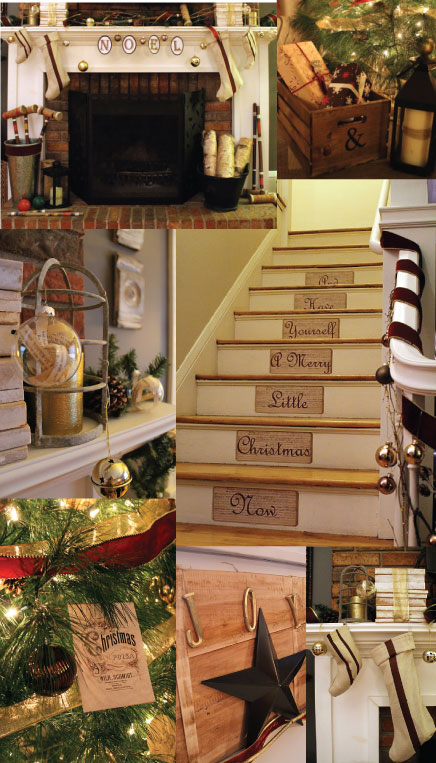
While pinning ideas, I started realizing that I was leaning toward a lot of white; white with greenery and just a few shiny accents, nothing too metallic or glitzy.  These pics also inspired me to keep things a bit more clean and simple this year which sounded like an interesting challenge!

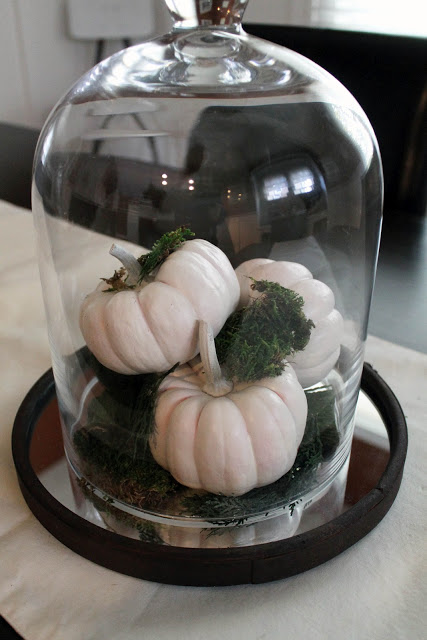
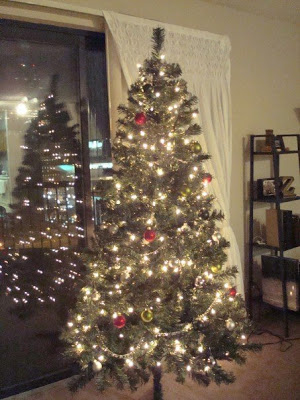
So the idea I've been going with is a White Christmas kind of feel or as Alex likes to call it, "A Christmas Void of Color," you decide which sounds better :)

The unexpected issue I ran into with this whole theme idea was finding plain ol' white ornaments.  Who knew?!  I checked Ikea, Target, Menards, JoAnne's, Michaels, and Bachman's (not all in one day, I spread out those disappointing visits throughout the week), no plain white ornaments!  Sure, maybe 4 white ones in a set of 20 with the remaining 16 being useless.  Which made me wonder...

Anyone else feel annoyed with all the color combo ornament sets when you just want one color in particular?  

I know, I know!  I am a Christmas crazy lady wit decor so maybe I am the only color particular weirdo, but I feel like I run into that frustration every year so I had to ask.  Why can't the colors just be separated gosh darn-it!!!  I don't want blue and teal... or a bomb of glitter, arrrgghhhh!!!!

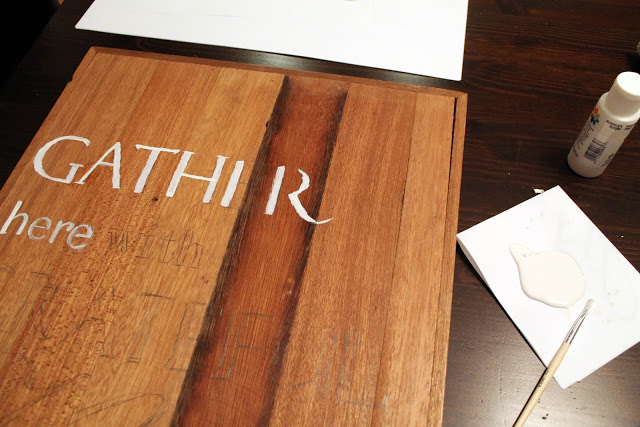
In the end I did what any DIY-er would do and spray painted some old ornaments white.  That task wasn't as easy as I thought it would be either.  Sure, they were plastic ornaments so I should have known.
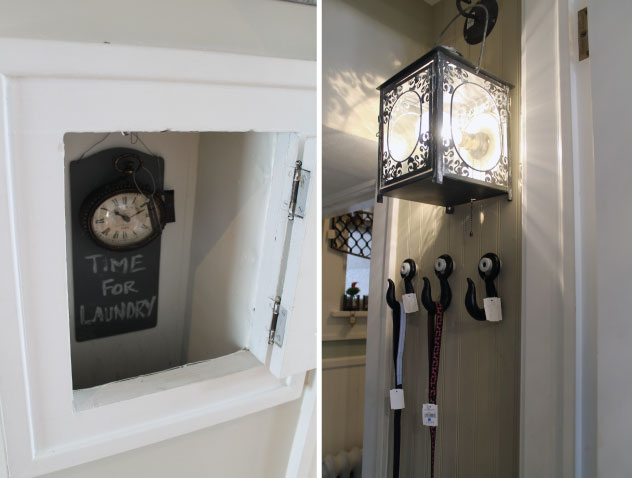
Oh yea, had my own little paint line set up!  The right image shows the paint coverage progress.
It took probably 5 light coats of paint along with lots of drying time and circulating air to get a good amount of paint color/coverage.  Sort of felt like it was as big of a pain as it was to look for white ornaments, sheesh!!!  Thankfully they're finally dry, some still a little tacky, but they're finally hung!

I'll take pics of all the decor tonight and probably tomorrow morning.  Stop back to check out this year's tree, mantel, dining room and more!  
Hope to see you then!

Meet Me by the Mistletoe for Our Holiday Staircase Look!

Kayd Roy2 Comments
Well, I wasn't totally finished with my Christmas bonanza or extravaganza or whatever I called it because I realized that our staircase banister and mistletoe decor is totally worth a look too!  I know "staircase decor" isn't all that typical (or necessary) for the holidays, but the little staircase was one of the things I fell in love with most when we chose our home and I love decorating it this time of the year.  It still makes my heart melt a little when I walk through the door, just like it did when we got the house :)

Here's peek at the staircase from our entryway...

Did you catch that fun little touch of mistletoe?  It's a fun, cute unexpected surprise right?!  I had never thought to add any kind of decor above our entryway but it's just so simple and cute- I'm loving it! 
I keep catching Alex under there just hoping I'll happen to walk by so he can get a smooch, hehe!  Mistletoe really rocks :)

When it came to the staircase garland, I used fresh spruce roping, juniper berry bundles, green+gold ribbon and metallic ornaments (same elements used on our mantel and in the dining room).

What do you think of the staircase garland or our little touch of mistletoe? 
Will you be adding some surprise mistletoe in your home too?

I highly recommend the mistletoe... Tis' quite fun if you know what I mean :)  If you need another staircase decor idea click the link to see the Merry Message Along Our Staircase we created during the 2010 Christmas season.


Well, with the staircase covered I guess that rounds out all the holiday decor for this season.  In case you missed any of the other Christmas decor posts, be sure to check out all the ways we decked our halls!  Here are links to our 2013 Christmas Tree, the Fireplace Mantel, and the Dining Room.

Our Green Holiday Dining Room Look and Some Entertaining!

Kayd Roy4 Comments
Okay, I know I didn't get my Holiday Dining Room post up yesterday as intended but I have a good excuse- Instead of writing about the Dining Room, I was using it with some of my favorite fabulous ladies!  Yes, we took in all the pretty holiday decor but we mainly soaked up some hot toddies, red wine, and a crap load selection of fine cheeses :) Can you blame me?
Wine, cheese, and chatting it up was too fun to pass up!

So despite falling a little short on my own "Christmas Extravaganza" week, I'll still wrap things up here in the Dining Room.  Let's have a look!
I added fresh greenery above the windows, on the sideboard, and in the table centerpiece.  I have to mention that the best deal I got when it came to the fresh stuff was that boxwood wreath above our sideboard- only $9.99 at Trader Joes, isn't that crazy!?!  Such a deal!  I added in ornaments to all the of the greenery to give it that special holiday feel!

Just like our mantel, I again used juniper berry and long spruce needle bundles with a wee bit of cedar and had two thin birch logs against the back of the sideboard.
I again used juniper berry and long spruce needle bundles with a wee bit of cedar and had two thin birch logs against the back of the sideboard.

For the centerpiece, I placed the spruce needles on the base of the candelabra then layered on the juniper berry and finished off the look with a few ornaments.  I feel like the layered fresh look adds a beautiful touch for our holiday table and it was pretty simple!

The final holiday touch that rounded out the room were the cedar stems I hung above each window.  I used ornament hooks to hang the stems and then hung ornaments from each stem.  Totally simple and really dressed up the look of our windows, right?!
I think that might be my favorite part of the decor this year?  Well that and the fresh, full $9.99 Boxwood wreath :) such a deal!

What do you think of our Dining Room Decor
Are you digging the cedar stems above the windows too?
Do you have a favorite Christmas decor piece this year?  I want to know what it is!

Thank you everyone that posted comments for my mantel post!  I kinda felt like a jerk for writing it then I almost went back to remove it, but it really cheered me up when I read the comments that came through so I let it be :)  I still kind of feel like a jerk but I guess it reminded me that the best kind of writing, whether from me or anyone else, is done with honesty and authenticity.  So even if I am a jerk at least I am the honest kind I guess?  Again, thank you for the kindness and reminder of why I love writing this little blog :)

Click these links if you missed our Holiday Mantel or our 2013 Christmas Tree

Time to Cozy Up for a Look at Our Holiday Mantel

Kayd Roy14 Comments
Our fun little week-long holiday decor extravaganza (if you can call it that?) continues!!!  We've covered the tree, now it's time for a cozy look at our fireplace mantel!
I kept with the same Gold+Green look to match up with our Christmas tree.  BUT- this is the first time I used all fresh greenery for the mantel decor!  It was a bit more challenging, but so fun and rewarding when I got to the final look, I'm feeling so proud of it!

I ended up using long Spruce Pine needles and cut Juniper Berry bundles, then arranged them with ribbon and ornaments to complete the layered look on the fireplace mantel...

Simple and sweet post I guess?!  Love that on a super snowy night here in Minneapolis!

What do you think of the mantel decor?  Or the tree?
Are you getting hit with a crap-ton of snow too?!?! 

Anyone?  Bueller.... Bueller?!?!  Guess I'm feeling like no one is out there anymore :(  Heck, Alex even said that when he gutted the bathroom tub and he isn't even the HBIC- ahem 'Head Blogger In Charge' (blame that acronym on Bravo's Housewives).

I know I haven't been as great at following up with the blog lately, but I hope someone out there is still reading and seeing this stuff?  I still love writing it all, but it's kinda bummy feeling like you are talking to yourself.  Okay, I'm done emoting now, I'd still love to hear from you though :) 

Hunt Down & Chop Down Time: It's Our Annual Griswold Style Tree Adventure! Plus a Look at My 2013 Christmas Style Inspiration!

Kayd Roy1 Comment
(Once again) In the historic words spoken by Clark W. Griswold, "We're kicking off our fun old fashioned family Christmas by heading out into the country in the old front-wheel drive sleigh to embrace the frosty majesty of the winter landscape and select that most important of Christmas symbols."  

And yes, I know the whole Griswold concept/story is a bit old now, but it's still a hoot of a good time and makes me giggle every year :) so the tradition continues on!
Click the link to see our 2010 tree adventure, 2011, or 2012

Yes, once our quiet Thanksgiving for Two was over (which also included some yummy AND pretty drinks, I totally had to share these with you!)...
Rosemary Gin Fizz recipe here and Hot Gin Toddy Recipe here
... We knew it was time to start covering our house with Christmas and where else do you start but with the tree!  So, we hopped in the car the next day with Rusty Rocco and Audrey Sadie and headed up to the Rum River Tree Farm to hunt down and chop down our 2013 tree.

After much debate and wandering through rows and rows of trees, grumpy cheerful Alex plopped down to chop down the 2013 tree of our dreams :)

Then, we stuffed that bad boy in our trunk (literally!), and got it all set up in the living room to decorate!  We paid just $32 for our self cut tree-such a steal if you ask me!   But man, I can't begin to tell you what mess of pine needles that ended up in our car and house, LOL!

Here's a look once we got it set up, it's just begging for decorations right?!

Here's a look at what I've been feeling inspired by for this year's look/theme.  I'm feeling the Greens and Golds for sure and I'm digging the look of cedar greenery or garland.
Images via Terrain, Good HousekeepingDigs DigsChatelaineRemains SimpleFinders Keepers Market IncA Country FarmhouseHappy Mundane
I've been working hard on getting it finished up along with our mantel and dining room decor- I can't wait to show you what I came up with!!!  I'm planning to share the finished tree tomorrow, then the mantel Wednesday, and the Dining Room Thursday!  It'll be a week long Christmas celebration here! Wooooo!  I'm so pumped! Are you pumped?!  If you're not you better get yourself pumped real quick because a whole lotta Christmas is headed your way!!!  Yep, I'm feeling that good ol' Christmas Crazy feeling, I just LOOOOOVE Christmas like a crazy lady!

How about you?  
Are you busy setting up your Christmas decorations too?  
Was there a theme or color scheme that inspired your holiday decor this year?
Are you a Crazy Christmas type of lady too?!!

I'd love to know!  Hope to see you back tomorrow for our tree reveal!

Last Minute Fourth of July Decor at the Hammers and High Heels House

Kayd RoyComment
Happy Fourth of July everybody!  Although it was kind of last minute, we decided that it'd be fun to just have a low-key kind of backyard barbecue with some friends and neighbors.  Naturally, I had to do some last minute decorating to give our home some patriotic spirit (which included our dogs too, they're proud little American pups)!
All I used to decorate were six flags (2 small, 2 medium, and 2 large sizes) and four rolls of decorative ribbon from JoAnne's which totalled under $10!   I hung the flags from our mantel with some galvanized metal ribbons I had from Bachmans, so simple and I love the classic American look!
In the Dining Room, I hung the flags similar to the mantel over our sideboard then wrapped some ribbon around the lanterns, wreath, and a small floral centerpiece.  Super simple right?  But it totally fits the feel of the Fourth!
Honestly, I'm pretty surprised with how nice my last minute decorating efforts turned out! Usually last minute doesn't go that well for me.  I wish I decorated a couple weeks ago so I could enjoy the look a bit longer :)


How about you? 
What kind of simple Fourth of July decor tips do you have?
What will you be doing to celebrate the Fourth?

Have fun celebrating our country's independence and freedom today!  Happy Fourth of July!

Warm & Welcoming Holiday Dining Decor...

Kayd RoyComment
The holiday season is still feeling warm, rustic, and cozy at home here for Alex, Rocco, Sadie & yours truly!   Here's a simple look at our table & dining room decor!


Pretty, cozy, and fitting for a comfortable night at home to celebrate the season!

What other simple ways do you make you dining room ready for the holidays?
Do you have fun cute ways to display food for company on the holidays? Let us know! 

Happy Holidays and thank you for visiting us! We wish you and you family a warm & wonderful holiday season!

A Message for Santa Along Our Staircase

Kayd Roy3 Comments
Last Christmas, one of my favorite home decorations was the "Merry Message Along Our Staircase".  So naturally, I had to do version 2.0 this year!  Take a look....
Don't you love that Rocco snuck into that photo?  Total photo bomb :)
I used "the stockings were hung by the chimney with care, in hopes that Santa Claus would soon be there," for this year's message.  I followed the same steps to create the decorations as last year, but in case you want a quick version...
  • Select a message for your staircase and count out the number of steps you will need signs for
  • Measure the size you would like your signs to be for your home's stair riser (our signs are 12.5" x 5.0")
  • Print out the signs for each stair riser on cardstock paper
  • Adhere the signs to each riser centered as desired (we used 3M Command Adhesive Poster Strips opposed to regular tape to make sure they would stay in place and not ruin the paint when it's time to remove them).
It's a pretty simple project and I love that our staircase is part of the holiday fun now!
 Here's a look at last year's if you are curious :)


I think all I have left to share is our Holiday Dining Room Decor! Hope you'll swing by again to see that too!
Click here if you'd like to see our 2012 Christmas Tree or Christmas Mantel!

What do you think of our Holiday staircase decor?  Would Santa approve?!?
Have you decorated your stairs or banister?

Linking this post up over at Southern Hospitality's Christmas Vignette Linky Party!

A Winter Storm Wonderland

Kayd Roy14 Comments
We woke up to metric-crap-ton of snow today and it just keeps on coming down.  Even though I know this much snow is going to be a pain in the buns when it comes to getting around town, I have to admit that I'm loving it because it feels like Christmas!!!!  Last year we barely got any snow at all and the year before we were buried from November until March in nearly three feet of the the stuff.  So yes I love it now, I just hope the snow stays around at a cute level and not a nuisance level :)

Speaking of not getting a lot of snow last year, the kiddos seems really surprised by the big puffy piles of snow today since they really didn't see it at all last year.

It took Sadie a minute to set foot in it (it's her third winter) but then it was like she'd been shot out of a cannon!  She just loved bounding through the snow!
Sadie sure loved it but our other little guy Rocco... not so much.  You can see that he pretty much stood in place as Sadie ran laps around him (notice the arrow pointing at Sadie running by in a blur).
I guess Rocco prefers this kind of stroll in the snow.  Works for me since he hates being held otherwise, ha!
The National Weather Service said that we should expect 8-12 inches of snow to stick around and some totals could be up to 16 inches!  Yikes!
For now I am just going to appreciate the beauty of it, tomorrow might be another story :)

If you are local, what do you think of the snow?  Love it?  Hate it?

Anyone else play in the snow today???

All Warm & Cozy By Our 2012 Christmas Tree!

Kayd Roy3 Comments
There's something about a beautifully lit Christmas Tree that makes you feel all warm and fuzzy inside, right?  We finished up decorating the tree we picked up on our annual Griswold adventure (that post is a must see!) and I'm feeling all warm and fuzzy looking at these pictures! 

I'm hoping you'll enjoy a look too!  Here's our 2012 Christmas Tree...
We decided to put the tree in our Living Room instead of the Sunroom like last year.  

 We kept with our cozy rustic cabin theme for our tree as we did for the mantel decor (click here for a look at the mantel!).
I used plaid garland with only red, gray & clear glass ornaments. I stayed away from any gold, silver, or glittery elements to keep a rustic vibe which was actually kind of tough!  Everything is covered in glitter this time of year, right?!?
My favorite ornaments on the tree are the glass ones filled with cut book pages inside!  I picked some up last year at Finch's Boutique created by Jason Berke and still love them! 
I also think that I finally mastered the art of winding the garland throughout the tree opposed to wrapping it around. It really makes such a difference!


*Sigh* I just love the warm cozy feeling of a Christmas Tree in our home and I love decorating it with my hubby each year!

Click here to see our 2011 Christmas Tree AND each one before (we've really improved our tree decorating since our first in 2007, LOL)!

What do you think of our 2012 Christmas Tree?

Do you have any tree decorating secrets/skills to share?

See you tomorrow for Head Over Heels DIY Friday!

Linking this post up over at Thrifty Decor Chick's Christmas Tree Linky Party!

Our Rustic 2012 Holiday Mantel

Kayd Roy1 Comment
Are you feeling the Christmas spirit yet?  I know we are now that our house covered in Christmas and I am excited to start sharing pictures of the decor!  Let's kick things off with our 2012 Holiday Mantel!
This year we decided to go with decor that felt cozy & rustic, sort of the feel you'd get from spending Christmas in a cabin up north. 
We used birch wood branches & logs, antlers, lanterns, pine branches, snowflake garland, and a few bronze & red glass ornaments.

 I love the cozy look and feel!

(Click here if you'd like to see our 2011 "Merry Little Vintage" Mantel or here to see our 2010 Christmas Mantel.)

What do you think of our 2012 mantel?

How did you decorate your mantel this year?

I'll have a lot more to share of our Christmas decor including our staircase, sideboard, a DIY here-and-there, and of course OUR 2012 CHRISTMAS TREE!!!!  Hope you'll stop back to see!

Linking this post up over at The Lettered Cottage Mantel Party!

Head Over Heels DIY Friday: Thanksgiving Wall Art

Kayd Roy10 Comments
Hello and happy Friday everybody!
This week's DIY project is a sweet little sign I made to use along with my Thanksgiving dining decor...
I thought "Gather here with Grateful Hearts" was a perfect message for the spirit of Thanksgiving and it was SUPER easy to make!

I started by using some left over wood from our basement. I printed off the message on regular paper and lined it up where I thought it'd look best. 
 Once I was happy with the arrangement I started to cut the letters to make a stencil.  It is a little tricky but if you can get a good frame to trace that is all you need. 
 I used a pencil to trace the letters then, I grabbed my white craft paint & brush to get started on filling in the letters.
 I filled in the thicker letters with a medium brush and then used a very small brush for the little details.

It took around two hours to finish but totally worth it!  Take a look...
I love the heartfelt message and handmade look, just perfect for the upcoming holiday gatherings!

What do you think?
Are you Head Over Heels for this DIY?

What DIY decor are you coming up with for Thanksgiving?


My brain is on Thanksgiving decor, I might have another decor DIY next Friday too! 

I wanted to say thank you to everyone that left a comment on my last Vestibule "Scrap That" post.  It helped cheer me up and I loved some of the new ideas!  I'll be getting at it (again) this weekend but there should be some fun changes you'll see on the blog too!  Have a lovely weekend :)

Holiday 2012 Idea House: Cozy Up to Alpine Chic Decor

Kayd Roy7 Comments
Who needs decor ideas for the upcoming holidays?!?! I do!  You do too right?
Thankfully, Bachman's 2012 Holiday Idea House started today and I got a first look! This house features "a glamorous take on a rustic lodge where a cozy up north cabin meets big city bling". (Click here to check out the Holiday 2011 Idea House).  As expected, it was full of great ideas and I am sure you will find at least one of your own after seeing these pictures!

Once again, here is the background information on the Idea House just in case:
Bachman's is a Floral and Gift Garden here in Minneapolis, and their Idea House was their original founder's house built in the 1920's. The company now uses the house for their seasonal Idea House creating entirely new rooms for each of the four seasons. Everything about each room is different for each season's idea house, right down to the paint on the walls. When you enter the house you get a brochure that lists all the details for each room including the paint color and 'ideas'. The cool part- everything in each room is for sale!

Alright, I will show each room's photos then the 'ideas' after.  Now that you have the info let's get in the holiday spirit and take a look...

LIVING ROOM
Antler stems as drapery rod finials and mantel decor; Coffee table made from a wooden wagon and layered with tree rounds; Lit stems with pinecones added to decorative birch tree; Cowbells as window decor; Christmas presents wrapped with fur and burlap ribbon with ornament accents; Side table made from wood and metal sieve with glass top; End tables made from stacked luggage and glass tops; Retail jewelry case displays Dept 56 and candy mold collections; Wall embellished with hand-painted grandfather clock outline; Outdoor metal topiary lined with birch branches as tree accent; Christmas tree topped with feathers and antlers.


SUNROOM 
Wine bar made from a vintage luggage cart; Side table made from luggage and glass top; Wooden wine racks and wall vases used as mounted wall decor; Pheasant feathers as drapery finial; Vintage beverage dispenser as wine chiller; Salvaged railing post turned into a floor lamp; Vintage wooden toolbox used as wine holder; Burlap panels added to chairs.


DINING ROOM
Chair embellishments made from snowflake ornaments and earrings; Slices of tree trunks under glass as table decor; Antlers used in centerpiece, as drapery finials and chandelier accents; Scarves used as window valances; Sprayed holiday stencils on buffet mirror and windows; Chandelier decorated with ornaments, garland and antlers; Placecard holders made from bud vases, stems and envelopes; Decorative bark panels and bark ribbon on table and walls.


KITCHEN
Metal pulleys mounted to wall as magnet boards; Oversized vintage metal sign used as recipe magnet board; Side table/storage cabinet made from incubator sections; Towel racks made from decorative sweater-covered deer heads; Chandelier decorated with kitchen utensils and dishtowels; Metal grates used as window valances with ornament accents; Curtains made from tree-themed table runners; Workbench as a kitchen island; Recipe card holder made by adding a decorative pick to an apple.


LOWER LEVEL BATHROOM
Magazine rack doubles as a towel holder; Toilet paper holder made from a mailbox; Metal grates and ropes as a window treatment; Metal pulley as wall decor.


STAIRWELL
Snowflakes made from salvaged wood pieces; Salvaged wood doors turned into mirrors


UPPER LEVEL BATHROOM
Sheet music as wallpaper; Ornament clips as shower curtain embellishments; Wall organizer made from a metal toolbox; Window valance made from salvaged decorative wood; Ladder used as towel holder; Painted holiday stencils on a vanity mirror; Wire candleholder turned into a toilet paper holder.


BOY'S BEDROOM
Headboard made from a basketball backboard and rope lighting; Basketball rim mounted to a wall as nightstand; Media unit made from vintage lockers; Basketball cage turned into a desk; Graph chalkboards hung from metal rulers as wall art; Accent pillow and Christmas tree made from a referee shirt; Mini basketball hoops and pillowcases turned into laundry bins; Basketball halves turned into table lamps, planters and valance decor; Ceiling pendant made from acrylic clipboards; Pegboard covered in contact paper with basketball court outline.


GIRL'S BEDROOM
Headboard made from a cabinet and table; Chandelier made from painted and deconstructed plastic water bottles; Hose reel as tinsel Christmas tree base; Window screens as mounted on walls as decorative magnet board and wall art; Wall calendar made of clear bulb ornaments filled with candy; Wall covered with furry blankets; Floor and table lamps decorated with colored tissue paper; Wall organizer lined with wrapping paper; Window valances wrapped in yarn.


MASTER BEDROOM
Vintage arched window as headboard; Lamps filled with holiday ornaments; Canary shipping cages as wall-mounted candleholders; Birdcage as ceiling lamp; Hand painted family tree with hanging frame ornaments; Dresser top covered in sheet music; Doilies used as floral holiday ornaments; Window valance made from salvaged decorative wood; Metal planter as nightstand; Wreath holder as scarf hook; Eucalyptus branches as fragrant Christmas tree decor; Jewelry holder made from vintage retail key tag fixture.


DEN
Metal topiary filled with pinecones as Christmas tree; Salvaged wood and oversized black and white photo turned into a wall-mounted TV cabinet; Vintage trunk as coffee table; Metal worker's cabinet as bookshelves; Birch pole and metal pinecones as wall art; Ceiling pendant made from birch poles and deer table runner; Salvaged wood and old pedestals turned into a sofa table; Birch poles as valances with pinecone finials; Vintage snowshoes and birch logs as wall sconces.


PORCH
House numbers on vintage winter skis; Wall tree made from cinnamon stick bundles and ribbon; Holiday cardholders made of ribbon and magnets; Galvanized planter box turned into a coffee table; Church pews as benches; Birch logs as drapery finials; Saddlebag as wall planter; Salvaged wood rounds and lantern turned into a ceiling light; Christmas stocking used as mailbag.


BACKYARD
Wooden skis behind wreaths as wall decor; Toboggan as valance on potting shed; Holiday "peace" sign made from metal ribbon; Birding tree made of pinecones, suet and birdfeed ornaments; Spruce tops planted into flowerbeds to create mini forests.


If you need more Holiday decor ideas, click this link to see the Holiday 2011 house.  
**********************

PLEASE NOTE: In case you didn't read the top of the post, I just want to reiterate that this IS NOT OUR HOUSE and I am not employed or affiliated with Bachman's in any way (which means I did not decorate the rooms shown). I am a HUGE fan of the Ideas House and love sharing it as long as they allow people take photographs when they visit. It seems lots of people get confused about that if they stop by via Google Images or Pinterest and I would NEVER want to take credit for something I did not work on. So I hope that's clear!

Which ideas where your favorites?!?!
Hope you found some inspiration, thanks for stopping by!

Dining Room Decor to Fall for!

Kayd Roy8 Comments
Let the fall season decor begin! 

Who else started getting in the fall spirit over the weekend?  Since I had a bunch of fall decor inspiration from my Friday posts (click for week 1 or week 2), I couldn't help but get started on some in our own house.  One of my favorite ideas I had been seeing out and about were glass domes/ cloches with pumpkins inside.  I just had to get my hands on a couple to bring together the decor I had in mind.  Well, that and some little white pumpkins...
Thankfully, I found a glass dome + mirror base at Bachman's for $34.99 (with a $5 off coupon) and another smaller cloche at Home Goods for $9.99.  I pulled together the rest with random decor elements we had around the house- except the white pumpkins
 
I picked up a bag from Home Depot along with some heirloom white spray paint totalling $10.49.  Once I got home I started spray painting my pumpkins white.  While spray painting my pumpkins I thought "I do some strange stuff for decorating & crafting".  Haha, anyone else feel like that a lot?
Anyway, back to the decor.  My goal with spray painting the pumpkins was to have a black, green, and white theme going on.  I didn't want any reds or oranges like I've done in the past, I wanted something totally fresh and different!  I added my freshly painted mini pumpkins along with some faux moss inside my larger glass dome on top of the mirror base on our dining room table.
I also tossed a bunch in an old metal basket with a larger gob of faux moss.
For the smaller glass cloche, added one of my mini bread boards from Diana at Our Vintage Home Love underneath along with a couple pumpkins, faux moss, and a vintage ampersand letter. 
 I'm loving how it all came together!

What do you think of the fall dining room decor?
What's your fall decor color scheme?
Who else has a hubby who's cringing about the fall and holiday decor seasons?!?! Haha!

Can't wait to show you what else I've been decorating! Time to link this up!
The Lettered Cottage

September Head Over Heels Friday: Fall Idea Shopping at Bachman's Fall Idea House

Kayd Roy6 Comments
Get ready, it is time for Bachman's 2012 Fall Idea House!   This fall house features "Cool Trends for Fall Gatherings" focusing on celebrating the season with friends, family, and pets- trust me, the pets part is a must see!.  (Click here to check out the Fall 2011 Idea House).  How perfect that the Idea House timing fit right in my September "Fall Idea Shopping" theme?!?!

Once again, here is the background information on the Idea House just in case:
Bachman's is a Floral and Gift Garden here in Minneapolis, and their Idea House was their original founder's house built in the 1920's. The company now uses the house for their seasonal Idea House creating entirely new rooms for each of the four seasons. Everything about each room is different for each season's idea house, right down to the paint on the walls. When you enter the house you get a brochure that lists all the details for each room including the paint color and 'ideas'.  The cool part- everything in each room is for sale!

Let's kick things off outside this time, I will list all the Ideas at the end of each room. Go!
Outdoors


Wall flowers made from burlap wreaths, wheat and honeysuckle vine; Hanging wicker balls with pumpkins as tree decor; Sunkist cart as planter; Tires lines with burlap as planters; Bedspring as wall planter

Porch

Wood planks pieced together as a rug; Beer bottle chandelier; Artwork framed with bottle caps; Bottle caps with magnets as curtain clips; Dish towels as curtains; Kegs as stools; Beer tap/keg made from old trunk.

Wicker ball filled with florals hung with burlap as door decor

Dining Room


Outdoor lanterns turned into table lamps; Drum shade embellished with stems and wicker balls; Candle holders as place cards; Wooden spools as candle holders; Cinnamon sticks as floral decor; Metal panels as window treatments; Fall stems as napkin rings.

Kitchen


Metal rolling cart as wall shelf; Plant stands as stools; Vintage trunk as wall organizer; Curtain rods made from salvaged wood and hooks with dishtowels as window treatments; Galvanized baskets as towel holder/organizer; Salvaged metal stand as center island; Hanging starter vases filled with gems as chandelier decor; Floral vase as utensil holder; Cupboard walls lined with tablecloth.

Living Room


Conveyer belt as coffee table; Shelving unit made from salvaged metal and wood; Galvanized planters used as wall shelves and cubbies; Whiskey barrel straps as firewood holder; Planter box with added frames along radiator; Fireplace planter made from a window box; Floor and table lamps made from metal and burlap shades; Optometrist table as wine bar; Wine glasses embellished with twine and fall leaves; Wine bag embellished with stems and wine stopper.

Sunroom


Room divider made from a pallet and iron panel; Metal garden orb and decorative candle holder added to chandelier; Wine balls as finials; Candles embellished with twine and pins; Radiator drip tray as planter base filled with rocks.

Stairwell
Farm discs as wall art magnet board; Metal vase turned into table lamp; Chandelier embellished with wicker balls; Assorted cabinet doors as wall art; Wood spools as vases; Glass cabinet door as photo frame; Vases added to window for hanging art.

Dog Room


Dog bone chandelier; "Doggy Day Times" placemat as wall art; Key chains as window embellishments; Metal dog bowls turned into wall mirrors; Dog bed made from an upside-down table and an old chair; Dog bowl dish holder as wall sconces; Vegetable garden raised bed base and metal topiary as doggy cabana; Done done shaped pool; Dog bowls stacked as side table; Dog bone topiaries made from foam and moss.

Nursery


Changing table made from a buffet; Cloth diapers used as organization pockets; Salvage metal turned into a wall shelf; Mobile made from a branch and origami birds; Bird wall art made from nails and colored yarn; Salvaged wood, rope, and clips as photo holders; Ceiling shade embellished with safety pins; Stickers on mirrors as word art.

Master Bedroom

Headboard made from doors; Wall mirror used as wall shelf; Cork tiles under glass for side table; Candle holder as vase; Window treatments across entire wall.

Upstairs Bath


Bark panel wallpaper; Leaves framed as wall art; Napkin holder as toilet paper holder; Shower curtain embellished by flower magnets; Wire baskets as towel holders; Stems between windows as fall decor; Candle tray as wall shelf.

Office


Desk made from old doors and fabric; Crates as wall unit and magnet board; Salvaged metal tray as pegboard; File holder as wall planter; Wood planter box as ceiling pendant; Chalkboards as file box labels; Metal panels as window treatments; Wooden spools as drapery finials.

Garage


Faux fireplace scene made from tarpaper and chalk; Centerpiece made from a galvanized trough; Placecard holders made from mini-lanterns; Leather doors and tissue backdrop as wall art; Witches brooms in planters; Mummy hands as lantern holders; Napkin rings made from skull bracelets; Halloween rings and decals added to wine glasses.

Phew!  Tons of decorating ideas right?  Which ideas were you Head Over Heels for?  I know I am loving the outdoor decor, the dining room tablescape, the trunk turned keg/tap (we have a trunk we've been looking for ideas for, oh boy!), the nursery with the cute wall mirrors, the skeleton centerpiece, and the dog room.... oh that dog room was crazy fun!  I do love it, but not enough to execute something that crazy in our house :)

If you need more Fall decor ideas, click this link to see the Fall 2011 house
To view all Spring, Summer, Fall, and Holiday Idea House posts click here.

**********************
PLEASE NOTE: In case you didn't read the top of the post, I just want to reiterate that this IS NOT OUR HOUSE and I am not employed or affiliated with Bachman's in any way (which means I did not decorate the rooms shown). I am a HUGE fan of the Ideas House and love sharing it as long as they allow people take photographs when they visit. It seems some people have been confused about that and I would NEVER want to take credit for something I did not work on. There, I feel better now :)

Hope you found some inspiration, thanks for stopping by!

Linking this post up...

Stop by Southern Hospitality and join the party!

Head Over Heels Friday: Bachman's 2012 Spring Idea House

Kayd Roy12 Comments
It's an extra special Head Over Heels post!  Why?  Well, I was super excited to share it and I feel bad that I didn't get posts written for our Guest Room and Master Bedroom project as promised.  But I am sure you will forgive me after you see all the pretty images in this post :)

Get ready, it is time for Bachman's 2012 Spring Idea House!   This Spring's house is a "Relaxing Renewal" celebrating spring energy and renewal.  As expected, the house was incredibly inspiring so it had to be in this week's Head Over Heels spotlight.

I think by now you know the drill with the Idea House but just in case:
Bachman's is a Floral and Gift Garden here in Minneapolis, and their Idea House was their original founder's house built in the 1920's. The company now uses the house for their seasonal Idea House creating entirely new rooms for each of the four seasons. Everything about each room is different for each season's idea house, right down to the paint on the walls. When you enter the house you get a brochure that lists all the details for each room including the paint color and 'ideas'. The cool part? Everything in each room is for sale!

We'll start in the Dining Room, I will list all the Ideas at the end of each room. I tried to keep this post a little more simplified than the ones in the past, hope you still enjoy it!

Dining Room


Hand-carved Hungarian dough bowls hung as wall art and planters
Napkins and metal flower clips used as chair decor
Envelopes as guest place cards
Craft tags as wine charms
Striped wallpaper made from tree wrap
Window valance made from table runner and clip-on tablecloth weights
Hanging glass bottles with jewels added to lampshade to create a chandelier

Kitchen


Newspaper as wallpaper and cupboard decor
Swinging restroom doors used for wall decor and organization
Bin scoops as wall shelves
Wire baskets and plants as window valances
Lighting added to permanent vine ball to create chandelier
Radiator turned into shelving unit
Wicker baskets with decorative forks as utensil storage
Table runner used as a window valance
Planted mason jar mugs and seed packet party favors
Wood drawer turned into wall shelf

Living Room

Statement wall piece made from vintage ceiling tins and medallions with mirrors
Coffee table made from a roof vent cover and mirror on a laundry basket base
Side table made from salvaged wood
Milk can as container/ vase
Salvaged buckets and pails used as planters
Decorative tin panels, fabric and lights added to built-in cabinets

Sunroom


Church pew used as a table bench
Tall, frosted glass vase turned into a table lamp
Twine balls used as curtain finials
Crates used as rustic vase holders
Oversized metal paperclip used as a napkin ring

Lower Level Bathroom

Metal bin drawer used as toilet paper holder
Collage of vintage-inspired mirrors
Iron grate and table runner used as window treatments
Twine holders as towel racks

Front Porch


House numbers cut out of sheet moss
Metal sink used as a potting bench
Clothespins as plant markers
Egg shells as seed pots
Toothpicks and page flags as plant markers
Artwork made from seed packets and springs
Vintage theater seats decorated with burlap letters to spell "GROW"
Seed pots turned into light shades
Suncatchers made from marbles and wood planks
Permanent moss orbs and discs as ceiling art
Lawyer's cabinet used as storage unit

Stairwell

Wall decor made from framed birch poles, permanent stems and canvases
Curtain panels made from oversized shutters
Vase mobile made from bundled birch
Radiator drip pans and doorknob plates used as wall art with coat hooks

Master Bedroom


Headboard made from a wall painting and garden trellis
Salvaged tin nightstands
Writing desk made from sawhorse legs and salvaged wood with postcards under glass
Window frame as standing mirror
Vases and book pages turned into floor lamps
Fireplace screen and vintage photos as wall art
Floral pins as drapery tiebacks
Vase trio as pencil holder
Jewelry organizer made from wall frames and iron twigs
Ceiling light fixture made from garden orb and permanent floral stems

Boy's "Jungle" Bedroom

"Grass Hut" bed loft made from scrapped wood and thatching
Light string made from coconuts
Bamboo pieces cut into dresser handles
Bamboo made wall canopy with permanent green plant accents
Permanent green plants and stems as window valances
Monkey-shaped vinyl decals applied to boards as hanging decoration
Tree stump and grass mat as a table and chairs
Floor lamp and table lamp made from coco basket liners, bamboo & tree rounds
Turtles with magnets as tic-tac-toe wall game
"Grass Path" floor rug to bed made from grass mat
Tiki torches with tissue paper flames

Girl's "Garden" Bedroom

Window valances and light shade made from garden fence
Storage bin labels made from floral candle rings and stenciled fabric
Hardware cabinet as nightstand
Garden gate with metal flowers as headboards
Quilt hoops as wall frames and bulletin board
Children's chairs used as wall shelves
Baby bathtub used for toy storage
Spools used as drawer pulls
Magnet boards made from cabinet doors

Upstairs Bath

Wine bottle holder as towel rack
Keys hung as shower curtain embellishments
Wall case trio used as toothbrush holder
Permanent greens fashioned as window valance
Wine bottles filled with colored water and permanent floral stems placed in window & toilet tank
Wicker vase and wall hooks used for toilet paper storage

Inspiration Den


Barn door hung on wall slides to hide TV
Hand-painted window drapes made with decorative paint roller
Wall shelves made of books
Wheelbarrow cart as coffee table
Windmill base turned into floor lamp
Windowpanes turned into decorative bulletin board
Decorative papier-mache globes
Hand painted table lamp and shade
Wire baskets as DVD & magazine storage
Coin purses as wall mounted storage pockets
Lamp shade frame embellished with keys

Lastly, take a look at these cute ideas in the hallways.  Bachman's did have them listed in the brochure, but I thought they were so clever!  I loved the antique clock in the laundry chute and the lantern near the backdoor entrance along with rustic hooks.

Too many great decorating ideas right?!? Which ones were you Head Over Heels for?

I thought they came up with a lot of fun window valance ideas, but my favorites were the collage of vintage mirrors in the lower level bath and the chandeliers made from the lampshades with hanging glass bottles.

What did you love?!?! What are you inspired to add in your own home?
 The Idea House will be open until April 15th, if you are local make sure you stop by!  It's hard to miss the big pink house :)

If you want more inspiration, here are the links to past Idea Houses: Holiday 2011, Fall 2011, Summer 2011, Spring 2011, and Holiday 2010.  

************************

PLEASE NOTE: In case you didn't read the top of the post, I just want to reiterate that this IS NOT OUR HOUSE and I am not employed or affiliated with Bachman's in any way (which means I did not decorate the rooms shown). I am a HUGE fan of the Ideas House and love sharing it as long as they allow people take photographs when they visit. It seems some people have been confused about that and I would NEVER want to take credit for something I did not work on. There, I feel better now :)

Hope you found some inspiration, thanks for stopping by!

Linking this post up over at Southern Hospitality!

My Simple Spring Mantel (and Bubo)

Kayd Roy4 Comments
Ahhh, Spring is in the air... and in our home now!!!  I meant to get this post up yesterday in time for the big Spring Decor Linky Parties, but had some technical difficulties (nothing more frustrating than that, I am sure you fellow bloggers can agree).  Anyway, I am very excited to get some Spring/ Easter decor started in our house because this year we actually have family coming to visit for Easter!  It will be the first Easter in 5 years that Alex and I won't be alone!  Oh, so many Easter tablescapes dancing in my head!

My first bit of Spring/ Easter is on our mantel... 
Much like last year, I went with muted colors since I am still afraid of pastels in our home.  Alex told me yesterday that I should get over that because he would like to see more "spring-y" colors in our Spring decor.... I told him the Easter bunny is more likely to show up than pinks, greens, and bright blues in our home (at least for now).  Here is a look at last year's mantel:
Side note: These photos remind me to be thankful that I got a newer nicer camera since then, yuck!
And now, here is our 2012 Spring Mantel. Sort of similar I know, but I love the updated and more balanced look.
I only bought three new items for this mantel, the rest were items we had in the house or basement from last year.  One of the new items was this clearance metal bird Christmas ornament from Pottery Barn- picked it up for just $1!!!!  It fit perfectly in the center of our candle holder.
I also removed our candles from the metal candle holder and placed a few faux speckled eggs in their place.
Over on the left side of the mantel, I ended up using the same framed skeleton key burlap that I used for my Valentine's mantel (just removed the felt heart).  I was still loving it as is but I added another $1 clearanced Pottery Barn Christmas ornament over the top of the frame. Behind the frame is an old metal wire charger I got from Target about 4 years ago, still love it! 
 On the right, is another one of the metal chargers from Target (a lot of people that come to our house think they are from an antique store).  Along with the charger is my mini birdcage filled with faux moss rocks. Lastly is that little nested metal bird- another $1 clearance score from Pottery Barn!  Those ornaments certainly worked well for Spring and I love the vintage industrial look.
Now, I can't help but think of that crazy robotic owl Bubo from the original (and way better than the new version) Clash of the Titans movie.  Kind of similar right?  Makes me giggle... I keep calling that ornament "Bubo" now :)
I still think all that crazy claymation is much better than the new version... makes the movie a comedy as well now, LOL!  I think most people are more likely to burst into laughter than turn to stone when they see this Medusa :)

That's a wrap for the Spring Mantel!  Time to link up!
The Lettered Cottage


Be My *DIY* Valentine Mantel

Kayd Roy12 Comments
Cupid must have hit me early (in home decor form) because I am in Looooove with my Valentine's themed fireplace mantel! What makes it even more lovable are the easy little DIY projects that I decorated it with, including...
 ...a framed felt fabric heart backed with skeleton key printed burlap and stacked books wrapped with printed bookends and decorative ribbon.  The bookends spell out lyrics to a sweet song that is special to my husband and I, ahhh the romance!  But romantic quotes or a poem would be sweet too!

First up, let's cover the stacked books with printed bookends tutorial.  All you need are books, ribbon, scissors, and paper to cover the bookends.  I didn't make full book covers because my books have the paperback covers torn off and I didn't think the paper would lay flat enough to look nice.  If you use hardcover books I'd recommend the full covers!
 I decided to print out the lyrics (text) for the bookends opposed to hand writing.  I made sure to space out each line in order to cut out each line of text to add onto the bookends.

 Here is one line cut out (reverse side, text on the other side).  I folded the outer edge so it would appear like a bookend cover instead of a raw edge of paper.
 Then I wrapped the cut out around the edge of my torn paper back (note the folded edge of white paper).

Once I lined it up on the book, I put a crease in the paper that fit the size of the bookend.
 Repeat those steps for how many you are making in a stack and then tie them together with a decorative ribbon! 

***Any guesses on the song lyrics I printed out????***

Now, let's cover the framed felt fabric heart backed with skeleton key printed burlap. Really, this one is pretty simple- take a frame, some fabric to cover the size of the frame, and lay a cut out felt heart on top.
 Ta-da!  Super easy, and super cute!

Here's a look once I got the mantel all set up.  I was really happy with it because it still looks a bit formal and not too cheesy or juvenile, which is often tricky with the pink and red Valentine's color scheme.
 In addition to the books and frames, I got these cute little "XOXO" letter blocks from Target's See Spot Save section for only $2.50. I used them in between each book stack.
 The other framed print is something I made for Alex on our first wedding anniversary (paper is the 'traditional' first first wedding anniversary gift, see the whole list here).
 It is a print of all the addresses that hold a special memory for us- like where we met, where we got engaged, where we got married, etc.  Makes for a cute gift idea for Valentine's Day too!
 Then on the right is another look at the framed felt heart.
 Just simple and sweet all together!

*** Well, have you figured out the song??? ***

(If you haven't heard the song before, you must click the link!)

The reason it hold significance to Alex and I is because his sister Amber and her husband Ryan performed it as a surprise at our wedding reception.
You can't really tell, but I am crying.  Oh, and Amber was only about 3 weeks away from giving birth to our nephew Henri!
Alex and I had never heard the song before our wedding day. We were incredibly moved and touched by their performance.  It is one of my favorite moments from our wedding day!

***** Hope you enjoyed that little romantic side story :) *****

So what do you think of the mantel?

Have you done any Valentine's decorating or projects yet? 


The Evolution of Our Christmas Tree: 2007-2011

Kayd Roy6 Comments
I hope you enjoyed a look at our 2011 Holiday decor last week.  I felt sort of amazed that I was able to fulfill a post for each day of the week, phew! 

It has been really fun to read or hear sweet comments about Our Merry Little Vintage Christmas decor because it's actually just my second time decorating the house for the holidays.  Last Christmas was the first time I tried to make our house look really nice and spirited for the holidays. My (few) attempts before that were pretty sad, but it is kind of sweet and funny to see how holiday decorating has evolved for Alex and I.

  With that said, let's hop in our imaginary DeLorean, bring it up to 88mph, and cruise through Christmases past...because where we're going, we don't need roads. (Sorry, to hard to resist!).

 Christmas 2007: Our First Place, Our First Tree
Behold!  The very first Christmas tree decorated by Alex and I....
Underwhelmed?  Shame!  This tree was in the first apartment Alex and I lived in together when we moved to Minneapolis.  Sure, it is small, plastic (not that it is bad), and sort of skinny, but this tree might be the most memorable of all our trees.  We opened presents together alone for the first time by that tree (sans Rocco & Sadie, life was so different!). I think we only bought one 15 piece red & green ornament set at Target along with the simple silver beaded garland and that was it!  Christmas decorating complete! 

Christmas 2008: Same Tree, Swankier Place
Behold!  The very first Christmas tree decorated by Alex and I.... uuuhh Take Two!
Hmmm, does it look familiar? After our first apartment, we moved into that swanky ultra-modern (teenie tiny) condo in downtown Minneapolis and didn't have much room for extra holiday decor.  So the same tree and ornaments went up (hard to tell with the bad bright photo but it was the same). Alex and I had company though this time after we got Rocco.

 Christmas 2009: We Own a House & Have No Idea What We're Doing!
 Yep, you guessed it, same little sad tree. Who knew it could look worse just by sticking it in a much larger room?  I guess we didn't because up it went without even considering alternative options.  Heck, we didn't even have anything on the walls then though.  We were still pretty new to home ownership.
Sadly, I didn't even take a picture of the tree itself that year (so unlike me, even pre-blog).  These are the only photos I have where you can see the first Christmas tree we had here in the ol' Dutch Colonial.  At least we added more ornaments to it this time.  Yes, the tree and overall decor was still boring/ bare but that Christmas was the first one that we didn't spend with family in Michigan.  It was just us, in our new house, with our own little family (which included our new little puppy Sadie).

Christmas 2010: Starting to Get the Hang of Holiday Decorating
What's that??? No little scrawny tree? Bright, cheery holiday colors? Even stockings?!?! My goodness, it appears to be our first big stab at holiday decorating!
Yes, just last Christmas I finally got into holiday decorating, and now I don't think our house could have any less for future holidays!  It was too much fun, and I think we discovered even more charm to love about our house when it shined with traditional holiday spirit. 
It all kicked off with our new favorite tradition- cutting down our tree Griswold style! Once we got a bigger tree in our house, Alex and I both felt a lot more excited about decorating! We felt so proud and excited about that tree, I think it was our first "grown up" Christmas tree.

Christmas 2011: Our Merry Little Vintage Christmas Unfolds
After all the fun last year, I felt anxious to take another stab at it this year!  I truly loved our previous tree, but I feel like I might have topped it (just a little) this time!  It just feels so warm and special, I love, love LOVE seeing this each night...
And it makes me happy seeing all these little reminders of the Christmas season throughout our house...
I can't lie though, it is a lot of work and I did put a lot of thought and time into it, but it is because I really do enjoy it!  Even when it did make me a little bit crazy for a couple days :)

It is pretty interesting comparing our first tree to our most current. I imagine my 2007 self would be SHOCKED that I'd take the time to do that much decorating! HA!  Oh, how things have changed though!

Now, I have a whole year to think about next year's tree & decor, hehe!

****************

Head Over Heels Friday: Our Vintage Christmas Tree Finale!

Kayd Roy11 Comments
Happy Friday everybody! 
We're finally at the end of Our Merry Little Vintage Christmas decor week!  We've covered our Holiday Mantel, Staircase, Dining Room and DIY Linen Striped Stockings.  Now it's time for the GRAND FINALE... (obviously) our 2011 Christmas Tree!!!
Oddly enough, even though this is the finale, it is the first Christmas decoration that kicked off ideas for everything else! 

After we cut down our tree (Griswold style), I wanted to start decorating right away but I didn't really have any sort of 'theme' in mind for our holiday decor and I was feeling really stumped for fun ideas. 
Luckily, a couple days later I stumbled upon something that made me feel very inspired by Christmases past...
 
These fun and nostalgic vintage clip art graphics from the Graphics Fairy (same place we found our staircase sheet music graphic)!

The site is filled with thousands of free clip art graphics!  I ended up searching their vintage Christmas clip art and found several that were simple black ink prints on a distressed background.  I picked a few that I really loved and printed them out on card stock paper to make tree ornaments/ tags. 
Aren't they fun, simple, and cute?  Not to mention FREE!!!  I love the special touch of nostalgia they added to our Christmas tree.

Below the tree, I couldn't resist adding in a few more vintage touches!
Like our metal lanterns, candles, and one of my DIY vintage style crates...
(Gratuitous holiday Rocco photo included)

There's also something new (well old really) next to our tree that Alex found for only $29.00! This antique cast iron school desk from the late 1800's!!!  We weren't sure where to put it in our house, but thought it would be a perfect side table for Santa's milk egg nog and cookies next to our tree.
But yea, we know this scenario is more likely to happen than Santa coming by for cookies....
I guess Sadie wants cookies for Christmas?

Well, nothing feels more warm and merry than gazing at a beautiful Christmas tree!
 I know I am Head Over Heels for that!


Hope you enjoyed a fun look at Our Merry Little Vintage Christmas decor this week!  I'm ready for some fun this weekend and a little blogging break!

Have a great weekend and be sure to visit all the fun Holiday Linky Parties...