Carla Like It Is

Our "Five Year House" Five Years Later

Kayd Roy3 Comments
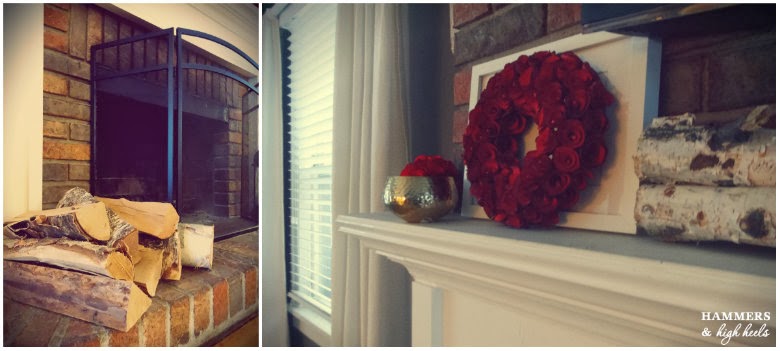
On March 27th 2009, exactly five years ago today, Alex and I walked through our front door for the very first time as homeowners.   It wasn't the magical day I thought it would be (you can read about that story & tears here) and funny enough, things didn't really end up how we had pictured five years later either.  We always thought this house would be a "Five Year House"  but as you can see/read we're still here kickin' it in our old (but totally refreshed) little Dutch Colonial and unlike March 27th 2009, this time, on this day I'm glad things did NOT turn out the way we thought they would.  Our house became so much more than a "Five Year House" for us.

I have no idea if we'll be here for another five years, or one year, or maybe we'll be here for forty years?  Yikes, can you imagine how many times I will have repainted the dining room in 40 years?!  (shutter) I just know that today that I can't imagine parting with it and if we ever do, a part of me will feel heartbroken over it.  This is the first place we made into a real home on our own and it will always hold a very special place in my heart.

Who knows where we'll be five years from today on March 27th, 2019 , I can only assume it will be different than what I'm expecting it will be like today.  I just really hope crying at the top of our stairs again isn't a possibility, that was a real downer :)

How about you?
Have you been in your house longer than you ever expected to be?
What ended up being your perfect/favorite home and why?

What a journey it's been inside these walls!  Cheers to the 5th year!  

Zippered Clutch / Carry-All with Handle Strap Tutorial

Kayd RoyComment
Since I'm still waiting on the new kitchen rugs I ordered earlier this week, I decided to keep busy with a few sewing projects I've been thinking about for a while.  First up, a new take on my Versatile Zippered Clutch DIY  (check it out if you missed it!).  This time, I increased the size and added a handle strap making it perfect for carrying a laptop alone or with a whole-lotta other stuff inside!

Totally beats using a boring laptop case right?!

Onto the tutorial!  One thing to note, I constructed this clutch a bit differently than I did in my first clutch DIY and I think this version is a wee bit easier for constructing the basic zippered clutch part so even if you aren't attaching a handle strap you can still follow this too!

First, cut a single piece of fabric to make the clutch (fabric will fold in half).  I based my measurements off of the size of my laptop so I cut a piece measuring 26.0" L x 16.0".  Once the fabric is ready, fold it in half (exterior fabric out as shown below) and pin the zipper on the top edge.
With the zipper pinned in place on each side, it's time to stitch in place.  To do this and get a clean finished top edge, first stitch the zipper with the metal portion of the zipper facing the fold/bottom of the clutch (left photo above).  When that line of stitching is complete, flip the zipper/top edge over so the zipper teeth no longer face the fold/bottom (middle photo above).  Then do another clean line of stitching, this will give you a nicely finished top edge where the zipper attaches to the bag (right photo above).

After the zipper is attached to both sides of the top edge, fold the bag in half with the interior of the bag showing (left photo below), pin the fabric together and stitch both side edges of the bag.
Once both sides of the bag are sewn together, turn the bag right-side out.  Woo-hoo you have the clutch complete!

Now, let's add the handle strap.  Start by cutting a single piece of fabric to make your handle (you will fold in half like the bag).  I cut my handle to 7.75" L x 3.5" W, so the completed handle would measure 7.75" L x 1.5" W.  The tricky part is that you will fold the fabric, but not in half.  Fold it so you get the width you want and have 0.5" excess (see right photo below).  You will stitch along the folded edge and then fold the excess 0.5" over the raw edge and stitch in place (shown in middle photo below).
After you finish those steps, turn the handle over so the clean folded+stitched edges are facing up (right photo above).

Time for the final step!  Pin the handle wherever you'd like it to be placed on the front of the clutch and stitch in place.

That's it!!!!  Not too bad right?  
Pretty simple and makes for a much more stylish way to tote around a laptop!

What do you think?  Are you liking the new clutch DIY?
What other cute clutches or tote bags have you been seeing lately?  
What style I should DIY next?!?!

I've pinned a few clutches and tote bags I want to try sewing next, who knows maybe I'll have another tutorial for you tomorrow?!  Heck I'll still be waiting for my rugs, oh the torture!!!

My Stylish Kitchen Rug Scores!

Kayd Roy2 Comments
Since completing the new paint job in our kitchen, I've been DYING to take our new clean, simple, black+white look from stark to stylish with the right touches of decor.  First up on my shopping list was a new accent rug or two and after a couple evenings of online shopping I happily stumbled upon perfect options for our space!  I was so geeked that I kept squealing "eek!" throughout the duration of placing my order!   

Here are the two I pulled the 'submit order' trigger on-  both hand-knotted, all natural vegetable dyed, one-of-a-kind original Kazak designed rugs!

Why are they so perfect and why am I being a squealing nerd about them?
Simply put, they totally fit the antique Kilim style rugs from my inspiration board, but the prices did NOT!   SUPER SCORE!
When I began my search, I quickly felt very discouraged after finding so many beautiful "found" rugs that fit the look I wanted but they were all $250.00 or more even small accent rugs, many were in the $1,000+ range.  Don't get me wrong, I know they may fit that price tag due to the base materials or because they are vintage, but heck it's a gorgeous look that should be accessible in some way for everyone and I think I found a well-fitting authentic alternative!

Thankfully, it was the right keyword search that brought me to the rugs of my kitchen decor dreams!  Instead of searching kilim, over dyed, diamond woven, global, etc., I typed in "tribal rug" and boom!  Beautiful budget friendly options in the look I was looking for!
I know $99 & $72 it is still higher than the typical Ikea rug price I'm used to but after buying so many of those rugs that are now in our basement, I wanted to spend the money on something that I will likely want to display in our home for many years. And hey, if for some reason one or both don't work, I'm always able to return for a refund (hoping they are both worth keeping though!).

Ohhhh, I just can't wait to spice up this blank canvas of a kitchen!  Despite my victory the estimated delivery date is March 26th, boo!!!  That is the bad part of online shopping right?  I want it now!!!!
If only Veruca Salt knew the horrors of Standard Delivery service (shutter).   Who doesn't hate that part?  In the meantime, please help entertain me!  I'd love to hear what you think!

- Are you liking one of both of the Kazak rugs I found?
- What other decor would you add to make our new kitchen look stylish and complete?

**********
Note: In case anyone wondered, I was not contacted or offered any discount from Overstock.com for writing this post.  Had that been the case, I may have ordered a larger rug, LOL!  Veruca on the other hand did and invited me to a party with roomfuls of laughter and ten thousand tons of ice cream :)  

Finished with the Kitchen Re-Paint and Onto Decor!

Kayd Roy4 Comments
We've finished up our kitchen re-paint project (woo-hoo)!  Now, there isn't a hint of red anywhere to be seen and it feels so refreshing!  Here's a look at how the new color shaped out from our dining room, into the kitchen, and ending with our kitchen nook.
Did you notice that Rocco sneaked into that bottom right photo?  Dude really loves photo bombing!
Below is a look back too so you can get a sense of the before and after action.  Our red wasn't bad or anything, we were just growing tired of it after five years.  The lighter (white/not white) Wheat Bread color contrasting with the darker (black/gray) Francesca color was exactly what we were looking for- something simple, clean, and a bit more modern  BUT...
Click here to see wood countertops & subway tile DIY or click here to see our original redo project
I have to admit that the new kitchen look is totally BEGGING for some new decor to give it some personality and style.       ***   It's looking a wee bit bare and empty right?   ****

So now it's onto my new kitchen challenge!  I've been on the search for some new decor and storage ideas to bring together the new look in our kitchen.  I guess it's kind of the fun part, well unless everything I want is crazy expensive?  But then it may lead to some extra DIY decor projects!

So here's what I'm thinking we need so far (visuals below):
Wall Art/Decor- Liking the clustered frames look, maybe above the archway to our kitchen nook?
Accent Rug(s)- We really need a hint of color and pattern, maybe a kilim look or stripes?
Storage- Mainly need above the fridge and in our nook, maybe baskets and then wall rails or shelves?
Images via My Hands Made ItMrs. JonesGoogy Dog,  Brigadeiro de Cholher,  MiCasa

*   What do you think?  *
Would you go with a kilim style rug?  Or the stripes?
What other ways would you add extra storage in a decorative way?  I'd love more ideas!

Please let me know if you have good suggestions for rug shopping or where to find the best kitchen storage bins/baskets.  I'm excited to get my shop on!

On that note, I'll close this one with another woo-hoo :)  Have a great weekend everybody!

The Kitchen Colors Come Together

Kayd Roy3 Comments
Things are coming along in our kitchen re-paint project!  It's not a finished look quite yet (we still have to paint that little back kitchen nook), but I was excited to show you where we landed with the whole kitchen color-combo decision!

Since we lived in that dark red/maroon color for 5 years, we found that there just wasn't a color we could agree to live in for however many more (no yellow, green, purple, pink, orange, red, etc. color families).  We also didn't want the whole space to be the white/not white Wheat Bread color for fear that it would look super washed out & bland dining room to kitchen.  So, we ended up going with an almost black paint color to contrast with the lighter tones - Martha Stewart's Francesca to be exact!
It's a blue based dark gray/black saturated color, perfect for creating a clean contrast with our white cabinets & subway tile.  Makes you think of black in a whole new light, right?!

If you're familiar with some of the previous posts from this project, you can see we pretty much stuck with black+white / dark+light type of look from the idea board from a couple weeks ago....
I'm hoping ours ends up with the same simple, clean, slightly modern type of look!  Regardless of that though, it's feeling a lot fresher without that dark red/maroon color for sure!  Painting (mainly the prepping/taping part) sure isn't fun or fast, but I love the new energy it brings to a space- especially one that we spend a lot of time in!  

Finishing up the kitchen nook paint is next then it's time for the more fun parts of the project, like updating the decor to complete the after look!  We're planning on painting the nook the Wheat Bread (white-ish color) since it is a small space, so now I have to ask you...

- For the kitchen nook, would you paint it the lighter Wheat Bread color or do something different?  
- If I do paint the nook Wheat Bread, should I paint the bottom half of the hutch Francesca to bring in some of the darker color?  How would you bring the darker color into the nook?

It's going to be a busy weekend for us but I'm excited to wrap this baby up!  Have a nice weekend everybody and get to bed early tomorrow, I know I hate losing that extra hour when we spring forward :)

My Miserable Morning Errand Run

Kayd Roy5 Comments
There are certain things you know you just shouldn't do during the weekend in the Twin Cities-   Example: visiting the Mall of America and/or Ikea.  You know it's going to be mobbed with misguided out-of-towners, Sponge Bob or some American Idol person clogging up traffic in the Rotunda, there won't be a place to park within a half mile, and the lines, ugh!!!!   Without a doubt, it will be misery. Pure. Sick. Misery.

So why I am telling you this?  Well, when I got up this morning I knew I had to head to get another gallon of paint for our kitchen project and thought, "hmmm, I should go to the Home Depot by Ikea so I can stop to get those new kitchen rugs and while I'm there I can run into the MOA to get couple returns done that have been sitting in my closet for a while."  

Yep I did it, I knew better but I did it and regretted it immediately upon seeing the line of traffic on the highway exit ramp.  Silly me for thinking that the -10 degree weather would scare off the crowds/out-of-towners but no, I was wrong, so very wrong.  By the time I got here it was too late to turn back.  I had come this far and I was determined to get my errand to-do list done.
I was prepared for awful parking but with the on-going construction situation between Ikea and the MOA, the options were even more limited.  I ended up finding a spot somewhere in Richfield (city north of Bloomington) I think?  With the subzero temps and MOA in the distance it was time for some cardio.  Tip for anyone planning a visit-  wear your heavy duty winter gear so you can make it from your car to the inside without risk of frostbite or a broken leg from running over sheets of ice :)
With my game face on I was ready to dodge the crowds... and by game face I mean my no make-up face (fun fact: I refer to that hat as my "no make-up disguise") LOL!  Not my best photo but I think it captures how cold I felt while going to & from the car.

Thankfully I lived to tell the tale after the whole ordeal and crossed off all those to-do's from my list including picking up extra paint for our kitchen repaint project!
We got a big chunk done but had to call it quits so we can catch some of the Oscars.  You might recall I dig some of that red carpet action :)

Any other local folks feel my pain when it comes to a MOA or Ikea visit?  
Will you be watching the red carpet & Oscar show?  Who are you rooting for?

We're going to have our own mini Oscar party now, maybe I'll share some pics and fashion thoughts in a bit?  I can't help myself :)

What We Disagree On Most When It Comes to Home Projects

Kayd Roy2 Comments
Alex and I were asked recently what the biggest disagreement or argument was when it came to our past home projects and we both kind of looked at each other and blurted out our own versions of "choosing/picking a paint color".   It was kind of like one of those Newlywed Game moments where you're happy (or pleasantly surprised) that you said the same thing, but then I kept thinking "that seems silly, why is choosing paint the thing we fight about the most out of all the stuff we've done in the house?" 

Picking a paint color should be easy right?  All there is to it should be looking for ideas, narrowing down to a color group, then grabbing your top color swatches or actual paint samples to slap on the wall for a final decision, and BAM!  You land on the perfect color for a room.  Or heck, it's supposed to be even easier than that if you've seen Home Depot commercials....
I'm surprised they don't have any of those where the someone ends of crying in front of the paint color swatches smack dab in the aisle at Home Depot?  I imagine it's happened there before?  Anyway, with Alex and I the paint discussions and decision making process usually unfolds like this....

***

Beginning:
After some research, loads of Pinning/image collecting, and creating Photoshop visuals, I then happily share 2 or 3 favorite ideas.  Alex's expression shifts from engaged+interested over to confused+upset and he rejects my idea.  
[ Ridiculous arguing ensues and repeats 2-3 times ]  

Middle:
I make Alex think my rejected idea is his own original brilliant idea. This begins with bringing up the paint topic at random moments over one or two weeks but only doing so when I know Alex is really focused on something else (but still listening) and when I know we aren't able to have a long continued discussion.  Examples:  Alex is scrolling through email on his phone, Alex is tinkering with his bike or motorcycle, Alex is searching and watching silly You Tube videos his friends have told him about. 

End:
In the right moment, I bring up the paint topic even mentioning my original idea to which Alex responds with "well that is what I said" or "no that was my idea" or something like that.  I appear confused but happy and say "well whatever, okay, so we agree now though right?" and we happily head to the store for paint and supplies.

***


That process might not work for everyone and I know it sounds super creepy/evil on my part, but that's how we've worked out a decision every time.  The good news I can share today is that we finally made it to that End scene for our kitchen paint project!  YES- The shelves are down, the painter's tape is up, my ugly sweat pants are on, and we're gettin' our paint groove on!!!
At least now you know why it took so dang long too :)  I just keep wondering if other couples have the same difficult conversations when it comes to paint color selection or is that just our hot button house project thing?  If there are some of you out there I have to ask....

Is selecting a paint color painful for you and your spouse/significant other too?  
How do you tackle a paint color selection with your successfully?
If paint selection isn't a big thing, then what is the biggest house project thing you've argued over?

Stayed tuned for more on the kitchen paint project, I'm so pumped that it's finally in the works!

Winter Storm Seneca: The Morning After Aftermath & Why I Had a B*tchin' Good Time

Kayd Roy6 Comments
Surprise!  It's snow storm #19 ya'll!!!  We, along with many other Midwestern folks woke up to the aftermath of our 19th snow storm this winter- this time Snow Storm Seneca, and she was a real monster b*tch  - But wait -  I'm not just going to complain because I had a real b*tchin' fun time in the snow this morning  More on that at the end, anyway...

We had been warned for the past couple days about a blizzard headed our way but when the snow began to fall it just didn't seem as dramatic as everyone had been saying it would be.  Even before heading to bed last night I wondered if it was going to live up to the hype.... and holy crap it did. 

Our reactions to the sight of 10 inches of fresh snow on top of the 2.5 feet we've had since November...
We're Minnesotans.  We're tough, we know snow, we know cold, we deal all the time.  But this was nuts. Stupid Nuts.  

Where did the sidewalk go?  Where are the roads?  Was there a road there or is that a park?  Or maybe it's a parking lot?  Well wait, that's what all highways turned into- parking lots.
Like everyone else that emerged from their home today, we had snow removal at the top of our to-do list. There wasn't an option really, you literally couldn't get out and about without doing some amount of snow clearing, even in tall heavy-duty boots you couldn't just wander on out unless you were up for some serious cardio.

Sadly, we don't own a snow blower, but our lovely neighbor Lisa does and boy were we relieved when she texted this morning offering it up for use!  Again, THANK YOU LISA!  You saved Alex a lot of cursing and me a lot of crying and a sore back :)

It took a while but we got ourselves out of the snow and were able to clear snow for a few of our awesome neighbors!  Alex was a real bad ass with a frozen beard behind that beast of a snow blower....
Ohhh Yea.  That's a Real Minnesotan Man.

What was I doing while the Minnesotan-Man-Machine worked to clear all that snow?
I was doing what I do best- having a real b*tchin' good time playing the in the snow with Sadie :)

Whatever game Sadie and I were playing, I guess she won.  You'll have to watch the video to see what I mean...

At least I had fun in this crazy awful winter storm situation, but I have to pray that winter is soon coming to a close.  If it doesn't, I'm seriously considering moving to Hawaii and becoming a hobo gypsy or whatever.  That just sounds like more fun than this winter crap-ola right?

Anyone else out there dealing with the Seneca aftermath?
How are you getting through it?  Or are you having fun with it like me?

To everyone dealing with Seneca right now... Stay safe, stay off the roads, and keep an eye out for others in need of help!  

Brining a Little Green Inside This Winter

Kayd Roy3 Comments
It's a sizzling 40 degrees here in Minneapolis for the past two days!  I have to say, this heat wave makes me want to put on my short shorts, flim-flams (my term for flip-flops because anything hyphenated along with "flop" sounds sloppy), and sip a salty rimmed margarita!  I know I wouldn't actually go that far-  But picture it, Sicily Minneapolis two weeks ago it was -20.  So, this 60 degree difference feels AMAZING!   Honestly, it really does... ugh, sick isn't it?  Why do I live here again?!

Anyway, this heat wave got me thinking (and hoping for) Spring so I grabbed a couple plants to do my own mini version of indoor gardening.   I have to get all of them into their little pots but I have a couple in my cute little copper vases under glass domes/cloches on the radiator bench/cover back in the sunroom.  I think they fit nice in that little reading nook and they'll get a good amount of sun there!

Perhaps it is kinda lame or comes from the "old lady" side of me, but there is something about seeing the green and watching the plants grow that seems to help me get through this last dull/dead stretch of winter.  I guess it just makes me look forward to doing actual gardening outside in the sunshine and we'll get to use Alex's DIY raised garden beds again this Spring!

What do you do to help get through the last dull stretch of winter?
Anyone else doing some indoor gardening this winter?  What plants do you typically choose?

Thank you to everyone that gave us comments and suggestions for our kitchen paint project!  Alex and I are still debating (and that is putting the discussions lightly) but I'm hopeful we can come to an agreement on paint and get started on it this weekend!

Kitchen Paint Project: Planning & Color Ideas

Kayd Roy12 Comments
With our kitchen color update next up on our project list, I started pulling together images of my favorite color choices.  I've also learned that it helps to have a visual in order to explain my idea/plan to Alex :) and you can let me know what you think too!

As you can see, I'm leaning toward the black and white type of look for the most part otherwise keeping lighter brighter and still neutral similar to the look of our dining room....

I guess I just worry if it's all light, bright, and neutral (same paint color from dining room into the kitchen), it might just look too boring or washed out or like we're in an apartment that we can't add color to?  What do you think?

If we got the black and white route, I think our black would be more of a very dark gray and we'd keep our kitchen cabinets white- I shared those darker cabinet pics and said "Oooo want to repaint our cabinets a darker color like this???" and Alex replied with a polite "Hell no."  Maybe I'll save that idea for our next house?!

Anyway, I guess that is where I'm leaning toward right now.  The tricky part is that we probably have to continue the same color along the wall leading from the dining room into the kitchen- Right?  It'd be weird to have a blunt taped off color transition?
I think that is an interior design rule, and I haven't found any photo evidence of this being done in a tasteful way but I could be wrong.   Please help me figure that one out if you can!

If that wall in the kitchen remains the same as the dining room I'd love to do a darker color on the wall it meets with...  Or the kitchen could just be that color throughout and we could do a darker color in the kitchen nook and in the alcove where the oven sits perhaps????  What do you think?

My brain has been bouncing between options so I'd love to hear if you have any ideas or suggestions!  Again, also let me know about that taped-off paint line thing- Is that a rule or not a rule?  It just looks funny to me right now since I've been looking at where we stopped from the last paint project but who knows, maybe there is a tasteful way to do that?

Hope everyone has had a nice week so far!  Oh, is it just me or did Valentine's Day sneak up awfully fast?  I better get a card  I'm looking forward to a nice dinner with Alex, anyone else doing something special to celebrate too?

High-Tops to High Heels: The Origin of My Heel & Height Obsession

Kayd Roy5 Comments
I'm still searching through kitchen paint ideas, but I thought I'd kick off the week with a fun little story about yours truly and where my high heel obsession may have originated.  Funny enough, I hatched the idea for this post a couple weeks ago when my dad was in town for a visit because it's kind of his fault.  You'll have to read through the rest to understand :)  This ones for you dad!  Hope everyone else is game, here we go!

Now, I know you see more of my hammers/DIY-ing side here on the blog, but outside of that stuff I am in my high heels everyday just as it says in my blog header.... total truth, you can ask anyone.  Anything from dates with my hubby, long work days, bike riding, factory visits/meetings, or even trekking through Europe's cobblestone streets- I'm well heeled at all times!

I may head in and out of work in winter boots or flats but I am rarely seen without my heels at the office or out doing social stuff with friends on the weekends.  If I am seen without my extra height, I often hear things like...
"It's so weird seeing you without your heels," 
or 
"You're so short without you tall heels on," 

And the funny thing is that I agree!  I'm right around five feet tall and I'm not used to me without an extra 3-5 inches of height (did you notice I can't even just flat out say I'm five feet tall?).   Yes, I admit it's weird, but it's just a weird-uniquely-me thing the way I see it :)  On the flip side, when I do have my heels on the other most common question I hear is...

"How do you walk in those?" 

And that is easy to respond to because I walk in my big ol' heels pretty easily because I am used to it and here's where we circle back to my dad's whole role in this...  and yea that sounds like an odd segway but it's not, promise, keep following!

As a kid, I was always the shortest in my class, from pre-school all the way through middle school.  Then for the most part I was still one of the shortest through high school.  For reference, here's a visual from my pre-school Spring Program in 1989.
Note- I am a whole head shorter than all of the other 5 year olds, the ducky head cut-out highlights that really well right?
For what I lacked in height, I made up for with courage in the form of doing things that the tall kids were afraid to do.  And wouldn't ya know it, my older sister of all people was one of those tall kids that was afraid of a whole-lotta things.  Included among those things was amusement park rides and I mean everything outside of your basic sit on you buns carousel ride.  I on the other hand, was not!  Yes, I wanted to go on all of the tallest, fastest, and scariest of roller-coasters anytime we went to an amusement park back then, the only problem with that was the standard 48" height requirement for those kind of rides-  a big problem for a peanut like me.   

Now, the average height of a six year old girl is 46" and at age eight it is around 50", however at eight years old I was barely reaching 46" tall.   So, what did my dad do for his little Peanut?  You bet'cher buns he didn't tell me "Nope, you can't do that, you are too small," and he certainly didn't want me to endure the disappointment of such height discrimination.  Instead, my dad did what every dad shouldn't should do...
He took me to Payless to find that tallest LA Gear high-top tennis shoes available, bought them, then balled up thick socks, stuffed them into the heel of my shoe and BAM!  I was just over 48" tall at last!  Bring on the big scary roller coasters!!!!

So there you have it-  
I traversed many of the nation's finest amusement parks falsely representing my height using high-tops and a couple big ol' wads of socks thus becoming my first version of high heels and experiencing the power that a young lady in tall shoes could have over society.

For that, I thank you dad.... Who knew?!
Photo of my dad and I, still a Peanut really without my heels on :)
*** DISCLAIMER: We do not recommend or condone the faux representation of height in small children for the purpose of participating in amusement park rides as it could result in harm, death, or dismemberment.  Boy, parenting must have been easier in the 80's???  Hmmmm... thank goodness nothing happened to me dad!!!  ****

A Kitchen Color Update & Our Year Old Butcher Block Countertops

Kayd Roy3 Comments
Hosting our Super Bowl shindig last weekend made Alex and I realize a couple things in our house...

First up-  Our wood countertops.
The day before our party, Alex oiled our butcher block countertops and that made him realize that we've had them for a year now because we debuted them to friends at last year's game.  Back when we shared our kitchen redo 'after' photos, we had a lot of comments regarding our choice to leave them as is and use mineral oil as instructed to care for them instead of doing a Waterlox type seal on them so I thought I'd share an update on how they are looking now.

Alex has oiled them 4 times as recommended through the past year.  It is pretty simple, just apply with a brush, allow an hour to dry, then wipe clean with a dry cloth.  I snapped some pictures of the process when he was in action last Saturday....

They still seem to be holding up well and look just as nice as they did when we installed them.  I'm still quite happy with our choice and continue to love the look in our old little Dutch Colonial.  They just fit perfectly!

Now to the second thing we realized-  The kitchen needs a new paint job.
Do you remember that paint job we finished in the Dining Room last October???

Well, yea.... that paint job should be continuing into the kitchen and we better get on finishing that up!  This whole taped-off blunt paint line is a bad look (shutter).

I'm pretty sure we have to keep that consistent color along that wall, but I'm wondering if we can incorporate an additional paint tone onto the other walls that compliments the dining room paint color?  Hmmm....

I'd love to know what you would do, if you have ideas please let me know in the comments!!!

I'm going to start pinning some ideas :)  I'll let you know what I'm leaning toward before I buy the paint!  Be sure to let me know if you have ideas or suggestions!

A Look at Our Super Bowl Shindig

Kayd RoyComment
All of that party noodling I did last week seemed to pay off because we pulled together a pretty decent Super Bowl shindig yesterday and I think everyone had a great time!  Goodness knows Alex and I did because getting up at 6AM and heading into work this morning was pretty rough :)  Hope we're not alone on that feeling!  (AHEM) Anyway...

Here's a look at some of the set up, food, drinks, and good times that were had last night!
When it came to the food and drink set up, I chose to stick with using things like butcher paper, cutting boards, and chalkboard signs since they all kind of gave that classic gentleman's pub kind of feel.   I had a lot of fun doodling and writing on the butcher paper too!  To compliment the paper-y look, I cut down paper lunch bags to use for individual popcorn servings.
When it came to the drinks, I knew we were limited on space since we had to fit everything onto our sideboard but those four mini beverage tubs ended up working out great!  We used two of the tubs for beers and and the other two for make-your-own Bloody Mary and Margarita bars.  The chalkboard signs and dessert stand rounded out the sideboard- and who doesn't like some sweets with their drinks?!

That covers the food and drinks, so now that you're full and tipsy let's get to the party!
As you can see, the food probably had a better showing than the Denver Broncos :) and since they didn't make it to the end zone very much, Alex and I did our end zone touchdown dance for them.... Or  maybe we were just being idiots??!!??  I mentioned this morning was rough right?
In the end, we had a blast and I'm glad everything worked out!  Wonder if we'll host again in 2015, hmmmmm?

So how about you?
Did you host or attend a fun Super Bowl shindig too?  How did it go?
What were your favorite foods, drinks or games?
Lastly, I have to know if anyone else was hurting this morning too?

Why is the Super Bowl on a school night anyway?  Just seems like poor planning if you ask me!  Hope everyone had a fun night still, now it's time for me to catch some needed zzzzz's!   

Superbowl Party Planning. Game On.

Kayd RoyComment
I've been feeling bored/bland/uninspired lately, but thankfully the most unexpected thing came along and got my creative juices flowing again- Football!  Well not football specifically of course, you know I'm talking about Super Bowl Sunday and I've got some party planning to do!

Alex and I had been thinking about having a few friends over to watch the game but it was just yesterday during work that I got an text from him that said "I sent the invites out for Sunday. The game starts at 5:30 so I have it scheduled from 4:30-10:00."  Confirmed, Super Bowl party is on. I responded with a quick "Cool, I'll start pinning ideas!!!!"  Then he said something like "Don't over complicate things darling"  Ahhh my husband knows me all too well :)  But without any other big projects going on and a bad case of the winter-blahs, I was pumped to noodle on party ideas!  I also wanted to do a bit more than slapping a bunch of pizzas on our table like we did last year- nothing wrong with that either though!

I've been looking for food ideas, drinks, decor, and perhaps even a game during the game?  Curious about what I've been noodling on so far?  Here's a look!
Bingo game via Style Me Pretty  |  Beer Beverage Bin via Evite  |  Bloody Mary Bar via Southern Living  |  Wings, fries & butcher paper via Making it with Danielle  |  Beer tub & popcorn set up via Target  |  Wings & blue cheese dip via The Dinner Concierge  |  Home made kettle chips via William Meppem  |  Butcher paper & food bags via Party Frosting  |  
I'm totally loving the idea of using butcher paper or small paper bags for serving- with that, simple bar foods like wings, chips, pretzels, peanuts, fries, and some kind of dip (Super Bowl requires dips, not sure why but it just does) seems like a good plan and do-able for a person like me who hates cooking :)   My favorite though is the bingo game idea since commercials are a huge part of the whole Super Bowl experience and a little more interesting/interactive than just betting on the game.  What do you think?

I'll be sure to share pics from our little super bowl party to let you know how things turned out.  I admit that party planning and entertaining isn't a skill I've mastered yet :)  I always have fun with it, but things typically don't turn out the way I hoped or I end up scrambling at the last minute.   We'll see, wish me luck!

What do you think of the Super Bowl party ideas?

What other food, drink, game, or party decor ideas have you been inspired by for your own party?

Do you have any party planning or entertaining tips that might help me?  Please share if you do!

Winter Wonderland to Winter-Bland

Kayd Roy1 Comment
Blah.  I don't know about you, but I find this time of year particularly uninspiring... and boring.  We're past the holiday excitement, the new year celebrations, and what was once a cute winter wonderland has now become plain ol' winter bland.

That is exactly how our house has been feeling too lately- bland and blah.  I decided to warm up our mantel with some mini red curled wood wreaths as a Valentine's nod but beyond that things are still feeling pretty boring around here.

Anyone else feeling the winter-bland and blahs kind of feeling?
Where have you found some home decor inspiration for this time year?

I've been going a little crazy Pinterest-pinning the last couple of days, hope to get some fun decorating ideas to spice things up around here.  We'll see!  Have a great weekend everybody!

The Year of 30

Kayd Roy3 Comments
And so it begins for Alex, myself, and many friends of ours... this is the year all of us 1984 born babies turn the big 3-0.  Thankfully, my handy hubby is blazing the trail for me and perhaps many more of you out there!  Today, my handy husband is celebrating his thirtieth birthday!

All I have to say is a simple birthday wish to my love- 
Here's to a year filled with courageous things, followed dreams, and the pursuit of happiness every day.
HAPPY 30TH BIRTHDAY ALEXANDER!

My New Workspace Set Up!

Kayd Roy3 Comments
Ready to get a look at a new room in the house AND see where those newly painted crates went?!?  Of course you are!  Here's a look at my new workspace...
I've been working on turning this little space into my workspace since finishing up my whole closet room set up.  You might be able to tell from the photos but this workspace is the opposite end of my closet room (accessible only through our Master Bedroom).
So it's basically a single long narrow room serving two purposes- Both just for me!

It's a pretty simple set up using some older furniture we had but I did purchase the chair for $15 and the spaghetti lady artwork for $20 (both from Ikea).  I'm pretty pumped to finally have a space where I can work on projects as well as store and organize all the random sewing/crafting stuff I've collected over the years.  NOTE: I refuse to call it a "Craft Room" because then I'll feel like a tacky old lady... and yes, deep down I really am... so I guess the phrase just irks me.

Now to those old crates that got a fresh paint makeover during my Arctic Vortex boredom spell!  Puzzled together and stacked up, they ended up creating the perfect shelving unit to store fabrics and the smallest size made for a nice storage bin....
You might remember those crates from LONG ago DIY project where we made a shelving unit out of crates on caster wheels?  I think the new white painted finish is a nice change giving them a cleaner, more modern look.  Gotta love an easy way to freshen up something you grew tired of and stashed in the basement right?!

I'm sure my little workspace will keep evolving (like every room seems to) but the only things I still need as of now include desk storage/organization type items and a desk lamp.... I think?  Hmmm

What else should I add in my workspace?
How do you set up or organize your office/workspace?
Are you liking the look so far?  What should I change up?

***  I'd love to hear your suggestions and/or what you think of the space, let me know!  ***

Award Show Kickoff! Thoughts on the Fashion & Films?

Kayd Roy2 Comments
I know this isn't a typical blog topic, but since it's something I enjoy following along with I thought you might too?  So let's chat!

Award show season is upon us!  You know what that means right?!  Yes- movies, TV, but more importantly is the red carpet fashion!  I can't help it, the high heels side of me is a total sucker for all the red carpet news coverage and there's plenty of it going on tonight for the Golden Globes! So before we get into TV & movies up for awards, I have to ask the most important question first...

Who's red carpet look are you digging most?  Here's who caught my eye...  
Leslie Mann in Dolce & Gabbana, Reese Witherspoon in Calvin Klein,  Margot Robbie in Gucci, Olivia Wilde in Gucci Premiere, Channing Tatum in Gucci with wife Jenna Dewan-Tatum, Amber Heard in Versace
Okay, onto movies and TV!
I admit that Alex and I were (again) pretty lazy around the house, but thankfully we were able to get out and about this weekend!  We decided to check out a couple of the most buzzed about movies which included American Hustle and The Wolf of Wall Street.


Have you seen either film?  What did you think?
Did American Hustle live up to the hype?
Was The Wolf of Wall Street offensive or did it depict a true crazy story well?

We saw Dallas Buyers Club a few weeks ago, but there's a bunch more we still need to see- 12 Years a Slave, Gravity, Her, Captain Phillips, Nebraska, and August: Osage County.  Geeze that is a lot to get to- Which films should we make sure not to miss?

When it came to TV, Alex did a serious Breaking Bad marathon.  I caught most of the first, second, and last seasons.  Gotta give it to Brian Cranston, he's the man in that role!  We're cheering him on tonight for sure!   That said... 


Who are you rooting for at this year's award shows?
Did anyone get robbed?

************************

I promise to share that other DIY from last weekend this week!  This is what I painted but what I am doing with them will be a lot more fun to look at, more to come soon!

Versatile Zippered Clutch DIY!

Kayd Roy7 Comments
Hello from Antarctica Minneapolis!  It's 1 single sexy little degree this evening here in the Twin Cities, well on our way to a balmy -17 for the night.... ahhh the splendor of the northern midwest!  I'm happy to report that I did in fact get my buns off the couch over the weekend for some DIY action!  I decided to tackle the DIY clutch bag idea first (link to inspiration here).

So glad I did!  How simple and cute is this little zippered clutch?!?!
If you have experience using a sewing machine, it's so SUPER easy to make one of your own!  I whipped one up in about 20 minutes..... sew easy, I decided to make two clutches!

All I needed was some leather or faux leather fabric, scissors, zipper, sewing thread, sewing machine and pins.  I cut the leather/faux leather to the size I wanted and found a zipper to fit.  The gold one above measures 8.25" x 11.0" (fits and iPad perfectly!) and the larger one I made measures 10.0" x 14.0, perfect for throwing a good amount of random crap in :)   Curious how to make one? Let's get to it!

Here's how I tackled making one of these versatile little clutch bags! 
Start by cutting two pieces of fabric for the front and back of your clutch.  The photos below are of the 10.0" x 14.0" clutch I made so I cut two pieces of my faux leather fabric, both 10.0" x 14.0" in size.


Then it's time to get the zipper stitched in place along the top edge/opening of what will be the front side of the clutch.  With this step, I pinned the zipper in place face down along the top edge of my faux leather then stitched in place.  Once that step was complete and the zipper was attached to the fabric, I turned the zipper face up and did another line of stitching on top of the leather 2mm from the seam where the leather and the zipper meet.
The extra line of stitching provides a cleaner look and allows the zipper to sit flat once the bag is finished :)

Next, you need to attach the back side of the clutch fabric/ faux leather to the zipper.  Take the second piece of faux leather and place it on top of the first piece and line it up with the zipper (make sure the right side of the fabric is faced down as shown in top right photo below).  Stitch the second piece of fabric attaching it to the other side of the zipper.  Then with the zipper attached, lay both right sides of the faux leather face up and stitch the back side fabric 2mm from the zipper & leather seam (top right image below).... You will basically repeat the steps you did for the front piece of fabric attached to the zipper.
Once you have the zipper completed, place the back fabric piece on top of the front so the wrong sides of the fabric face out and then pin together.  Next simply stitch along the three outer sides 0.25" from the edge of the fabric.

That's pretty much it!  Then turn that sucker right side out, situate the zipper a bit and you are done!
Super easy if you know your way around a sewing machine right?!?!

I have to tell you that I've been calling the larger version my "work clutch" and I LOVE IT!  It's totally useful for the office- Instead of carrying a big ol' purse around or stacking little random stuff on my laptop when I'm on the go to meetings, I've been stashing all the goodies I like to keep on hand in my new little "work clutch"....  (cell phone, pen, pencil, measuring tape, iPad, mints, credit card, etc.) 
The Work Clutch idea is pretty b*tching right?  (sorry I am obsessed with b*tching lately for things I love)!

Aside from the DIY clutches, I tackled one more little DIY project during the Arctic Vortex :)  The second coat of paint on project #2 is drying and then I'll get it all gussied up to share!  Stay tuned for more DIY action!


What do you think of the DIY clutch?!? What color fabric and zipper would you use if you made one?
What project do you think I tackled for DIY #2?!?!
Did you tackle a fun DIY while you've been stuck inside due to the nasty weather?

In Need of a Fun DIY While I'm Stuck Inside

Kayd Roy6 Comments
Anyone else feeling like their January is off to a slow start?  It is BITTERLY cold here in Minnesota- like high of -20 degrees kind of cold, -40 if you factor in the wind chill temps.  Unreal right?!  I am worried if I leave the house my nostrils and eyeballs will freeze!  So what have I been doing while trapped in the house?  Naturally, I've been sitting around in my jammies watching Bravo and pinning things on Pinterest with the dogs piled around me :) Hmmm, does that even count as doing something? Ha!

So, since I'm stuck inside I thought I could tackle one or two of the DIY ideas that I pinned....

I think most of the nation endured snow storms and a killer cold snap this week with sub-zero temperatures on the way starting tomorrow, so I figure I am not alone on this "I'm trapped in the house with nothing to do" kind of feeling.  Come on, help a gal get her buns off the couch :) 

What do you think?  
Which DIY project or two should I tackle?
What projects are you taking on if you are stuck inside this weekend?
Do you have a fun DIY project idea you've recently completed?

Stay warm this weekend!