Carla Like It Is

The Dining Room

Can You Guess What's Behind Old House Style Door #1 and #2?

Kayd Roy4 Comments
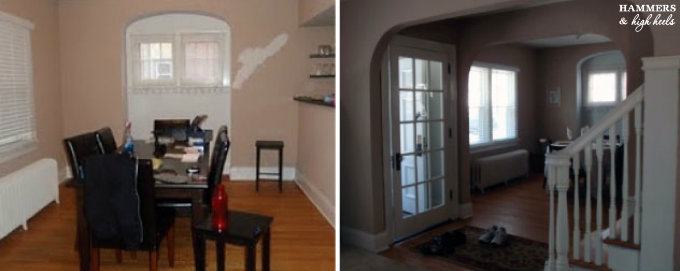
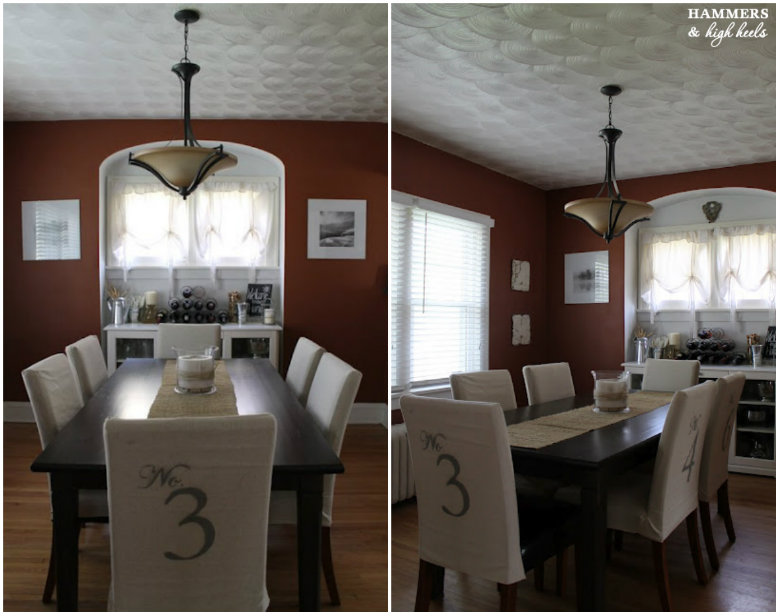
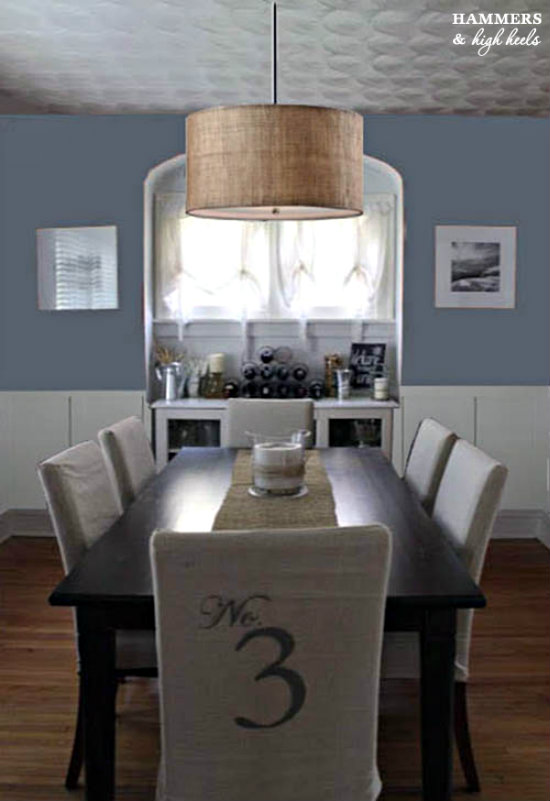
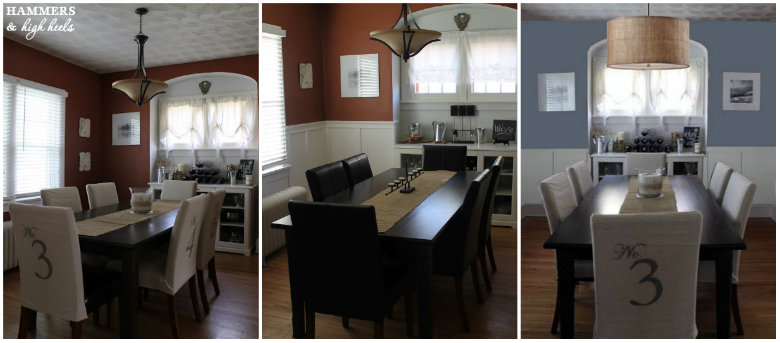
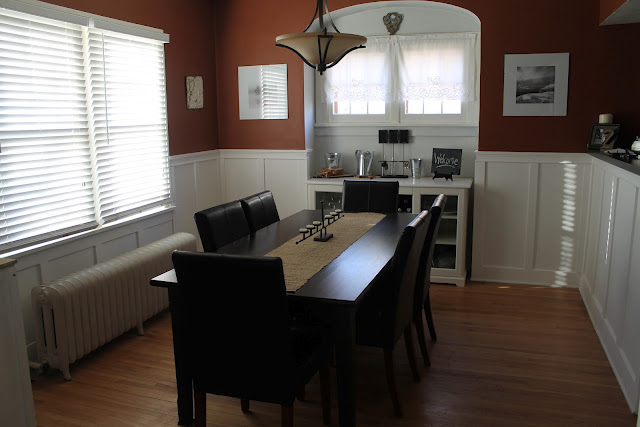
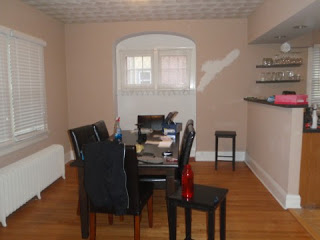
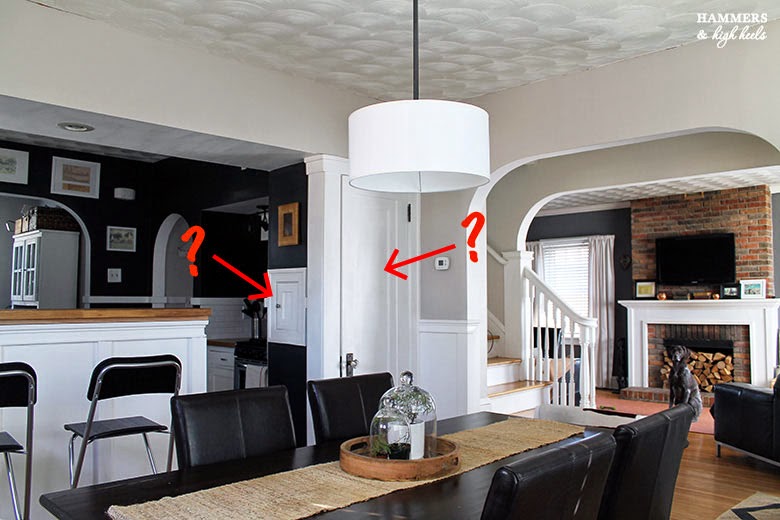
A couple weeks ago I shared new photos of our Dining Room along with a view of the room looking into the kitchen and living room.  This was a view I haven't shared photos of before on our blog and I think it cleared up some questions we've gotten regarding the layout/floor plan of our home- but that led to a new question...

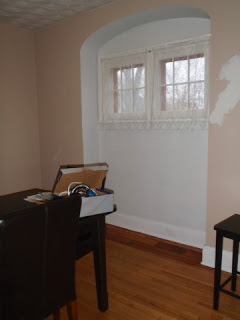
What's behind that skinny white door and what's in that smaller white door halfway up the wall?

Here's a look at the full question that Dayna wrote in the post comments:

What a great question!!!  I can't believe I've never talked about those little quirky details in our old house!  So glad you were curious about them Dayna!  Of course I'll share details about those mystery doors, thank you for the fun post idea!

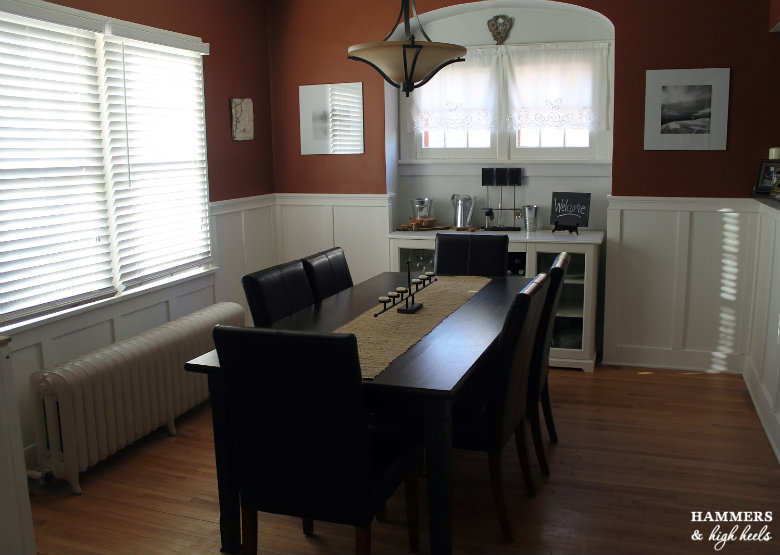
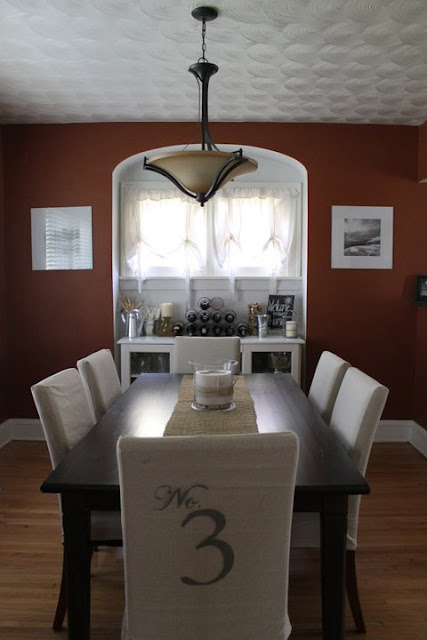
Let's start with the quirkier of the two- the small door halfway up the wall.  Any guesses?!?
If you guess laundry chute, then you WIN!  That little door halfway up the wall is the laundry chute door on the main floor of our house.  I guess it's convenient if you have lots of dirty kitchen towels or table linens to deal with?

I guess we get more use out of the other laundry chute door that is on the upstairs level of our home which sits between the doors to our guest room and office Alex's winter cycling training room...
Because that is where all the wardrobe changes occur, take it off and send it down the chute!

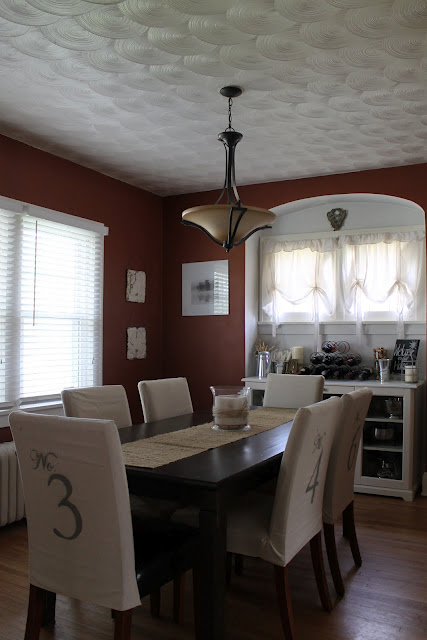
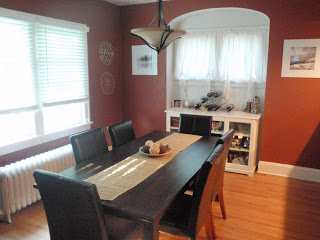
Now back down to the dining room!
Any guesses what's behind that tall narrow door next to our staircase?  If you guessed the actual laundry chute then you WIN - well - you half win because it's also our coat closet.  Ahem, mini and kinda icky coat closet.  It's an odd space, so nothing too fancy about it.
Coats, two-tier shoe rack, wall mounted mail & sunglass storage, and upper shelf for bike helmets & hats, gloves, etc.
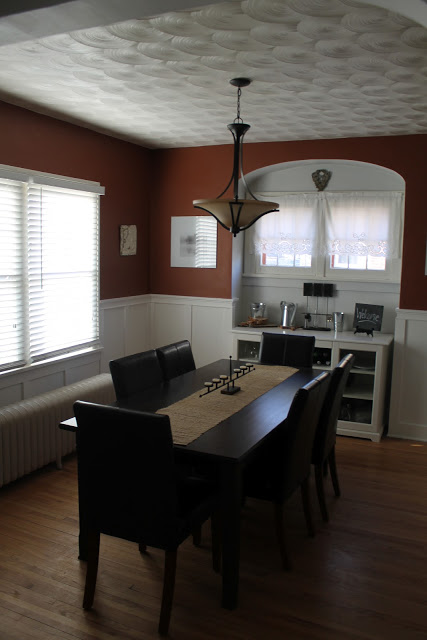
As you can see, the chute takes up a good chunk of what could have been (or still could be?) extra storage space for coats and shoes near our front entry.... but who cares!  (sarcasm font)  It's the high-speed highway down to our electric washer and garment wringer in the basement!
Never had taken a photo looking down the chute, so dark & dramatic, sort of like wearing sunglasses while doing laundry?!
Had to make a little joke with that one :) I can't lie, it is a total pain going up and down two floors several times on laundry day - BUT - I don't think I'd ever have the heart to tear out the old school laundry chute since it is an original feature in our little 1924 Dutch Colonial.  I'll just try to look at the upside- I'm doing loads of stairs along with several loads of laundry which seems like efficient multitasking!  

So there you have it, no more mysteries behind those quirky old house doors! What'd ya think?!

Did you guess that little door was a laundry chute?
What about the coat closet?  Waste of space?  
How would you improve the closet without changing the overall small/awkward storage space?

Five Year Refresh Week #3: The Dining Room

Kayd Roy5 Comments
Ready for room #3 in our Five Year Refresh Week?  Let's take a fresh look at the Dining Room from a whole new angle!
Did you catch my Sadie pupper in that photo?! She's stealthy and adorable!
The 'new angle' part is because I don't think I've ever shown a photo of our house from this corner of the dining room looking into the living room and kitchen.  Gives you a new viewpoint on the layout of our house right?  Aside from the new view though, the dining room itself is looking quite different from before!

After we finished up the new look in the kitchen we had to make some changes so that the two rooms flowed together well.  Here's a reminder of how it looked the last time we shared photos of it....
Still fresher and nicer than the previous red paint look, but it still needed a cleaner, simple, slightly more modern touch to match the new look and feel in the kitchen.

So, I made a few changes and I think this style fits us much better now...

Some of the changes you might have caught are the new dining chairs, barstools, and some wall art.  We had been getting a little tired of our dining room table & chairs, but instead of getting a whole new set we decided to get two new chairs (Ikea Nils chair $79.00) for each end of the table to give it a little bit of a new look.
I draped two cowhide skins over the end chairs to add in touch of pattern (and fun?!)
We decided to add barstools (Ikea Franklin barstool $39.99)  as well by the dividing wall to the kitchen because whenever we have guests we seem to gather around there (our Superbowl party is a good example)...
The tough part is that the dividing wall used to be a whole wall with upper kitchen cabinets and it was opened at some point by a previous owner and were were unable to lower the height of that top counter top due to electrical wiring inside the wall (which is maybe why that previous owner kept it at the height?).
So, it is slightly higher than typical bar height but we've been using those two stools like crazy... why the heck did we wait five years to get them?!?!

What do you think of our updated Dining Room space? 
Do you think the looks pairs better with the new look in our kitchen?
What about using new end chairs at the dining table to give it a newer look without a whole new set?

***********************

If you missed any posts from my Five Year Refresh Week, click the links to see room #1 The Living Room and room #2 the Vestibule 

Our Latest Project Reveal! New Color & Lighting in the Dining Room!

Kayd Roy7 Comments
It feels like an extra fun and special Friday because I get to share one of the best kinds of posts there is- A completed project and room reveal!!!  (Those are the best right?)  As promised on Wednesday, I rounded up some new photos of our updated Dining Room along with some 'before' and 'after' looks.

So, I might as well start with the 'before' and 'afters'- Here's our Dining Room before with the dark red we grew tired of....
... compared to our new Dining Room look!  It's lighter, cleaner, neutral, and feels a bit more modern but still fits nicely in our old colonial style home.  I'm just in love with it and all we changed was the paint color on the walls and did a DIY update on the pendant light fixture.  Almost seems to easy peasy for creating a different look right?  Makes me love it even more!
When it came to color, after four and a half years of dark red (Behr's Sequoia Grove) it was certainly time for a change.  Adding the new wainscoting last year helped brighten up the room a bit but we both agreed the red had to go...
The not too gray, not too white, not too taupe color of Behr's Wheat Bread turned out to be perfect!  It contrasted with the white wainscoting just right without being too dark, it's a great neutral shade!  We chose the Behr Premium paint option since we knew covering red might be a challenge and it seemed to cover nicely with two coats.
When it came to the light fixture, I had been looking at Drum Shade pendant lights for a while and began to wonder if we could just take apart the pendant light that was there and add a shade around it.  We had an old plain white large drum shade from Ikea in our basement so I thought we could toy with to see if it could work.  Turns out, it did!  DIY surprise!  Not sure if the same thing would work on other hanging pendant lights, but if they are similar to the style we have then it might!  Here is what Alex did to DIY our new light fixture....
He started by disassembling the old light fixture since it came in parts when we purchased it.  The bottom bracket that held the bowl was the first step, then the glass bowl, and lastly the metal bars that accented the hanging rod.  All that was left was the rod and light bulbs.  Sorry I don't have photos of all the steps, I didn't think it was going to work so I didn't have the camera ready :( hope you get the idea still!
Alex then took the drum shade, flipped it upside down so the part that would sit on top of a lamp base harp could attach to the screw cap and bolt that the old bowl pendant had attached to.  So easy!  The only thing I need to add still is something to cover the bottom of the shade so you can't see the bulbs :)  Maybe when I figure that out I can post a better tutorial with all the steps and photos!

That's pretty much it for the bit changes, I guess the only cost to revamp the look was the $32 we spent for the can of paint! Crazy right?!?

When I started putting the room back together I also updated a little bit of the decor.  I decided to add in some floral/foliage arrangements like I did on our mantle since I loved it so much (and they are FREE since it is just pretty foliage from our yard, love it!).
I also decided to add in a new table runner when I found this one during a Target trip for $17.99.  Thought the lattice print with the burnt orange border was cute for fall and not too themed!  It was so hard to ever find a cute table runner that went okay with that dark red paint, now I can decorate with any color scheme really, woo-hoo!  Oh, just think of the possibilities for Christmas decor!!!! 

Well, I guess that's it! 
So what do you think of the new look and new color?  Should I update the black and white wall art next since I'm no longer fighting that dark red color?  Let me know!

Alex and I are doing our annual Pumpkin Carving challenge tonight!  (hehe, I'm betting on me to win.... again)  Have a great weekend everybody!

Dining Room Repaint Preview!

Kayd Roy2 Comments
We're getting things put back together and close to finishing up our Dining Room Repaint Project!  I'm so dang excited about the new look and can't wait to share it all but for now, here's a little preview pic....
I can't wait to share it all along with some before and after shots- You know I LOVE me some before and after action right?!?  It's so dramatic!!!

I'll have our dramatic conclusion post up soon, stay tuned!

Dining Room Paint Project & Progress

Kayd Roy8 Comments
We kicked off our Dining Room Paint Project last Sunday and sadly didn't get much further on it during the work week, but here is a look at where we are at...
So why the big color change?  Well after four and a half years cooking and dining in the dark red, we were both just plain sick of it. The dark red kept making everything look and feel too traditional country kitchen or something.  I know we liked the color (Behr's Sequoia Grove) when we painted almost five years ago, but I guess it just doesn't reflect our style much anymore.  It was actually pretty funny how easy it was to agree on repainting, all I said to Alex one day was "I'm kind of sick of the dark red color, it feels so old and too traditional, I'm just feeling sick of it" and he replied with a simple "Yea, me too, let's pick out a new color."  I have to say it was probably the easiest project decision we've ever made together- but then there was the color choice of course.

When it came to a new color I knew I wanted something lighter, cleaner, neutral, and really just something that felt a bit more modern.  Most of the rooms I've been pinning all have sort of a black and white or white with warm neutrals with a little color pop going on....
Images via Dream Book Design, French Design, Interior Bloggen,  

So after much debate over said neutral color, we decided on Behr's Wheat Bread.  It was the perfect not to gray, not too white, not too taupe color we were looking for!
Like I said, not much progress during the week but I'm pumped to (hopefully) finish up all the painting and maybe even install a new light fixture this weekend. 

Woo-hoo, here's to high hopes!!!!  What are you working on this weekend?

Head Over Heels DIY Friday: One Room, Three Ways

Kayd Roy3 Comments
For this week's DIY, I was inspired by Layla's One Room, Three Ways post over at The Lettered Cottage and thought the Dining Room would be fun to use for the challenge!  Afterall, we've revamped the space in stages, so it's fun to see the different looks as it evolved and who knows how long it'll be until I start itching for a fresh look.  Gotta keep dreaming right?!?

So, here's the room in three different looks- two actual looks and one faux photoshopped look of a whole new scheme I had been pondering about...
I have to say, it was pretty fun to compare the three looks side-by-side and for fun I guess I could say it's One Room, Four Ways if you count the very, very "before" look of the space when we moved in...
From there, we added fresh paint (Behr's Sequoia Grove), a sideboard from Ikea, new pendant light fixture, and my DIY Numbered Chair Covers (click here for the tutorial to make your own!).
About two years later, we grew tired of the look and thought it was missing something.  It needed some depth/dimension and character, so Alex added in wainscoting to freshen up the space. 
Ahhh!  It did look fresher, brighter, and it certainly added some character that it lacked with the plain flat painted walls.  From there, I've only changed up the table and sideboard decor but that is how the space has remained for the most part. 

I guess the only question I have about the newest look was "where did the chair covers go?" and I still have them but I don't always keep them on since the leather is much easier to care for when it comes to the day-to-day.  But I do admit that when I look back at the photos, they do look nice and maybe I should keep them on the chairs more often?  They do brighten up the look of our dining room and give it a unique look...

So for my dreamed-up third dining room version I started there, then wondered how a lighter paint color would look, and a new light fixture.  Wowzers!  It had a whole different vibe and I kinda love it!
When I look at all the looks side-by-side, I really do love the idea of completely revamping the space (again) but I still love the warmth of the red-ish paint tone in our dining space.  Perhaps it's because in the summer I want things lighter and brighter but I don't think I'm ready to commit to a new color just yet. 
I will say, this photoshopped image makes me want a new light fixture and right now.  I loved that pendant light when we bought four and a half years ago but I'm not loving it as much now.  Who knew it'd look so blah after just 4.5 years, or maybe I just love the look of that drum shade pendant light a whole lot more right now?  I know we don't need it, so if you have recommendations for a place to buy a drum shade light fixture at a reasonable price please let me know! 
Which Dining Room look are you Head Over Heels for?
Where can I find a nice drum shade light fixture at a good price?

Hope everyone has a great weekend, I know we will with my sister, brother-in-law, and (almost) 1 year old niece here for a visit!!!  I'm sure I'll have lots of cute pics to share with you later!  Now, time to link this post up over at The Lettered Cottage "One Room, Three Ways" Linky Party!

Wainscoting Tutorial & Getting My DIY Groove Back

Kayd Roy11 Comments
I've been home for about a week now since my trip to Asia.  After doing some necessary cleaning, organizing, laundry (mountains of laundry), and spending some much needed fun time with my hubby, I think I am finally ready to get back into some DIY-ing!  Before I left, we were mid-way through our Master Bedroom Redo Project and I am eager to get moving again on that again.  Also, I realized I never wrapped up our Guest Room Redo (post tornado repair) so I hope to get some pictures taken and write up a quick post for that too!

For now though, it is time to wrap up the wainscoting tutorial and show you some more 'before' and 'afters'!  The whole idea of adding wainscoting to our Dining Room came after Alex read an "All About Wainscoting" article in This Old House magazine. It gave us a lot of ideas and information for the project and it inspired the crap out of Alex so much so that he put it as his #1 project during the time I was away.  
Now before I begin I thought I would include this image below from This Old House to help with the terminology for this project, however, their construction is a bit more complex than ours.  Alex did a few things differently since we wanted a more simplified look that would fit nicely in our home. Two examples: he used our existing baseboards and individual plywood panels between each stile instead of one on each wall.
 Did you know what a stile was?  Neither did I, but I do now!

 Let's get started!
First, Alex removed the base cap from our existing baseboards.  Then he measured and cut the chair-rail pieces for each wall (we used 1 piece of wood instead of the chair-rail cap and apron pieces in the image). After each piece was cut, he installed them with nails and nail glue. We chose the height for our wainscoting according to the height of the breakfast bar that separates our kitchen and dining room. 
After the chair rail was in place, Alex installed the stiles evenly spaced along each wall.

Next, Alex cut the 1/4" sanded plywood panels. Notice Alex opted for "Diddy" glasses again instead of taking the time to grab real safety goggles?
These are the panel sections that are installed between the stiles.
Alex installed them using nails and nail glue.
After they were all in place, Alex smoothed out the finish and saw lines using wood filler, caulk, and sand paper. Then it was time for the last step... paint!
Love that 'Before' and 'After' action!
It really helped to brighten up the space and make it feel a bit larger.
Now, I know a few of you are wondering why we aren't using my DIY Numbered Chair Covers (if you want to make your own view the sewing tutorial here and the painting tutorial here). We take them off from time to time, but Alex removed them from the chairs when he began working in the room.  Maybe I will put them back on soon... or make something new and exciting, hmmm?!?!
One last look, ahhhh I am in love with this change!
Alex estimates the project cost ended up just under $200 for the wood and small supplies.  That's it for the wainscoting!  Now I need to get our Dining Room decorated for Easter!
See you soon with an updated look at our Guest Room and progress in the Master Bedroom!

Dining Room Reveal! Alex Meets the Wainscoting Deadline!

Kayd Roy12 Comments
Hello everybody! 
I am back from my 17 day business trip adventure, hooray!  I am feeling well rested, happy to be home, and I am PUMPED to get back into my blogging routine!  Not sure if you've missed my posts but I have certainly missed writing them :)

Now, it was the big project I was waiting to finally see once I got home- our newly improved dining room with wainscoting.  Seeing the blog posts of Alex working on the wainscoting was such a teaser! Thankfully, all of that anticipation was worth it because I am SOOOO HAPPY with the final look once I got home!

So, are you ready for the big dining room reveal?!?  Of course you are, here it is...
This is what the dining room looked like before for reference...
Again, another 'before'...
And the 'after', looks so nice right?!?
Now, I know from the 'before' photos you can't see much of the walls, but that was because they were never worth showing much of in a photo.  I REALLY LOVE the formal feel the wainscoting adds to our dining room!  It also kind of gives it a more formal feel, don't you think?
My hubby certainly added something beautiful that made our home even more wonderful to come home to!  Nice work Alex! Oh, and he will be back posting later this week covering the DIY step-by-step post for this wainscoting project (complete with more gratuitous action photos).

What do you think? 
Are you loving the wainscoting too?

As for those other projects Alex wanted to tackle, well he didn't get to them... because he tackled a different project all his own which had nothing to do with our house.  Had more to do with this I guess...
Yep, that is Bill Murray from the movie Zombieland.  Curious? Stop by tomorrow to check out his "other project". He-he!!!

1,2,3,4,5,6...The Chair Covers Are Done!

Kayd Roy6 Comments
Finally!  I finished up all 6 chair covers! 
Here is a link to:

I ended up still spray painting the rest, didn't hand paint like I thought I would.  So here they are!
The leather on the chairs is nice, but it will be fun to have the lighter linen look for a while.  I think they will add a nice touch over the holidays too!


Chair Cover Project: Adding Designs to the Chair Backs!

Kayd Roy3 Comments
I have been working on this chair cover project for quite some time now.  I got started on them in this blog then wrote the tutorial about sewing them in this blog.  I finally got the guts to cut out stencils and paint the designs onto the chair backs.  I have been putting it off for a while now, just a little nervous about how they would turn out.  After all the hard work I put into sewing them I got worried if they didn't turn out right after painting the design then I would just have to get rid of the covers.  Luckily, the first one turned out great!  So I am getting in gear to finish up all six chair covers!

This is the chair cover I saw in Rachel Ashwell's Shabby Chic shop in NYC that inspired me to make my own:
It took us a while to determine what we wanted designed on the backs.  We agreed to use numbers because we have number decorative pillows in our living room from Pottery Barn, so it makes a perfect match!  Here is a picture of the pillows:
Here are the steps I took to add the design to the back of the chair cover:

  I started by printing out the design we wanted from my computer and then I copied it to poster board. The font I used for the "No." part was Ewardian Script ITC and for the "1" (or whatever #) I used Garamond.  Once on the poster board I used a craft razor to cut out the text to make a stencil.
Here is a picture of cutting out the number from the poster board.
Once I had my stencils, I laid them down to be painted.  I decided to use spray paint because it was a technique I was familiar with from my younger days when I would make t-shirts and tanks for my friends. However, I'm considering painting the next ones by hand. 
Here it is after spray painting. It turned out fine but I got so nervous about the paint running off the poster board and back into the fabric. It did a little on the 'No.' stencil but luckily it gave it a more vintage and distorted look, so I didn't get mad and have an 'Alex cursing fit'. It is however a reason that I'll be doing it by hand on the next few.
Here it is once I fit it onto the chair.  I love it!  I can't wait to have the full set finished.  I might make another 'No.' stencil in a different font so some will be slightly different instead of too matchy-matchy.
I think the fabric and the dark gray paint looks great together.  Kind of reminds me of the Vintage French Linen pillows at Restoration Hardware:
By the way, I am in love with those pillows, maybe I need them?  Or maybe that is the next project, however stenciling that would not be fun!

DIY Chair Covers: Simple Step By Step to Make Your Own Chair Covers

Kayd Roy18 Comments
Phew!!!  Feeling a bit pooped, but pumped that I got finished with chair #3 for my chair cover project!  I started this about 2 weeks ago (sad) but got busy with sanding and painting our table and helping Alex with the bathroom redo.  So once I got started on chair 3 I felt pretty confident with the steps and decided to snap pictures as I made the cover so I could share. 

Before I get started, I have to mention that I only had to cut 2 pieces of fabric.  I learned after the first chair, that I was cutting out too many pieces and it got too complicated.  All you need is 2 pieces of fabric!  I picked up some linen-looking fabric from Joanne's for $3.99 a yard (had a 40% off coupon too, so make that $2.39 a yard-woot!).  Here we go!

First, cut one piece of fabric to cover the face and back of the chair back (so the fabric folds over the top).  Then, sew the sides together stopping where the chair back meets the seat.  I tried to illustrate by pinning the sides, so this would be the inside of the cover.

 Second, once the sides are sewn pin the top to make a corner for the chair top (looks like a little triangle).  Make sure to sew a smaller corner than you think you will need, easier to sew more after to fit than it is to seam rip and start over.

After you sew each top corner and flip right side out it should look like this...

Here is where the tricky part starts.  So since we are only working with 2 pieces of fabric, you have to leave the chair back side piece whole, but cut the chair face side fabric to end at the seat.

Here is what that piece looks like off of the chair (in the photo you can see I left the back piece whole and cut the front shorter).

This is the second piece of fabric for the seat.  I cut out a little rectangle in the center of the fabric that is half the depth of the chair back.

This is what that rectangle is for, it will line up where the chair back and seat meet and wrap the side of the chair back to match up with the chair back piece (the first sewn piece of fabric).

Here is the chair back piece flipped inside out pinned to the chair seat fabric to be sewn.  Line up the edges of the fabric and pin together to make sewing easy.

Here is a view of the seat with the pins lined up for sewing.

View of the other side pinned for sewing.

The part where the sides turn up to the seat is very tricky to sew.  Keep pins in place and take the corner slowly.

After you sew and flip right side out this is how the corner should look.  It is definitely the hardest part to line up and sew.  It took me until the third chair to get the hang of it, but once you do the way the cover fits the chair is perfect!

Now the front corners, flip the cover inside out so all seams are showing.  Then pin where your corners are located and cut off excess fabric.

Once you sew the front corners you are ready to hem the bottom!  First make sure you cut the bottom so it is even and level with the bottom of the seat.  Then iron about a half inch up for the hem.  Here is the hemmed edge of the back of a cover...


You should now have a chair cover!  I have 3 done so far, it really gets easier as you go.  I have 3 left, then onto adding the prints to the chair backs!

I am Sewing Again! Starting on those Printed Chair Covers...

Kayd Roy8 Comments
I mentioned in my NY shopping blog that I was in love with these printed linen chair covers I found in Rachel Ashwell's Shabby Chic store in Soho (isn't the printed crown on the chair back lovely?)
Anxious to get started making my own, I headed to Joanne's Fabric over the weekend. I found some great "faux linen" to use, this is going to help save a significant amout of cash since I need to make six covers for our dining room table.  I am really hoping the chair covers will add some more style and brighten up the look of our dining room.  However, I'm still unsure of what designs we will use on the back, but it will most likely be numbers or even a fun vintage design... feel free to send any ideas my way!
Caffeinated and feeling ambitious I got started cutting the fabric into the 2 pieces (one for the chair back and one for the seat).  I will be sure to get more detailed pictures of all the steps when I work on the next 5 covers.  Oh, and yes, I have to use our dining room for my sewing space for now since we haven't put together our office yet (boo).
 After cutting the fabric (and putting on my pajamas I guess, whoops), I got started sewing the covers.  I admit, I haven't sewn in a while, so I was nervous.  I used to sew clothes all the time, but nothing for home other than curtains and pillows. So this is a challenge for me! 
 After about 2 hours, I was able to complete one.  I learned a lot along the way, so I am guessing the next one will be much easier and faster (and the quality will most likely turn out better than the first- I hate how that works!).  Here is the chair before...
Here is the after with the cover!  I can't wait to add numbers or letters to the back!  The fabric looks plain white in this photo, but the texture is similar to my linen blog background with hints of greys and browns. 
I'm going to try and crank out 2 more of these this week and 3 more next week.  After finishing I will get started on the designs for the back!

Our first room project! The Dining Room

Kayd RoyComment
So, the first room we decided to tackle was the dining room because, really, it was the easiest room to figure out. We knew what furniture we needed and that we needed a new light fixture and some paint of course, so we got to work! Nothing to tough except patching that GIANT crack in the far wall.
One sad thing, at some point, an owner of the home had the built in removed, which is a crime in an old house! I can only imagine what the real built in would have looked like in the dining room, would have been gorgeous, but for now, we had to purchase our own for the space.
After much debate at the Home Depot and almost coming to tears over the decision (the paint aisle at HD is a great place to completely lose your mind!), we decided on Behr's Sequoia Grove for the Dining Room and Kitchen, we thought the warm redish-orange-brown would suit our style well and fit the older feel of the house.
The hardest thing about the revamp was putting up the light fixture. Have you ever done electrical work in a house built in 1924? NOT EASY! It took Alex about 4 hours, and 2 trips to Home Depot to get that sucker up there! When we took the other light fixture down we found some weird iron bolt thing hanging down in the center of where the light needed to go, along with fabric covered wiring from lord knows when! So it definetly wasn't easy, but once we got it up it looked so lovely! Really added a focal point to the room.
And here is a more recent picture during the day. The wall frames and photos are from Ikea, the white wire decorations by the window are actually chargers from Target along with the table runner & curtains, we got the new buffet from Ikea, I believe it's Swedish name is Liatorp :) it was very difficult to find one that fit the space well and could hold a lot of storage (since we don't have a lot of kitchen cabinets.

Also, we didn't have a dining room table since we lived in tiny apartments before (table for 2!), so when we finally got to choose one, we wanted to make sure it was large enough to fit 6 people. We ended up getting the table on clearance at Ikea (yes, we love Ikea, feel free to make fun, but hey, we are just getting started in life!), and we got an amazing deal on the leather dining chairs from Target, they were normally $99.99, found on sale for $79.99, and I had my discount (10% 0ff) + my Red Card Reward discount (additional 10% off) so each chair was $63.99 each! It was great to finally have a dining room table for 6, great for entertaining and the holidays!