Carla Like It Is

Upstairs Bathroom Redo

What a Week Back! Tiling Progress & Why I Need a Rubber Ducky

Kayd Roy1 Comment
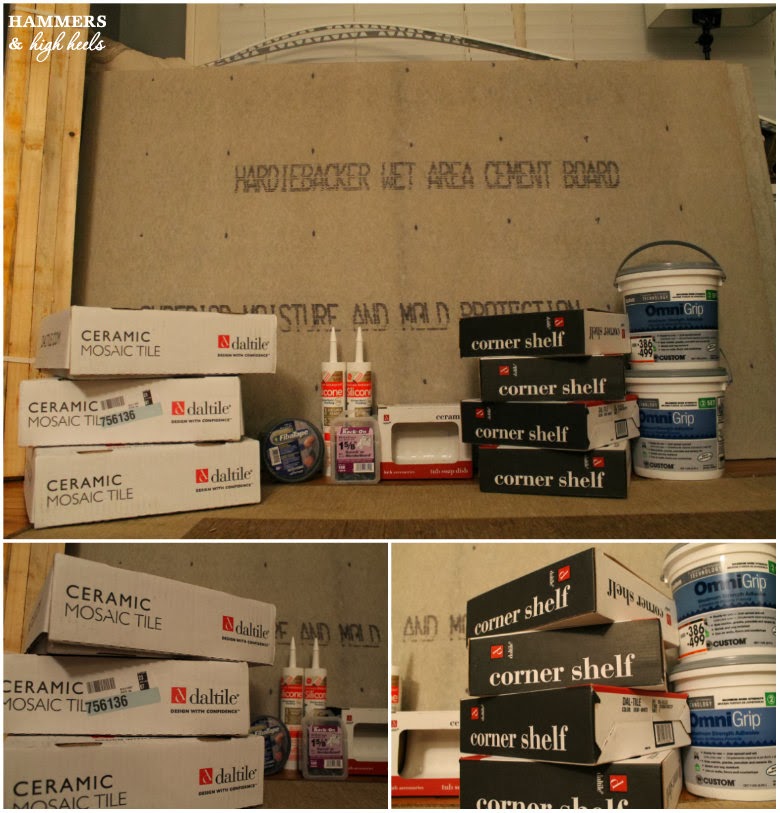
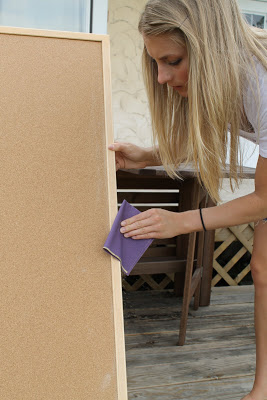
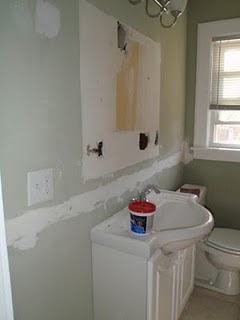
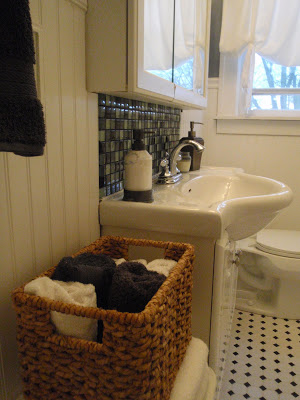
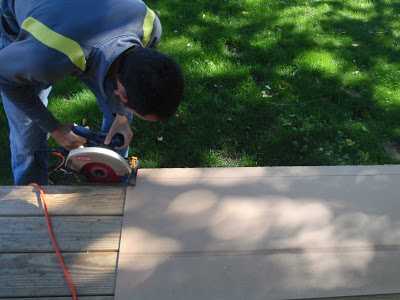
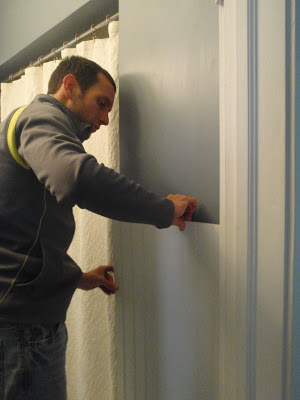
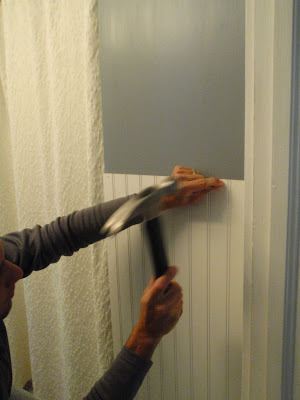
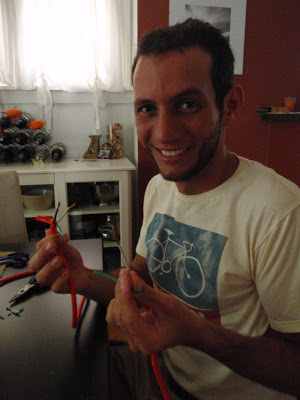
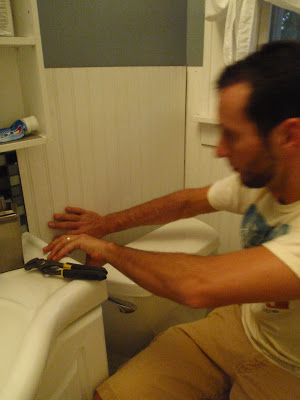
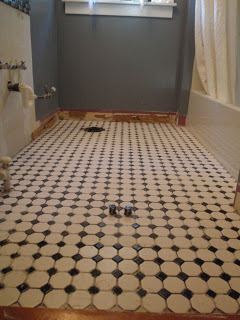
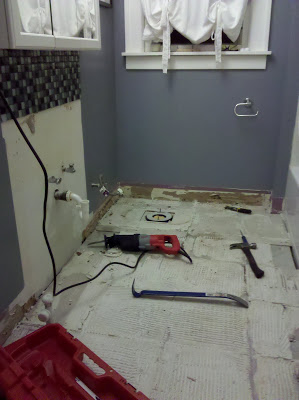
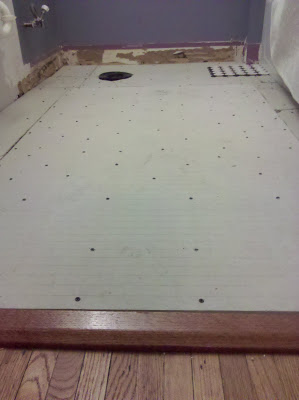
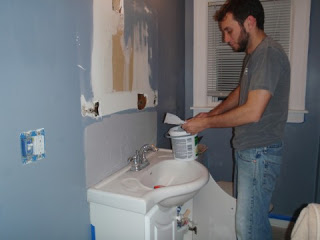
What a crazy week it's been, so glad it's Friday!  I've been home from my last minute India/China trip for just over a week now and with busy days at work and Alex working on the tiling we haven't been able to update the blog much but here's an update at where we are with our bathroom shower/tub project (aka "Project Deep Soak").

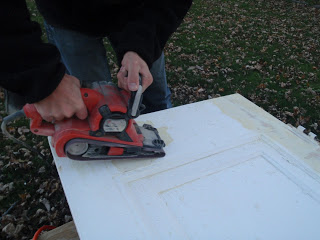
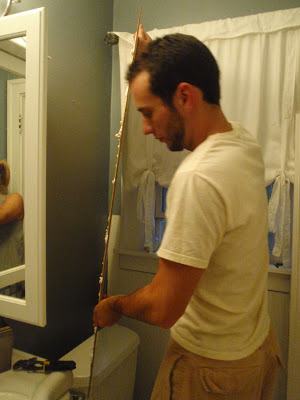
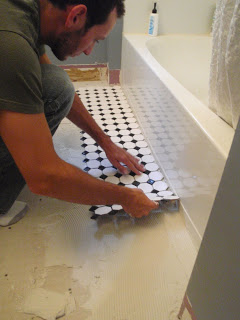
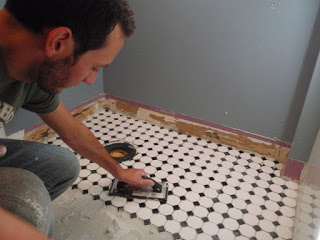
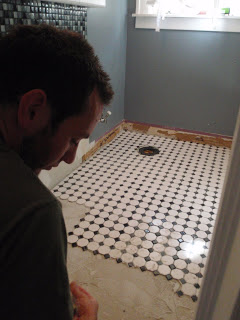
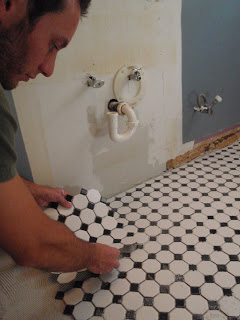
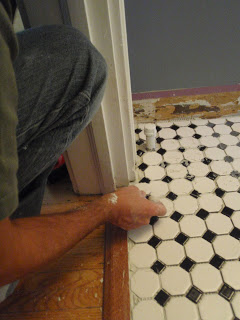
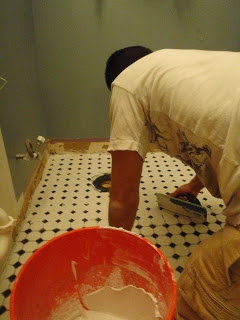
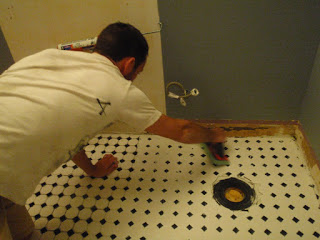
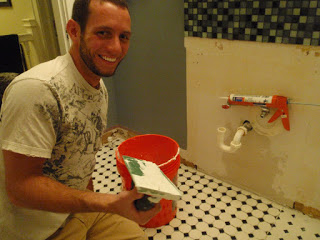
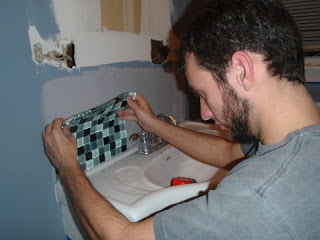
After gathering up the last of the supplies at Home Depot on Sunday, Alex dove right into tiling.... And the tiling has continued everyday after work this week.

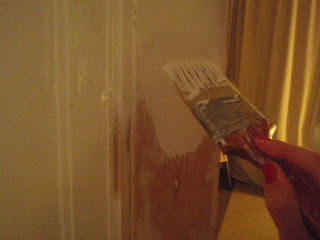
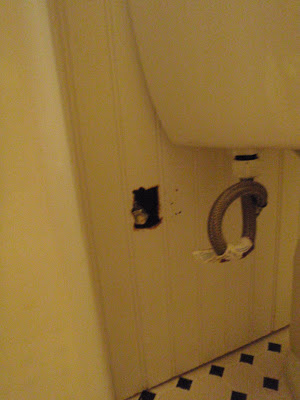
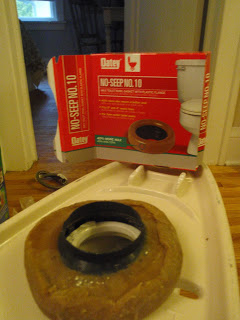
Thankfully he's finished with the shower head/ faucet wall and the joining wall where we added two shelves, so he's at least through the trickier steps in the process!

I can't wait for it to be finished up- and not just to see the finished look...
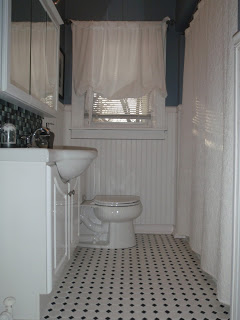
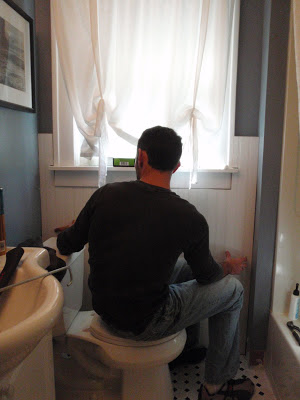
As you can imagine with the tiling still going on all we can do is take baths in the morning (since it's our only bathroom with a shower or tub in the house).  Let me tell you, I don't think there's any easy way to take fast bath every morning.  It's kind of funny that I've been getting so much use out of our new deep soak tub already because it isn't as fun as I thought it would be, LOL!  Like I said, he's still at it tonight....

It will be so nice to have the shower in full operational use again!  Alex is planning to wrap things up this weekend and I'm hopeful everything will go smoothly.  If not I'll make Alex find me a rubber ducky.   Until then...

Rub-a-dub-dub ya'll! 

I'll be out doing my Thanksgiving grocery shopping this weekend, anyone else braving the crowds to gather up turkey and fixings too?  For those of you that are- here's to wishing for bountifully stocked shelves and small crowds!  

Have a great weekend everybody!

Deep Soak Tub Installed, Onto Tiling Prep!

Kayd RoyComment
Fortunately I was able to call in a favor to a couple of my friends (big thanks to Tom and Paul!) before Carla got home from her work trip and after a little cursing, plenty of tight spaces, and some hot Sawzall action, we got the tub installed in it's mortar bed!
Kohler Bancroft 60"x 32" Alcove Bath
With the bathtub and plumbing in place, I was able to rough in the new bathroom fixtures and temporarily install some poly sheeting, allowing us to shower/bathe while the project progresses. BTW: I am in love with my new shower fixtures!  I made three purchases in order to find the perfect set and the Delta Silverton was it! The large aerating shower head provides an amazingly luxurious experience... even with plastic covering the walls around you :-)

Enough about the fixtures...
Delta Silverton Faucet $119.00 from Home Depot
With the tub and plumbing in place, it was time for another trip to good ol' HD! I was in the zone too - checking off nearly every item on my "Hurry Up and Finish the F'in Bathroom Project" list! Tile, Mortar, Grout, Furring Strips, Sheet Plastic, Cement Board, Silicone Sealant, Corner Shelves, Soap Tray, Joint Tape...You get the idea.

I almost forgot - Every project requires a skilled and licensed handyman...Rocco will do if you're in a jam.

Time to put all of those newly acquired home project pieces to use. I started by squaring off the cuts in the old drywall while using the furring strips to level the wall joists to the tile flange around the tub. Next came the vapour barrier (nobody likes mold in the walls) and the HARDIEBACKER, followed by taped and mortared lines and corners! A lot of progress today but there's still plenty more to come....

Stick around throughout the week as Carla and I get closer and closer to having a nice, clean shower/bathtub space that still fits the look of our 1924 Dutch Colonial.

I'm betting that there will still be a few more Starbucks and Papa John's fueled nights in my future.  With that, does anyone know if it's safe to operate a Sawzall while drinking an Old Fashioned?  Rocco said it was okay but he could be after my life insurance payout.

A Faucet Refresh For Our Bathroom Sink

Kayd Roy11 Comments
We're faucet caaa-razy lately!  Well maybe it just seems like it since we just got a brand-spankin' new one during our lovely kitchen uprade last month and now we're onto another.  While shopping at Home Depot for that faucet though, we ended up seeing Glacier Bay's Teapot Low Arc Faucet with traditional porcelian "hot" & "cold" handles and fell in love!  It was just $32.00 and we couldn't resist...

I know it's kind of a small change, but the new faucet goes really well with the overall look of our bathroom (scroll to the bottom for more photos).

This little upgrade was pretty easy.  Alex started by disconnecting the water lines then removing the old faucet and all the old icky caulk.


After that, he cleaned up the surface and put in a new line of caulk along the backsplash.

Then all he needed to do was connect the water lines back in and install the new faucet.  Not too bad right?

I'm totally loving the new look!  Those "hot" & "cold" porcelain handles seem perfectly coordinated with our black and white tile!


It felt really nice to replace that old one...  Especially when I looked back at our bathroom photos taken when we moved it.  That faucet was part of that old look and even though it's small, I'm glad it's been replaced with a fresh look.  Better yet, something that feels like it could have fit the original look of our home!

That faucet is a fun & elegant little change for our other little bathroom :)

What do you think of our new "hot" & "cold" porcelian faucet change up?

See you tomorrow for Head Over Heels DIY Friday!

My Finished Cork Board and Sitting Room Decor, Decor, Decor!!!

Kayd Roy14 Comments
Hip-hip-hooray!  My lovely Sitting Room is feeling complete! There's a whole-lotta decor chatter in this post (hence the triple 'Decor' in the title).  Here's a look at the final product!

In my last post I showed the DIY steps for this distressed vintage styled cork board (my sister corrected me today, I called it a bulletin board in the last post, thanks Holly).  Check out how I decorated it!  I used the maps I had talked about along with a few other fun things!
Let's have an up close look at some of them...
I had these antique fashion ads from an old newspaper that I picked up at an antique shop in Stillwater and never knew where to use them.  I think they look right at home here on the board. The goofy little cards on the bottom right side are actually little Hanna Barbara playing cards from the 1960's that we found stuck in the radiator in our Guest Room when we did tornado clean up.  They are a little crispy, but I think they were a really fun discovery.  Makes me think that room was most likely a child's room at some point in time. 
In this photo you can see more of the distressed finish on the board as well.  I added a fun photo booth picture of Alex and I that makes me smile.  I also have 2 old Vogue covers prints on the board, I think they are a fun glamorous touch!  That was a suggestion some of you gave me in the comments- thank you, great idea!
Another fun thing to note in this 'Gratuitous Rocco Photo' are the wood crates used as a side table.  I picked those up a while back on an antiquing trip in St. Paul (you can see that post here). They were a total score.....both for just $4.50 each! 
Also, do you see that grate on the right side of the photo on the wall?
Here is a closer look...
I got this grate from Bauer Brother Salvage in North Minneapolis.  I thought it was perfect for this room with it's olive green color, great match for the hanging antique window and throw blanket.  I got the idea for placing photos on an antique grate from Bachman's Spring Idea House.  I thought it was a really unique way to display photos.  Definitely check out the link to see how they did it, they had a variety of grates too, it was very cool!
A photo from our first trip to Chicago and on our wedding day on a Pedi Cab
Oh, and does this lamp look familiar?  It is the one I talked about in my Head Over Heels post a few weeks back.  It is the Barometer lamp from Ikea for $59.99.  It has such a nice vintage feel to it, and it is pretty study- I was impressed by the quality! 

I am really happy with how sweet and charming this little sitting space turned out to be!  In fact, I am currently cuddled up in my big cuddly Ektorp chair (which was a Craigslist steal for only $80) while I finish writing up this blog post.  It is a perfect little spot for blogging :)  The room really has come a long way since back in January when we pulled out the icky carpet and Alex installed wood flooring.
Before all that we NEVER used this room at all.  Now I have my Dressing Room and this lovely sitting space!
Whew!  What do you think?  I'm really loving it, although now sitting and looking over at my Dressing Room I am afraid I might need to do a few changes in there too, hmmm....
Oh dear, this Spare Room space may never be officially finished!  Darn awkward layout!  Decisions, decisions.  Does anyone else struggle to design a particular space in their house?  Or change up a room alot?  Maybe it's just me?!?

***6.30.11 Update: I realized I assembled the lamp wrong, there is an extension of the arm that is missing, I went to throw away the box this morning and found another part in it!  Oops!  Guess that is what I get for not following the stick figure Ikea instructions! I will try and get another photo of the fully assembled lamp!***  


Distressed Bulletin Board Wall Decor

Kayd Roy8 Comments
How was everyone's weekend?  Ours seemed a bit busy (hence the lack of posts), but I am excited to show you what I worked on for the Spare Room!  In the last post I showed some of the accessories for the space, but was kind of stumped for ideas for the awkwardly shaped wall behind the Ektorp chair...
I went back and forth about using different sized frames for photos and arranging them in a way that made sense, but it just seemed a bit forced for the weird space.  I kept thinking that I wish I could overlap photos... then a brilliant idea popped into my head!  Why not create a large bulletin board?  Then I could overlap images and pin up any cool pictures or ideas that I am in love with. I can also change it as often as I like!  Totally perfect for this sitting room space nearby my dressing room!

I guess I also kept thinking about that bulletin board I featured in my Burlap Head Over Heels post...
To give you a better idea it might look something like this (fingers crossed!).  But of course cuter with my own photos and artwork.
(looks like a cartoon- ha!)
To get started, I ordered the largest cork board I could find at a low price.  The best deal I found was a 36" x 48" board from the Container Store for $34.99- not too bad considering this thing was pretty huge!
The board looked pretty generic, so I had to add my special touch to make it more special.  I decided to paint it white and add a distressed finish for a vintage look. Believe it or not, this is my first time doing a distressed finish DIY project!  Here we go!

I started by sanding the wood frame into order to rough up the surface for painting.
 After sanding I put on 2 coats of white paint.
Once the paint dried I carefully rough sanded the frame to give it that distressed/ chippy look.
Ooooo, ahhh... it is looking older, loving it!

I just hauled the board back up into the Spare Room for Alex to hang for me.  It came with some special screws and brackets because of it's size. I thought I would leave this for 'the man' to do- otherwise there might be a few extra holes in the wall :)

Here is what I am dreaming up for the board. 
I have some vintage styled maps that I picked up at Posh in Chicago.  I thought I would combine them with some vintage fashion prints and old sewing patterns.  I want the space to have some more color than what I normally do in our house so it feels a little more inspiring and feminine.  I'm also getting a bit more freedom to design the space the way I want since Alex won't be using it as much as me (isn't he sweet?!?).

Anyway, I will be decorating the space and getting it ready for some 'after' photos for later this week!  Yay!  So what do you think?  Do you like the vintage fashion prints?  Any other suggestions for what I should put on the board?  Be sure to let me know if you have ideas!

Bathroom Redo #2 is Complete! 'After' Pictures!

Kayd Roy11 Comments
We are DONE with the Bathroom Redo of Our Redo!!!!  Before I get to the fabulous 'after' pictures, let's take a trip down the memory lane of all the wonderful experiences we had with this bathroom (sarcasm font).  You can click this link and see all of the bathroom redo posts.

Here is our very, very 'before' photo, taken just after moving in.  Note the flooring, toilet, and trim at the base of the window frame that goes around the room.
 During our first redo go around, we decided to remove the trim, old medicine cabinet, and repaint (we aren't really fans of any shade of green for some reason... greys and blues are our kind of thing)!
 So after the first redo, we ended up here.  New medicine cabinet, paint, and glass tile backsplash.
What is the one thing we didn't mess with the first time around?  The tile floor, which over time began to detriorate.  Note the grout missing and uneven tiles.
So after almost a year of hating the floor, Alex did this (much to my excitement)!

DRUMROLL!!!!  Here it is!
Yes, it is tiny, but it is our biggest bathroom, and now it is fabulous!  I am in love with the beadboard, makes it look so clean, bright and new!  The beadboard also adds that 'old house charm' to our little bathroom.  One thing you might notice, I ended up taking out the stool from our 'Sort Of Mudroom' and added it to our bathroom (so I have to figure out that space again).  The stool fit perfectly and I love the folded towels with the basket of hand towels on top.
Here is a photo that shows the other side of the sink and our fancy new toilet!
Closer look at the basket and glass tile backsplash.
My favorite part is still the floor.  It was a major problem in this room before, and even made me embarrassed when we had guests.  Now it is level, the grout is perfect, and the black and white tile design is so 'old school' and charming!  I just love our new bathroom!
 I have to say, Alex really did a great job with this (even though he admits that it took too darn long).  There wasn't a whole lot I could help with other than painting and decorating. Love my handy hubby!

Bathroom Redo: Sanding and Painting the Bathroom Door

Kayd Roy1 Comment
Wa, wa, waaaa... we had everything all set to go from our bathroom redo, then we remembered... we need to sand and repaint the bathroom door.  That's when we heard the 'wa, wa, waaaaa'.  Our bathroom door is the original door (from 1924) so it had been repainted who knows how many times, and also weighs about 80 lbs!!!  Sadly, over time it began to chip at the edges when we would shut it.  It was clear to us that we would need to sand this puppy down and slap on a few fresh layers of paint.  So Alex brought the door outside for some severe sanding. 
It was NOT easy, paint had been caked on so many times that the layers were hard to sand away. 
We decided it was best to sand away only the outer edge where it had been chipping and leave the inner frame as is.  The inner frame had no chips, so naturally we were nervous to sand it down; If we messed up we could ruin the original look of the 1924 door.  So here is a closer look at the outer frame of the door before I was ready to paint a fresh (not to mention thinner) coat.  For some reason, I found it very interesting and special to see a bare stripped piece of wood from 1924, like it was special and preserved, is that weird?
Aww yea, getting that first coat on!
Here is the door after one coat.  I have at least one more to put on, then the door goes back up on the hinges.  After that, it is safe to call the 'redo of our bathroom redo' complete!  Ahhh, I can't wait!

The Last of the Trim is Up!

Kayd Roy1 Comment
We have been a little slow finishing up the last of our Redo of our Bathroom Redo (started in this blog, then here, here and here). But we are now in the final stages of completion!

The last of the trim is finally up! Alex cut corner edge, floor trim and top trim chair rail to finish off the beadboard.  Next, all we have to do is paint it white (it's currently just primed white).  I plan to get started on that tomorrow morning and will hopefully get it done in one shot! 

Here is a preview of what the 'after' will look like.  I'll be sure to post more photos of all the details and decor when we are finished up!

Bathroom Redo: Installing Beadboard = Learning to Appreciate a Crooked House

Kayd Roy1 Comment
Square beadboard panels + square walls = easy project, right?  Well, problem is, our house is 86 years old, and NOTHING is perfectly square anymore.  So, what we thought would be the easiest part of the bathroom redo (ongoing, blogged here, here, and here) was certainly not (especially for Alex... lots of curse words!).  

Alex picked up panels of beadboard from the ol' Home Depot, measured the walls, got out the saw and started cutting them to fit the walls.  Here he is at the beginning, cutting away with the saw all hopeful and happy.  Note: Alex has a rule about using his saw; the orange electric power cord must always be behind his foot, so it will never get caught in front of the saw (this is part of the story, keep reading).


 Once he got the first sheet fit and ready to go, he grabbed the Loctite Power Grab and started applying it to the back of the beadboard.
 Look at him go...
 Tons of it for good measure! Once it was applied, he made this goofy face and pressed it against the wall...
 He made sure it was precisely in place...
 Then used a few nails to hold it in place.
 This was the piece that really killed the project, meaning, the level of difficulty significantly increased.  We have one wall in the bathroom with a window that has beautiful original trim, which made for an awkward piece to cut out, not to mention nothing is even and straight in our 86 year old house.  After much cursing and re-cutting, Alex finally got the piece that would fit against the wall and window.
 So here he is installing it to the wall with the window around the trim, I was holding the camera, keeping my fingers crossed that there would be no problems (so thankful it worked!).

Then, to make matters worse, with Alex's frustrations at a peak, he went to saw the last piece of the beadboard for the day and cut through the orange extension cord (he said at that point he didn't follow his rule to keep the cord behind his foot).  I was there when it happened and it was so scary!  He turned the saw on and then in a split second all I saw was a big spark and the saw shut off......so thankful nothing bad happened!  Well, the only bad thing was Alex was very upset that he killed the power cord, but who knows, maybe it was a sign to stop working on the beadboard for the day, so he did (hence why this blog took a little longer to write).

A couple days later, I asked if I should go get another extension cord so he could get started on the beadboard again and he said 'No, I can fix it'. Really?!?!  I didn't know that it was that easy to fix...
I will write up a blog about how he fixed the cord later, thought that was pretty neat.  Anyway, so he got to cutting up the rest of the beadboard to fit once the power cord was working again.  This was the last hard piece he had to cut, the panel that would go behind the toilet.  He had to cut a hole and slit up the beadboard to surround the water supply pipe to the toilet.  Then added the glue to the back of the beadboard...
Now lifting it to place behind the toilet...
Here is a close up of the hole he had to cut so the water supply pipe could get to the toilet.  Alex is going to use wood patch to fix the appearance of the hole, and add a chrome pipe fitting around the hole to finish the look.
Pressing in to finish before nailing in...
So that is it for the beadboard, really wasn't as quick and easy as we thought.  We still have to add the trim around the edges of the floor, top of beadboard, and the corners but it is looking great!  I might blog about that part along with painting the beadboard (it is white, but not a finished white surface, still needs paint).  Then, our bathroom is finally done (only 3 weeks longer than Alex originally thought it would take)!  I can't wait!

***Update- If you want to see how the bathroom turned out, check out the 'After' photos HERE***

Check Out Our New Porcelain Collection (The Bold Look of Kohler)

Kayd Roy3 Comments
      Alex installed our fancy-pants new toilet yesterday as part of our ongoing bathroom redo (hey we have full time jobs outside of this too!).  I never really thought that much about a toilet, I mean you use it and clean it, but other than that I want nothing to do with the toilet, nor do I pay much attention to the appearance.  So when Alex informed me he got a new toilet, my response was "well what's wrong with the old one?"  Turns out, although they all serve the same function (hehe), there is a big difference between the 'economy' commode and the upgraded Kohler toilets at the ol' Home Depot.

      First off, size, the economy toilet is the smallest there is out there... and I don't want to go into detail here, but lets just say it is a serious upgrade.  Secondly, functionality is so much better!  He picked out the Kohler Wellworth, the best part is that it has 'Class 5 Flushing Technology'.  So what does that mean?  Here is what Kohler's website says "With names inspired by the raw power of whitewater rapids, this powerhouse features an industry-leading 3 1/4-inch flush valve, combined with an efficient, direct-fed jet, to maximize water flow and allow for an eco-friendly, 1.4-gallon flush setting option"- yes they compared it to 'whitewater rapids' which is strange, but we were attracted to the 1.4 gallon eco friendly flush option.  So a light push gives a small flush and the full push is for a bigger flush (no need to elaborate here either).  Last, the toilet just looks plain cool and fancy! 

So here we go (no "#2" jokes allowed), Alex already removed the old toilet (glad I wasn't here for that, sounds super gross and stinky not to mention it involved a sponge and rubber gloves).  He covered the sewer/waste pipe while he worked on the rest of the bathroom so that no sewer gases would escape into the house.  So once he was ready to install this bad boy he began by tipping it upside down to attach a ' Number 10 No Seep' wax ring (this is slightly larger than most wax rings as it is designed to accomodate new toilet installs where the flooring is slightly more elevated than the waste pipe - gotta love the 'charm' of 1924 construction). 

 Once you get it good and gooped on really tight, it is ready to be installed over the waste pipe.
 We both aligned the toilet straight over the pipe and guided the bolts through the holes on each side of the toilet to be attached.  Here is Alex tightening the mounting bolts.
 And here it is!  Our new fancy pants (no pun intended) toilet!  We are still working on the rest of the bathroom, beadboard is next along with new trim.  Did I mention before that we also have to re-sand and paint the door because it was chipping?  That is on the list too... hopefully we will get done with this soon!

Bathroom Redo: Gettin' Our Grout On!

Kayd Roy6 Comments
Well the Bathroom Redo of Our Redo has completed the tile and grouting phase.  This also shows the tile we chose for the floor.  We wanted something with a more vintage feel to fit the look of our 1924 house.  We have gone on a lot of historic home tours in the area and decided we wanted small black and white tiles.  We found them in a lot of older homes and loved the look. 

Here is a picture of the inspiration (not our bathroom), I also think my grandmother's bathroom had tiles like these.

Here are the steps that Alex took along the way, he was really happy that I was taking pictures of him, he loves to tile and grout (sarcasm font).
Laying the mortar down with the trowel
Laying sections of tile into the mortar
Pressing tiles in securely with a grout float
Progress!
Laying the last single tile!
Laying the tile is complete!
Then, after clearing the grout lines between tiles of any mortar that was there after the installation, Alex mixed the grout and began laying it in the lines with the float.

I stood in the tub to take these pictures and asked Alex to smile for one.  After hearing several times "No! Go away!"  I got a gorgeous smile and a laugh.  Ahhh the mood swings of home renovating :)
Then the tile sets with the grout for 30 minutes to firm up
After the 30 minutes passed, Alex cleaned the lines with a damp sponge.  The directions say to wait 16 hours before you can walk on it, but we are going to wait 24 since we have had bad experiences before with tile and grout.  We need that grout to solidify baby!
That's it for this part, goodness I can't wait for my sink and toilet to be back!  That should be the next bathroom blog (I hope)!

Bathroom Redo of our Redo: Demolition Phase

Kayd RoyComment
Well, after yesterday's awesome surprise event, we are now back to reality, and our reality is that we still don't have a functioning upstairs bathroom yet!  I wrote a blog about starting the bathroom redo-of our redo here. So now I am showing the photos of Alex's progress; because I was out of town with our camera he took these on his phone while he was working so I could blog about it, how awesome is my husband?!?

Here is the before of the main problem leading to our redo, the tile floor.  You can see that some of the grout had cracked and tiles were becoming loose.  We aren't sure when these were put in the house, (they were there before we moved in) but when we moved in we didn't see any problems and over time it just got worse and worse.
So he got started breaking the tiles out with what he calls "good ol' blue", his breaker bar.  He stuck the edge of the bar into the grout hard enough to pop the first tile out, and then just kept going.
He also had to break out the baseboards, which was nice because they weren't very fancy anyway.  Here is a closer shot of the floor with the baseboards removed.....great purple color, right ?!?!
And here is another shot of the room with most of the tiles removed.


Next Alex removed the vanity: Currently we're still on the fence about getting a new vanity.  I would love one, but is it worth the investment right now?  The backsplash that is there is from the 1st redo we did of our bathroom, we still love the glass tiles. Next, The toilet had to go!

 Alex had to use the sawzall to cut the base bolts (they were stripped pretty bad) in order to get the toilet out. Once they were cut off, he said he had to rock it side to side to break the seal on the wax ring.  So, now the bathroom is empty!  Alex decided to get a new, more substantial toilet.  Our toilet was the "economy" toilet (priced at $25), which is kind of funny to me.  I always thought any toilet would be more expensive than that.  But anyway, Alex picked out a nicer commode, however, the nicer toilet is 5" longer than our old one, and our bathroom isn't very large, so we will have to see if it fits comfortably.  If not, a new "economy toilet" might have to go back in, the nice thing about the economy toilet is that it fits in smaller spaces well, so we will see!


And here is the last photo: Alex measured and cut the new hardy backer board and screwed it in. He found out that the main reason our grout had cracked and the tiles were coming loose was that the floor was uneven underneath.  At some point, "someone" cut a hole in the floor to reach some wiring and where they patched the hole in the floor it had an uneven spot. So Alex corrected it and made sure the hardy backer board was level at each point of installing.

So there it is!  Alex is going to start tiling today!  If you look closely at the top right corner, there is a preview of the tile we chose!  Goodness I can't wait to have a sink and toilet upstairs again soon!!  Getting up in the middle of the night to use the bathroom is such a pain when you have to go all the way downstairs! 

Upstairs Bathroom Redo.... Again!

Kayd Roy1 Comment

Yep, you read that right, we are redoing last year's upstairs bathroom redo!  Which you can read here.

I was gone for a few days in New York City, so my hubby was all alone at home with the pups, and was apparently feeling very ambitous!  So I came home to a BIG surprise when I headed upstairs and saw the bathroom as shown below.  And I was SO EXCITED!

So why are we redoing our redo?  Mainly due to the tile flooring, the first time we revamped the bathroom, we didn't change the tile floor, and have since wished that we did.  The grout started to crack and even tiles felt loose, evidently installed incorrectly, it just kept bugging us when we would look at it everyday.  The grout was even stained and gross, guessing it was never sealed or just sealed incorrectly.

A few highlights the new bathroom will have: new tile, new toilet, beadboard, wall trim, and (maybe) new cabinet doors/ vanity.  Get excited!

Alex was a good hubby and took lots of pictures of his progress while I was away, so I will follow up with a much longer blog about the process!


Our Bathroom Update

Kayd Roy2 Comments
So, when we moved in, our bathroom wasn't too bad to start, it looked decent, however needed a fresh look. Here is out before picture:
Doesn't it just say.... 'BLAH'. So, to start, we knew we needed a better paint color, the light green really isn't our style, and we had to get rid of the cruddy old medicine cabinet that was close to the end of its life. We stripped everything down, including some trim that went around the middle of the walls, and started patching and sanding the walls.
Then up went the paint! We used Behr Raging Sea since we wanted a mid-tone blue shade, you know, looks very bathroom-y. I don't have photos of the paint going up, it took about 3 coats to get it perfect since it was some fancy paint that can be exposed to moisture, it was pretty irritating to paint over and over, but it eventually stuck! Alex picked out some backsplash to match the paint color and give the room a little extra pattern. Here is a picture of him prepping for the backsplash.
Alex picked out the glass tile from Home Depot, we used three 1'x1' squares
Here is Alex putting up the grout to fill in between the tiles
Then tada! After we put up the new medicine cabinet it was a whole new bathroom! We got the medicine cabinet instead of a decorative mirror since our storage space is limited as it is in our old house, and it is a perfect space to put in extra storage for our little bathroom.
The sink/ cabinet was fairly new, so we didn't make any changes to it (even though I would have loved to do that too, maybe later?) But here is a close up of the backspash, just adds a nice updated look, and protects the wall from water getting on paint.
Here is another final look, I added two 5"x7" black and white photos and a 14"x14" old black and white photo from Alex's bachelor pad days. We got a tie up shade from Target to pull together a newer fresher look in the bathroom. We finished this one up pretty early on after moving in, it was basically paint, new medicine cabinet, and backsplash, pretty easy. We hope in a few months to update the tile floor and bathtub... which will be pretty tough, stay posted for that blog!