Carla Like It Is

Mini Bathroom Redo

Our Bathroom's *Beastie* Twin?

Kayd Roy4 Comments
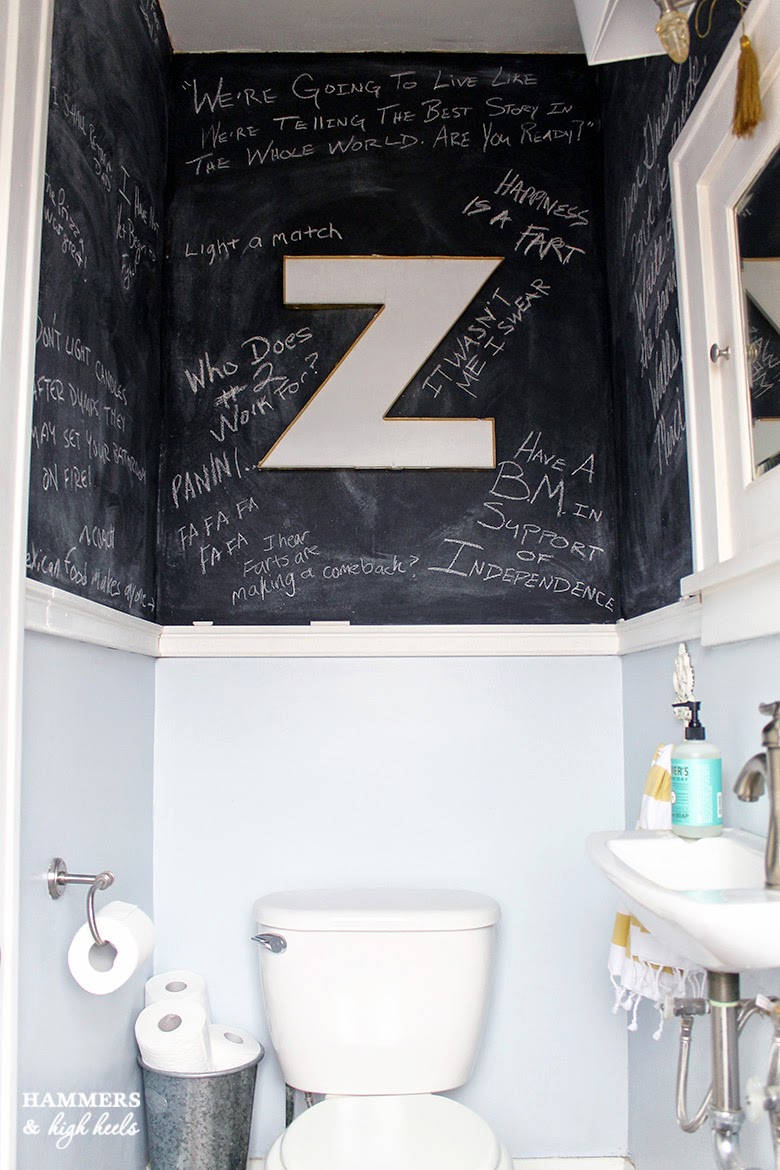
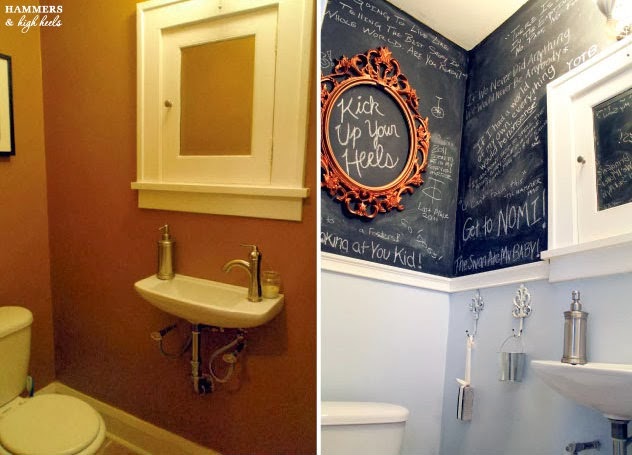
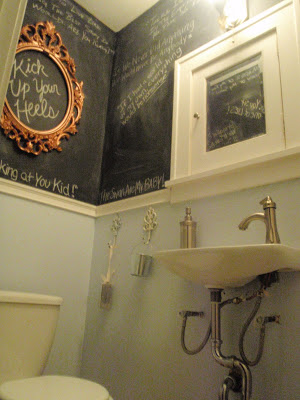
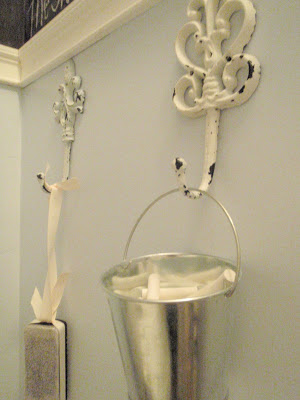
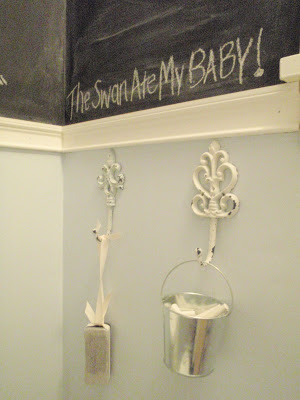
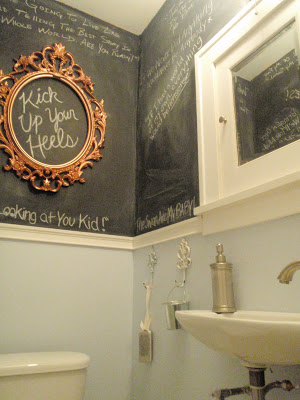
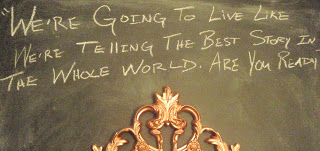
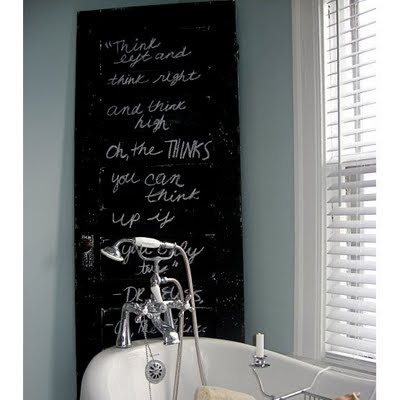
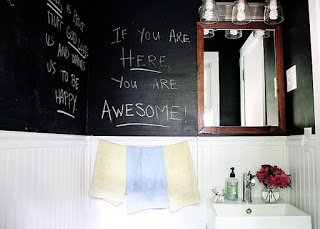
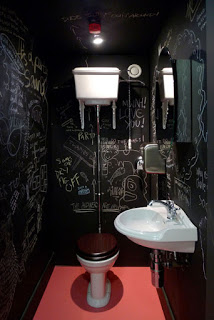
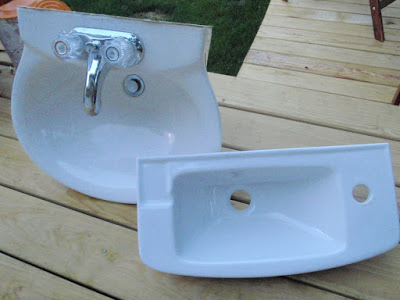
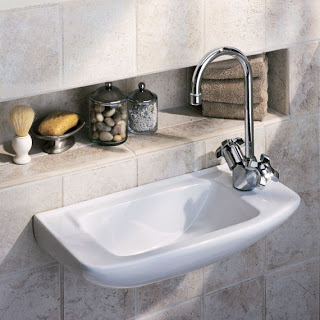
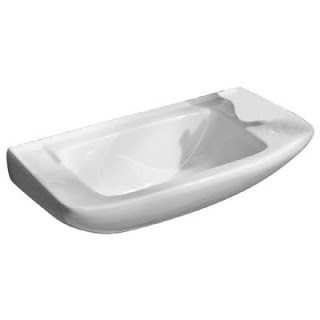
Since posting new images of our Mini Chalkboard Wall Bathroom last week, I discovered while doing some random Pinterest cruising that it has a TWIN!  Same size, shape, chalkboard walls (half for ours), and even the same Elfe sink!  Crazy/funny/weird right?

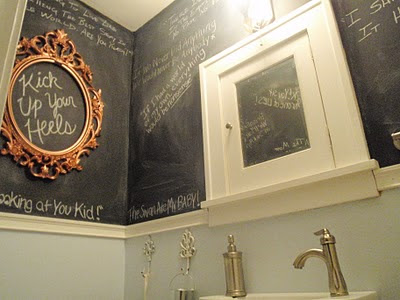
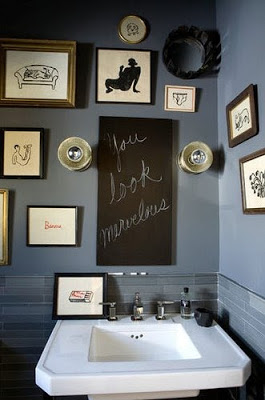
Turns out Mike D. of the Beastie Boys is the owner of this twin-like mini chalkboard bathroom and he shared it while touring the New York Times through his newly renovated Brooklyn Town House.
Loved the simple eclectic look and feel of his place!  Lots of beautiful unique light fixtures too!

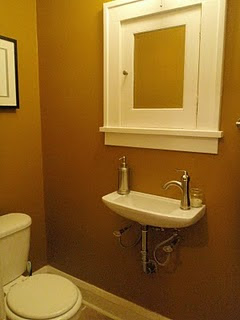
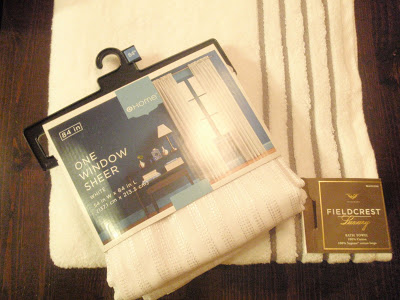
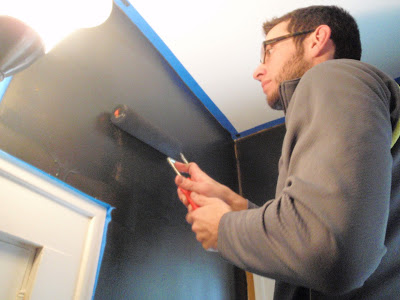
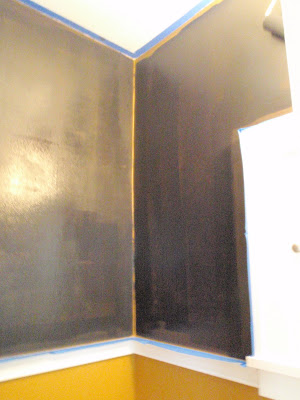
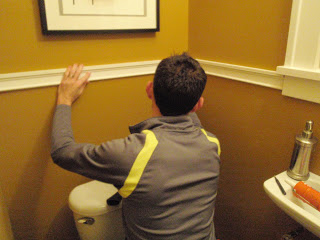
Anyway, I found it because I had been noodling (I'm really into "noodling" now) on a paint change on the lower half of the walls.  I thought about making it all chalkboard paint or even doing some black and white striped wall paper.

What do you think?  

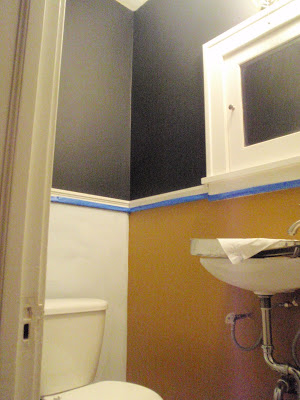
Is it time to ditch that baby blue color on the bottom half for all chalkboard paint?
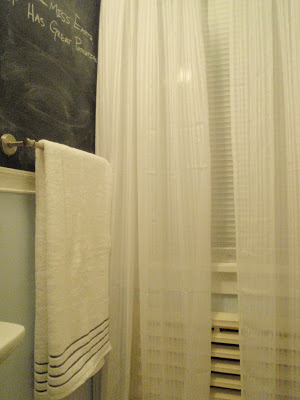
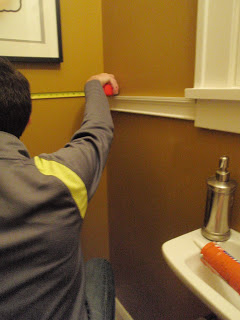
Or should we try some stripes on the bottom half?

It'll be mainly a relaxing weekend for us, my dad's in town for a visit and we'll be catching some Twins vs. Tigers action :)  Fingers crossed my dad won't try to embarrass us- yep we're 29 & 30 years old but he usually reminds us that we're never too old to have dad embarrass us in public :) I'll keep you posted, ha!

Have a great weekend everybody!

Five Year Refresh Week #4: Our Mini Chalkboard Wall Bathroom

Kayd RoyComment
Time to finish of our Five Year Refresh week with our last room- Our "Mini" Bathroom!  But first, I must post a warning message regarding the chalkboard painted walls because I took photos of the room with whatever was left written on them.  Ahem, here's the official warning :)

WARNING: The following images feature content on bathroom walls that may be offensive to some readers... also could be hilarious if you are not offended by toilet humor - Anyway - it is not our intention to offend anyone and if you are, our friends did it.  Okay, end warning.

That warning probably made you too curious now, so here is an updated look at our "Mini" Chalkboard Wall Bathroom....

It's been a while since we've talked about it on the blog (sheesh, it was back in 2010!), but this is how it looked when we added the chalkboard paint to the top half of the walls....
I decided to take that empty ornate frame down and replace it with the large letter "Z" I picked up at Junk Bonanza last year.  I figured since that space is soooo teeny-tiny, it would be fitting to have a cartoonish-ly large piece of wall art in there :)
Other than that, nothing much has changed in that room other than the constantly evolving content on the walls :)

Well, that wraps up all the rooms from my Five Year Refresh week!  If you missed any, click the links to see our Living Room, Vestibule, or Dining Room.

Which room had your favorite updated look?
Which one made you miss the old look?
Did our chalkboard bathroom walls offend or make you laugh?

Have a wonderful Easter holiday!  I'm hoping to see our very own chubby Easter bunny again tomorrow!

The Mini Bathroom Is Done! It's Nonsense But It's 'Us'!

Kayd Roy22 Comments
'Kick Up Your Heels'! (the Hammers and High Heels mantra of course), the Mini Bathroom Redo is finished! So now you can see what we did with that Ikea frame from the last blog!
 Looking back to that first blog we wrote stating the game plan, we finished adding the trim, painting the upper half with chalkboard paint, painting the lower half, then adding accessories to the room. So the next step was to 'prep' the chalkboard paint by coating it with chalk (on the directions of the paint). So Alex got busy covering the room with chalk, just a warning if you do this it was a dusty mess.
 So here it was then (check out the blog about our 'Elf' sink change, it is awesome!)....
And here we are now!
 For our re-do we added basic wall trim in the middle of the walls ($13), Chalkboard Paint ($10), Behr Cumberland Fog Paint for the lower walls (free, reused leftovers from Guest Room), Ikea Frame (reused from another room), vintage wall hooks ($4.99 each), window curtains (Target, $14.99 each x 2), bath towel (Target $11.99) = roughly $75 total, which isn't too bad for replacing the gold paint and Butt Fart for a more grown up but still very fun feel.
 On the vintage wall hooks I got from Bachman's I hung a chalkboard eraser from ribbon and a mini metal can of chalk.
 They are hung just below the trim.......anyone recognize the quote?!?! One of my favorite movies!
 Another view...
 I'm thinking we still need something behind the toilet since the space looks a little empty.  I like the idea of a small vintage drawer used as a shelf like this one from Bachman's Idea House. Or even the metal hooks behind the toilet.
So did you pick up on our theme for the walls? Alex and I decided to cover the walls with some of our favorite movie quotes (for the increased entertainment value of our guests). It was a blast!
 These are a couple of my favorite quotes in general, know which movies they are from?!?!
 Here is one of Alex's favorites.
We have handful of quotes from several other movies in our newly redone little 'Outhouse' from the likes of: The Wizard of Oz, Drop Dead Gorgeous (hey I'm a Minnesota girl now!), Gladiator, Alice In Wonderland (the original), Vanilla Sky, The Last Samurai, Elf, An Education, Forrest Gump, No Country For Old Men, K Pax, The Great Outdoors, Dumb and Dumber, Invictus, Gone with the Wind, and The Brothers Bloom. Yea, we didn't exactly follow a specific theme, we just went with movies that stuck with us over time.

So what do you think? We know it's weird, but it's fun, it's different, it's 'Us' and we are totally having fun with it! We spent a good hour cracking each other up with our fun quotes and bumping into each other as we graffitied the walls with chalk.  Feel free to submit (comment) themes or fun ideas for the bathroom walls since we will love changing it up once in a while.


WhisperWood Cottage

Accessories For Our Mini Bathroom Update Plus Preview!

Kayd Roy1 Comment
Thankfully, we are just about done with our Mini Bathroom Update! Last week we put up trim and painted the upper part of the walls with black chalkboard paint. We also asked what color we should paint the bottom half and it was unanimous that the lighter blue was the way to go!  We actually didn't even need to buy paint, we used some of the extra Behr Cumberland Fog color that we had used in our Guest Room.  Here is a little teaser of how the new color is going to look (left part of the lower wall), so much better than the gold, what in the world were we thinking?!!?
 Now I am finishing up the accesories for the final look!  Here is a picture frame from Ikea that we had in another room. I thought it would be perfect for what I needed in our mini bathroom. Just needed a little something extra.
 I love gold antique frames, so I thought with some gold paint I could give the frame an older, more glamourous look. I used Rust-Oleum's Metallic Copper paint, their gold was a little too bold and brass looking.
 Oh I just love painting, spray, spray, spray(sarcasm font)!  Goodbye black (you will have to wait for the next blog for the final look on this frame, it is super fab though)!
 I originally had a black curtain and black towel in the mini bathroom.  Now that we have the black paint, it would just be overkill.  I wanted to lighten it up a bit, so I picked up a new Fieldcrest Luxury Bath Towel for $11.99 and two Home Brand Window Sheers for $14.99 each.  I've never had Fieldcrest Towels before, man are they thick and plush and I love the gray stripes at the bottom so it isn't just plain white. The Sheers are great too, these have some light striped embroidery on them to give them a little pattern and texture.
 Now we need something vintage with charm for this little room! I found these awesome wall hooks at Bachman's when I went to the Idea House. They were only $4.99 each! We have a fun idea in mind for these guys!
 I might get a couple more things but we plan on posting the 'Afters' tomorrow or Wednesday when it's are all set up!  I can't wait to see what you guys think!

While the Chalkboard Paint Cures, Should We Paint the Lower Wall a New Color?

Kayd Roy5 Comments
After Alex finished up getting the new trim midway up the walls I got out the ol' blue painters tape to prep for painting. I really don't mind painting but goodness, I hate doing the blue tape thing!

I'm pretty sure the hubby will be mad I included this picture of the painting process, but I had to show how tiny that bathroom really is!  At first, he and I stood in there painting together. He likes to do the roller thing and I stick to the edges and small brush details. It didn't take long for us to decide it was crazy to be in there at the same time trying to paint, we just kept bumping into each other! After a few brief freak outs, and nearly dumping over the paint tray, we decided to take turns in the little outhouse.
Here is the bathroom after 1 coat of the chalkboard paint.  We ended up using 3 coats just to be safe and to make sure it had a smooth finish that would cover all of that beautiful, exotic gold for the rest of all eternity (makes me sound like a villain in a cheesy superhero movie) . 
The paint is currently in the process of curing for 4 days until we can write all over it! We're even considering having a bathroom wall graffitti party!

Here is where we need your help!  You can see in the previous photo, although it isn't a fully completed 'after' photo, that we have a black, white and 'medieval gold' color scheme going on (see this blog to understand the gold paint. I think we've grown a bit in the realm of home decor since making that decision, which sadly could mean that Butt Fart has to come down). I feel like the gold/ black almost looks Halloween to me even though it isn't orange.  So... we are thinking about painting the bottom walls too.  Question is what color?  Here are a couple bathrooms with chalkboards and white trim that I liked.
Of course blues and grays! Also, I love the little small frames with funny little black and white drawings, might incorporate that into the final decor?
So what do you think? Lighter bright blue or the darker dusty blue?!? Perhaps something totally different?  Pretty please send us some comments!

Outhouse to Schoolhouse, A New Look for the Mini Bathroom!

Kayd Roy4 Comments
In the midst of crazy Christmas decorating and debating the fate of the Spare Room off our Master Bedroom, Alex and I got a whole new crazy idea for a different room in our house.

A few weeks ago I was reading the CSI Project Blog and read through the Beautiful Bathroom Challenge.  As I scrolled through all the gorgeous bathrooms I wondered how fancy the winning bathroom would be and when I saw it I knew why it won.  Here it is the winning half bath done by Home in the Country.
A Chalkboard wall bathroom?!?!  How awesome and creative is that? Right when I saw it I knew that it was the perfect idea to spice up our Mini Bathroom. We all know I have been loving chalkboards for a while now!

Here's another inspiration photo I liked. I think we will stick to just the top half of the walls so it doesn't look this dark.

I think it is a great idea for our bathroom since it is so small, just a neat way to make it cool and unique. As of now we love how the new sink changed the space, but it is still really plain, nothing special about the space.  So here is where we left the mini bathroom last after we painted and installed a new sink:
Alex and I took an adventure to the ol' Home Depot and picked up wall trim (to divide the top and bottom halves of the walls) and 2 cans of Rustoleum Chalkboard paint.  That was all we needed to make this transformation happen!

So the first step was to cut the trim and nail into place to divide the walls. Alex got right to work, and as we have mentioned many times before, this type of project is tough in our house since it is so old and nothing is very straight and even.
Once the trim got around the little bathroom I kept thinking that we should have done that before, it already looked a lot nicer.
So, we've got the ball rolling!  Next we just have to paint!

The New Sink in our Mini Bathroom is Installed!

Kayd Roy1 Comment
So I made a previous blog about the sink we ordered:


We had to order this tiny sink because our bathroom is so small, and with the way the plumbing pipes are installed, the existing sink and toilet were so close together, when you would, ahem, use the facility, you would be leaning over the sink as you conducted your business.

Here is a before photo, it is hard to tell from the photo, but if you can picture a person sitting on the commode, their knees would be under the bowl of the sink and their chest would butt up to the rim of the sink, not comfortable, and certainly awkward! I  never really used this bathroom, I would just go upstairs to our larger bathroom to avoid the awkward space, anytime I did use it, it just reminded me we had to get a new sink.
So again, the very before when we moved in, beige and wooded fixtures, ick!
Then after we painted and got new fixtures, still didn't use it because of the sink.

So... DOWN WITH THE OLD SINK!
Here is the old sink (the big round one) and our new Porcher Elfe sink (longer rectangular sink)!

Here is a size comparison photo, you can see that the Elfe solves our tight space problem, the Elfe sink only extends 9 inches from the wall, HUGE space saver!

Alex is holding the faucet we ended up getting, the original one I ordered was wrong, we needed a "single hole" since the sink only had one hole for the water, and I had accidently ordered a "single handle"- not the same thing, whoops!

Here is a picture of Alex holding the sink after attaching the drain and faucet.

Prepping to mount the sink...

And finally, the sink is up!!!

So happy with the final look! And yes, that is the original medicine cabinet to the house, someone once asked why don't we just move the mirror and cabinet over, but you can't destroy original elements to the house! Crime! Not to mention you have to move the plumbing lines, that didn't sound fun to us, no way. The new sink works great!

Here is a view from back behind the toilet (sort of), so much space now, the sink made such a difference in this room, I actually use it now! No need to run up and downstairs to use a bathroom, so nice!

*** Update!  The bathroom sure didn't stay this color for long!  Check out the new look we gave our bathroom here!

Art? Or "Butt F-Art"? Butt F-Art Indeed!

Kayd Roy1 Comment
In our little mini bathroom on the main floor, we have one of our favorite pieces of art hung up, it is our Butt Fart Art, a gift that Alex recieved from his sister on Christmas of 2008. Anyone that knows Alex and I well knows that we both have a ridiculous sense of humor and nothing really offends us, so this was a perfect gift! It is a real original piece of artwork from an artist in my hometown of Grand Rapids Michigan that illustrates... butt farts, interesting I know. I remember when Alex opened the gift, he held in it portrait orientation instead of landscape, so flipped around I thought it was hills with a tree, haha! Once he turned it I was like, "ahhhh it is a butt!"

We loved the gift and knew it would be perfect to frame and hang in our bathroom (where else would it be appropriate?). It is quite a conversation piece! We also chose our paint color for the bathroom based on the, well, fart shimmer I guess you would call it? Our bathroom is Medieval Gold, and compliments the artwork, but is without a doubt the strangest room in our house, but we have to have at least one!

The Porcher Elfe Sink has been ordered!

Kayd Roy1 Comment
I never thought I would feel so excited about a sink, but I REALLY am! Alex and I just ordered the Porcher Elfe sink, why is this so special? It is really small! See below image:


Our smaller bathroom on the main floor has a small pedestal sink, but it is still too large for the space, so if you are on the toilet, the sink is basically right in front of you, you could lean on it, which makes the space really awkard! The Elfe sink is wall hung with the faucet on the side, so it only comes out from the wall 9 inches! Crazy! This will really make the bathroom more usable, and better for the resale of our house! I will post another blog of the small bathroom once we get started installing the sink!

Here is the sink by itself:


And here is the single hole faucet we ordered, we didn't want anything too modern for our old home, so we thought this one fit the bathroom the best (fingers crossed since we haven't seen it in person!):