It's Craft Night #3 in our Holiday Crafting Series! We got so many fun pictures during this project that I am also including a Caption Contest! The winner will receive their very own Multi-Wear Snap Scarf (scroll to the end of the post for details).
First, let's take a look at our crafty creation. My friend Sarah hosted and she came up with this bright idea....

Wondering how or where those string lights are plugged in? Well that's our project! We got out our power tools and drilled a hole into the back of the glass bottle. Pretty simple and it looks much nicer than seeing a cord come out of the top. This project is fun, inexpensive, and can turn empty wine bottles or jars into holiday lighting! Let's get started...
(Click here for Craft Night #1: Yarn Wrapped Wreaths with Felt Rosettes OR here for Craft Night #2: Decorative Cutting Boards)
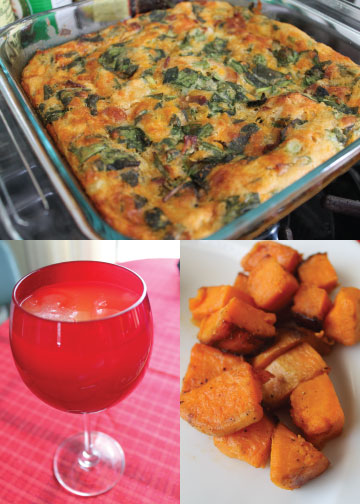
I guess it wasn't really a Craft "Night" since we met up at Sarah's for Sunday Bunch, which was a nice little change up! We kicked it off with some yummy food and mimosas!!!
After we fueled up, it was time to get started on our project!
Here's what you need:
Power Drill
Empty Wine Bottle or Glass Jar
Masking Tape
Mini String Lights (easier if you get ones that DO NOT connect end to end)
Safety Goggles
Working Gloves
3/8" (or 1/2") Glass Drill Bit (shown below)

NOTE: since this project includes power tools and glass, make sure you wear the appropriate safety gear! Also, take it easy on the mimosas if you have those too!
First, take your bottles or jars and soak them in warm water with dish soap for at least 10 minutes. It will clean out the inside of the bottle and those pesky labels will get saturated with water making it easy to scrape off with a scrubber.
Once you have the label removed, dry the bottle and apply a piece of masking tape over the bottle where you intend to drill the hole. The tape surface makes it far easier to start the hole with your drill (not as slick as glass). It also serves as a SAFETY measure in case any of the glass around the hole chips or breaks.

Next step- Drilling!!!
To add some holiday spirit, I forced everyone we decided to wear festive head gear, 'tis the season after all! Sadly, we forgot our protective safety goggles but thankfully I remembered Alex's go-to when this happens- sunglasses! At least it made for some fun pictures :)

Now that you have your drill, place your bottle on a steady surface where you feel comfortable holding it in place while drilling. Make sure to have your work gloves for this step, glass + drilling = scary, so protect your hands!

This step does take a LONG TIME! So be ready for your arm and hand to hurt a little, drilling through glass is a slow process. Once you notice you are getting close to finishing the hole, take it a little slower so you aren't surprised when the drill bit breaks through.
As I was finishing up drilling the hole (which was kind of scary, not going to lie!) and the drill bit finally fit through, a little chunk of the glass broke near the bottom of the bottle (shown on left). So, remember the masking tape part? Well it SURE came in handy! That little broken piece just stuck to the tape and didn't end up inside the bottle or somewhere in Sarah's living room! Kind of a bummer, but hey, it will still work for our project.

Sarah's bottle (on the right) is a better example, she had no problems with glass breaking. Again, BE CAREFUL! After you've made the hole, rinse the bottle out again to clear it of any drilling dust and dry it off.
Now, it's time to start stringing in the lights! Sadly, I was unable to find any string lights that do not connect end to end (as in each end has that big square plug that doesn't fit through a little hole). So, I had to fold my string of lights in half and start stringing them in from the middle, leaving the two big plugs outside of the bottle.

Important Tip: Make sure to test your lights before you string them into the bottle. Thankfully, I remembered to do just that and sure enough my red string lights with green plastic were broken! Boo! At least I brought a back up white strand, even though the color wasn't my first choice.
Since I had that broken section of glass, I covered it with tape before I started trying to insert the lights. Turns out, that extra space did come in handy since I had to fold the lights in half and string them in. If you have the lights that connect end to end like mine I would suggest using a larger glass drill bit (1/2" or larger) so you have more space to insert the lights.
Sarah rigged up this little stick with a hook at the end so we could pull the lights toward the top of the bottle as we were working. It was SUPER helpful!

Once you have the lights inside plug it in so you can "oooo" and "awwwww" at their glowing beauty!

Sarah used small battery powered LED lights in her bottle (on the left). The bulbs were really small and it was much easier to get them through the drilled hole (just thought I would mention that as an option as well). Ally didn't have hers finished by the time I took pictures. Instead of a wine bottle, she used an antique glass peanut jar she found at a thrift store. Turns out, those old jars have really thick glass so Ally was drilling for quite a while :)
Once I got mine home I added this vintage label (another from the Graphics Fairy) on the bottle to go with Our Merry Little Vintage Christmas theme.

I placed it in the middle of our wine tasting station and plugged it in. I love this unique touch of holiday lighting in our dining room! What do you think of the final look?
Now, onto the Caption Contest!!!
While I was writing up this post I wanted to use the images below, but I was STUMPED for fun ideas :( Here's where you come in! Just post a comment with your caption suggestion for myself, Sarah (middle) and Ally (right).
 The winner will be chosen by Alex and I based on the most clever/fun caption that will make us laugh out loud :) That winner will receive their very own Multi-Wear Snap Scarf handmade by yours truly! They were a hot seller at Finch's Boutique, so male readers out there should make sure you post your caption ideas too! The scarf would be a great Holiday gift! **Hint Hint**
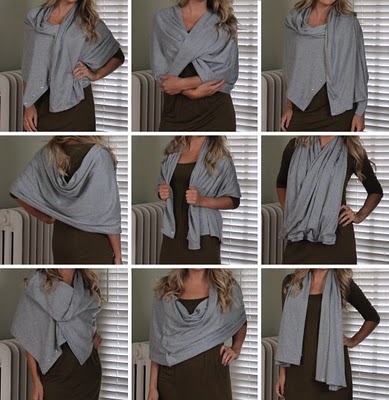
The winner will be announced Friday, December 16th. I look forward to reading all of your funny caption ideas and remember keep it clean and appropriate!
Alright, put on your creativity boots and get cracking! This contest is officially ON!
Now, onto the Caption Contest!!!
While I was writing up this post I wanted to use the images below, but I was STUMPED for fun ideas :( Here's where you come in! Just post a comment with your caption suggestion for myself, Sarah (middle) and Ally (right).
The winner will be announced Friday, December 16th. I look forward to reading all of your funny caption ideas and remember keep it clean and appropriate!
Alright, put on your creativity boots and get cracking! This contest is officially ON!