Carla Like It Is

The Lettered Cottage Guest Room Redo

DIY Tiered Grain Sack Window Shade Tutorial

Kayd Roy8 Comments
Ready for the DIY Grain Sack window shade tutorial mentioned in our last post?  Let's get to it!

Now here are the supplies you need to get started:
1. Grain sacks or fabric
2. Wood trim to hold the shade (I used scrap wood in our basement...free!)
3. Staple gun
4. Scissors
5. Sewing thread
6. Sewing needle
7. Seam ripper
9. Measuring tape

It is likely you might already have most of these things in your house, so this is a cheap and easy project!  The only thing I bought were the two $6 vintage grain sacks from the antique store!
First, I measured and cut the piece of scrap wood trim to fit each window frame.
Alex did a quick cut on our saw for me.
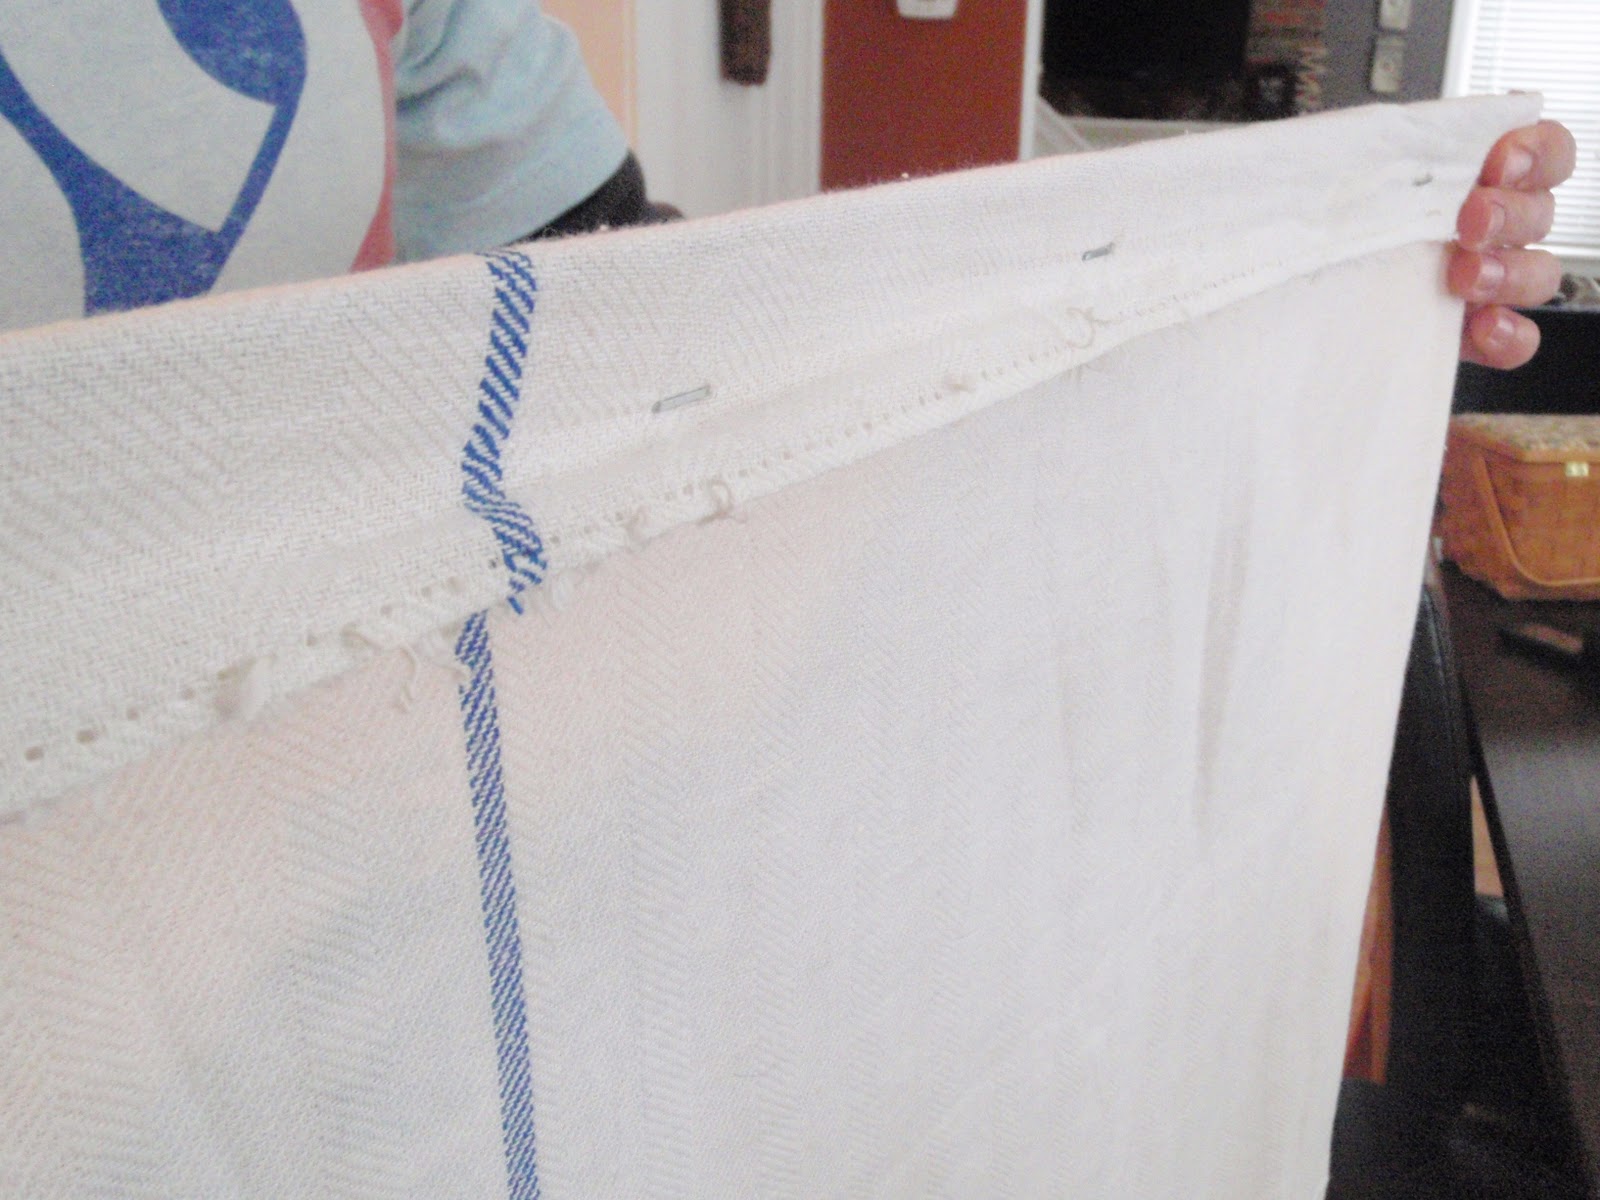
Next, (and this is the LONGEST step if you are using real grain sacks) grab your seam ripper and open up the grain sack so it is no longer a functional sack but a flat piece of fabric. I couldn't believe how long this took, they really use industrial strength thread on those things!
Once I got done seam ripping, this is what our grain sack looked like laid out.  Aren't the stripes gorgeous!?!
I then had to do a little ironing to make sure the edges were flat and crisp.
Next, you will grab that staple gun and staple the fabric to your wood trim piece.  In this case Alex did it for me, I did one staple and got nervous I was going to mess up the fabric.
Here is what it looks like with the staples, fabric and wood.
I used a thinner piece of wood trim, so the staples did shoot through to the other side.  We used pliers and bent them down flat to the wood so they were no longer sticking out. 

Once you bend the staples down (sorry I don't have a picture of that, drat!) you will turn the wood trim downward so the fabric covers the staples... ready....
...and turn! 
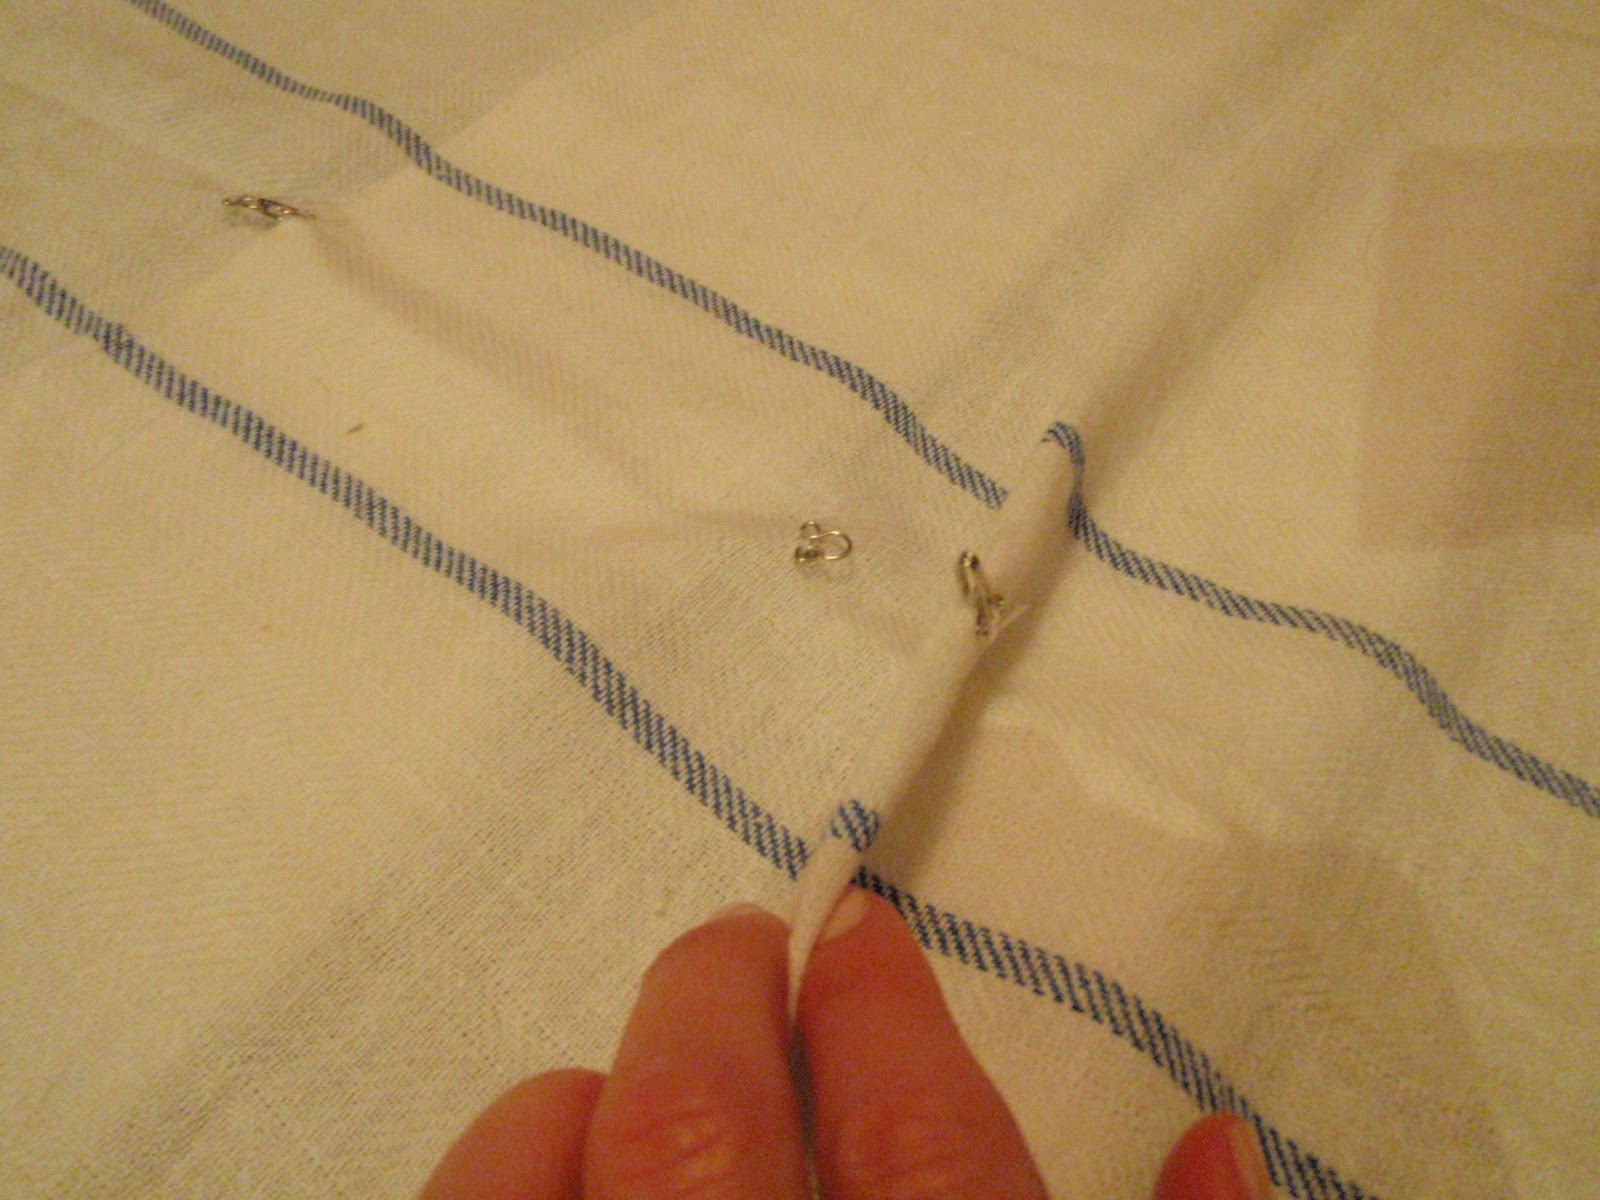
Now is the fun part!  Creating the tiers!  Depending on the size of your fabric, you can do as many tiers as you want.  Our grain sack measured 36" so I only did 2 tiers.  Here is what it looked like from the back.
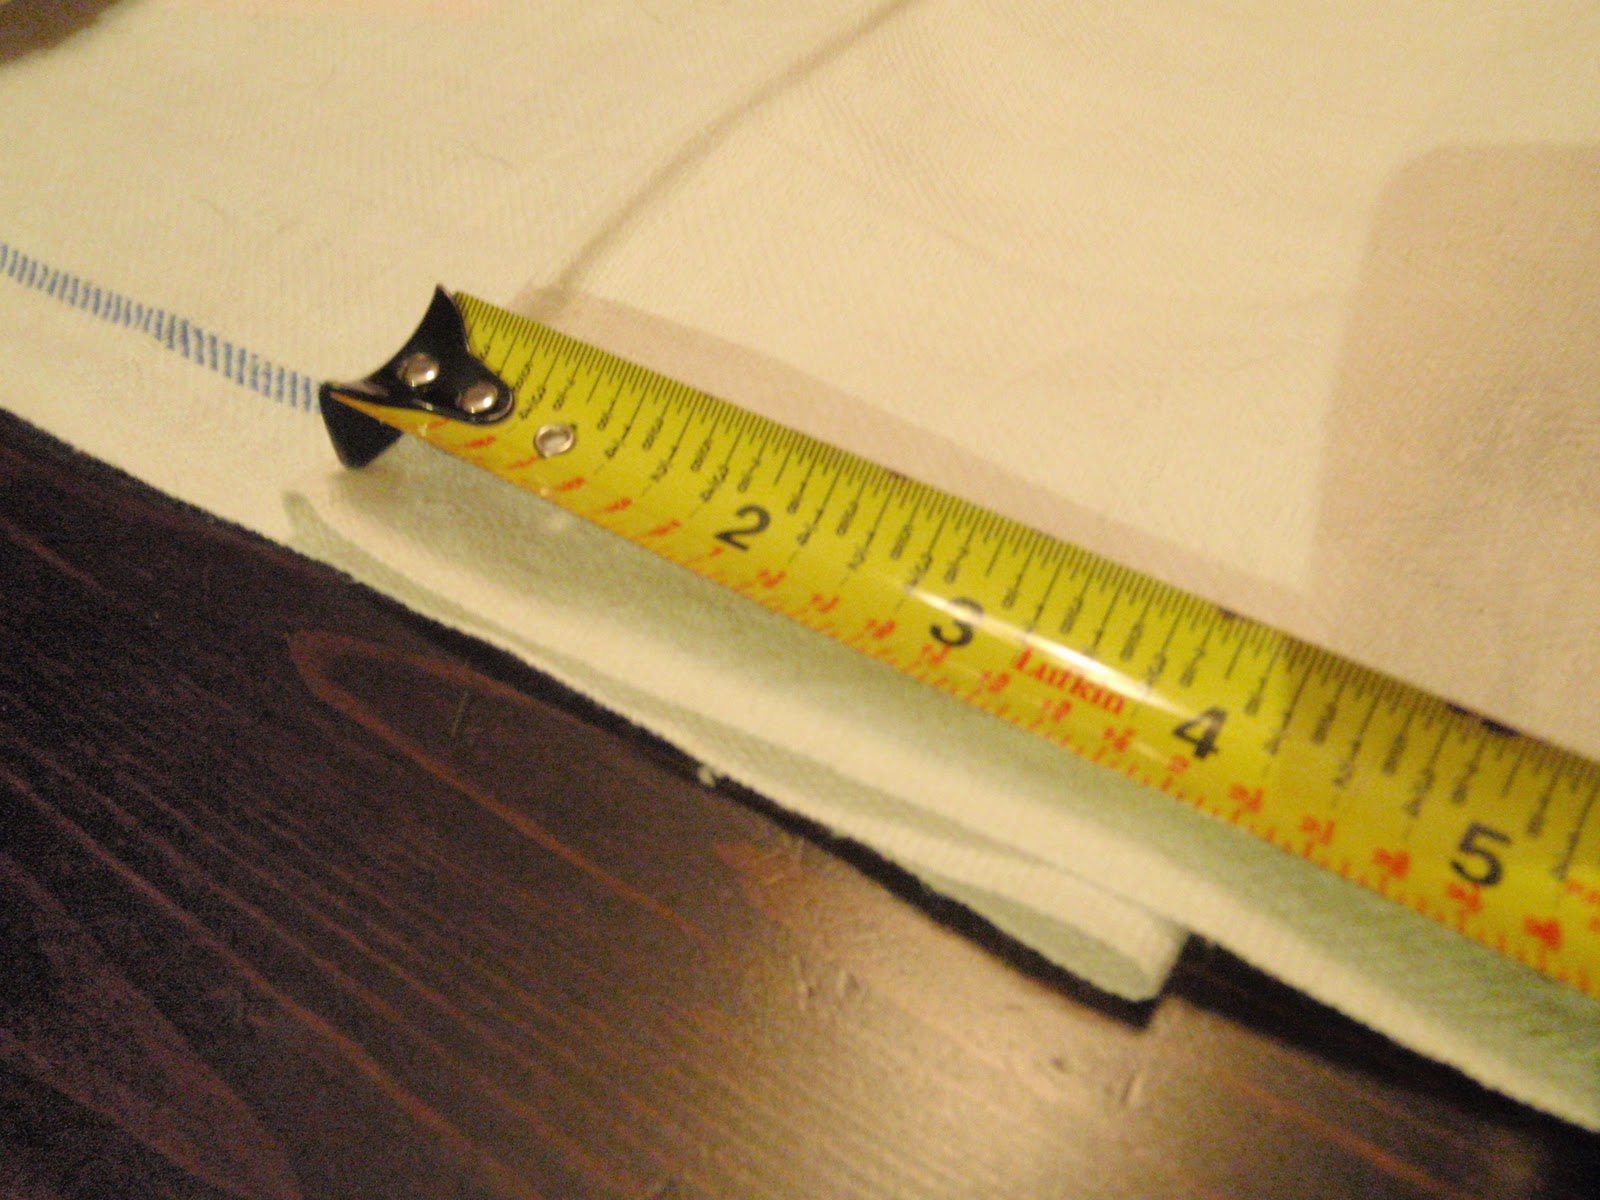
To be honest, I didn't use a mathematical formula for the placement of the tiers.  I just folded the fabric evenly 2 times. Sorry, I hate measuring!

To give you an idea of the size of the tiers on my 36" piece of fabric, I did 2 tiers that measured 4" when folded.  The top of the bottom tier should fold right up to the bottom fold of the top tier (see above photo on this description, I know that was confusing!).
Once you know the placement of your tiers, iron them to make crisp, clean folds.  This will also help them to lay nicely once they are hung.
Now the secret weapon!  Hook and Eyes!  This was my super simple idea for this DIY project.  I thought hmm... I already have a bunch of these in my sewing kit and they will hold nicely and be functional as well if I ever want to open the shade.  If I went out to the store to get them, I probably would have purchased larger ones just because they might be easier to use with the shade in the long run. So if you go out to get them, I would get ones that are a bit larger!
I did 3 across each tier, so if you do the same you will need 9 hook and eyes for each shade.  I did a simple tack down with my sewing needle.  Nothing too complicated so if you aren't a super savvy sewer this will still be easy.
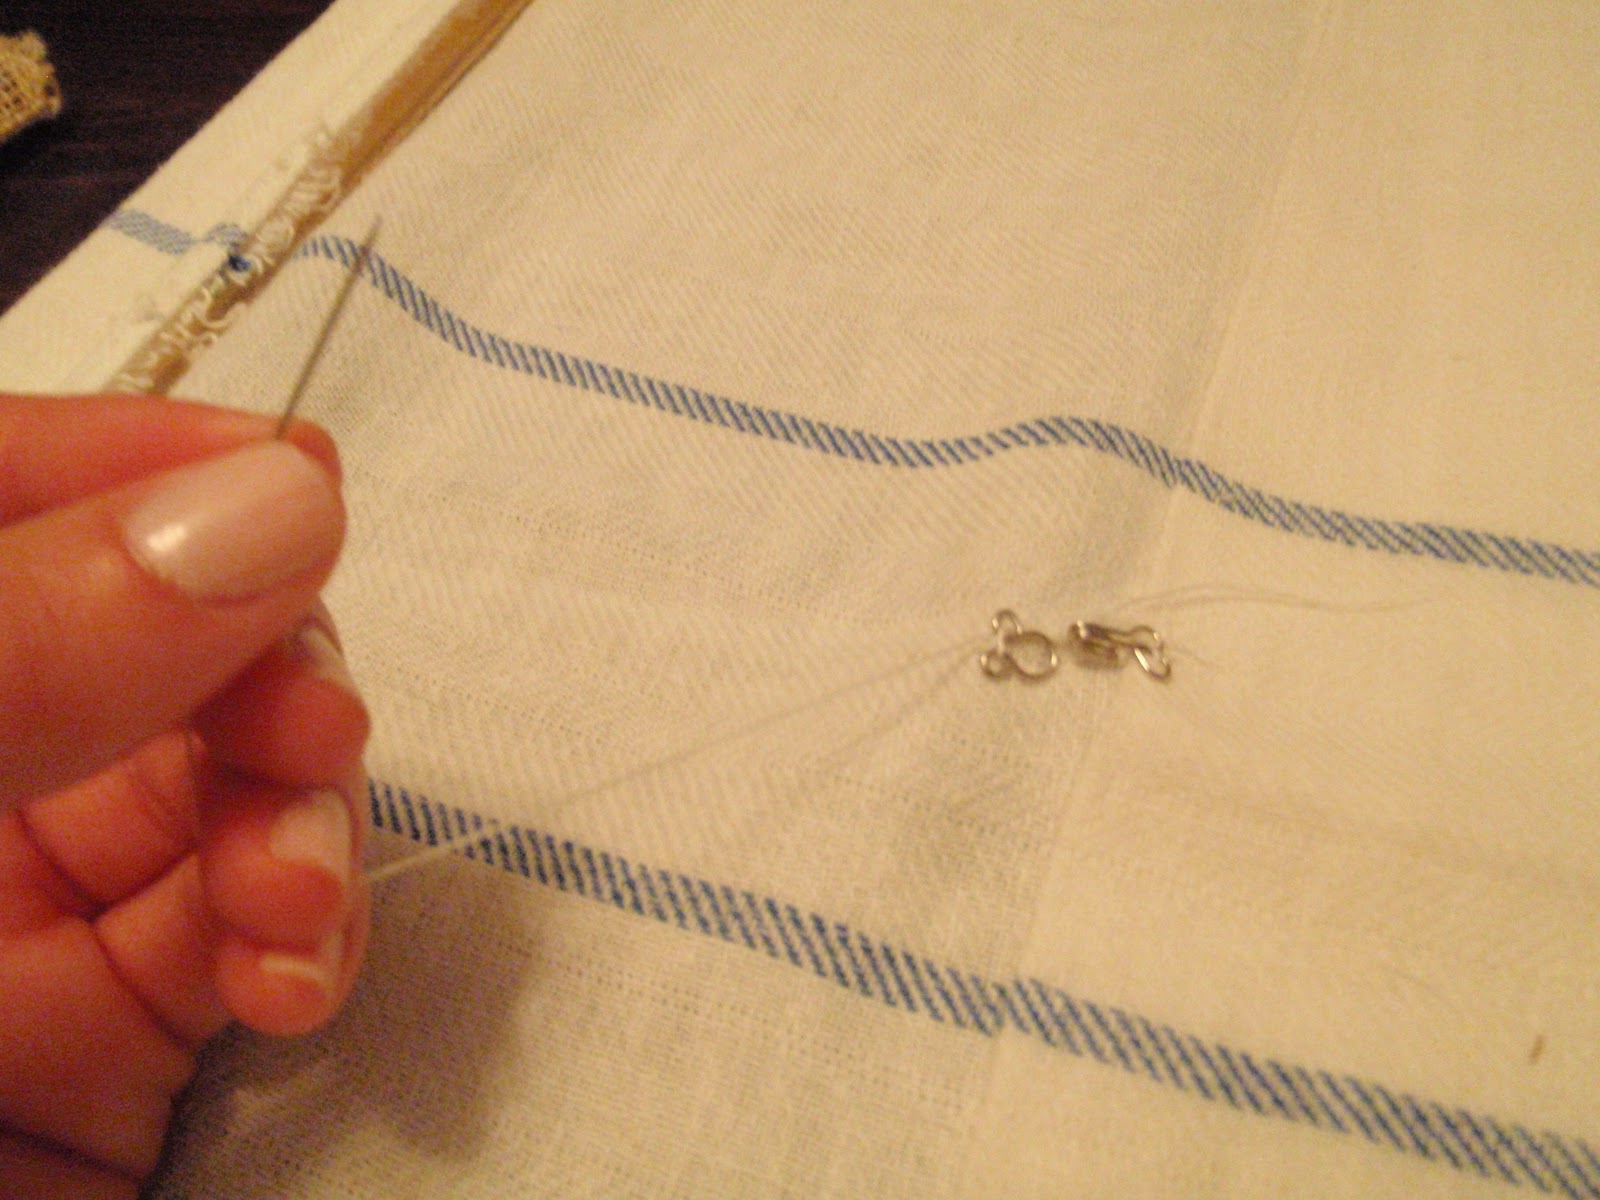
Here is a look at one complete hook and eye on the bottom tier.
Then here are both tiers with hook and eyes sewn in place.
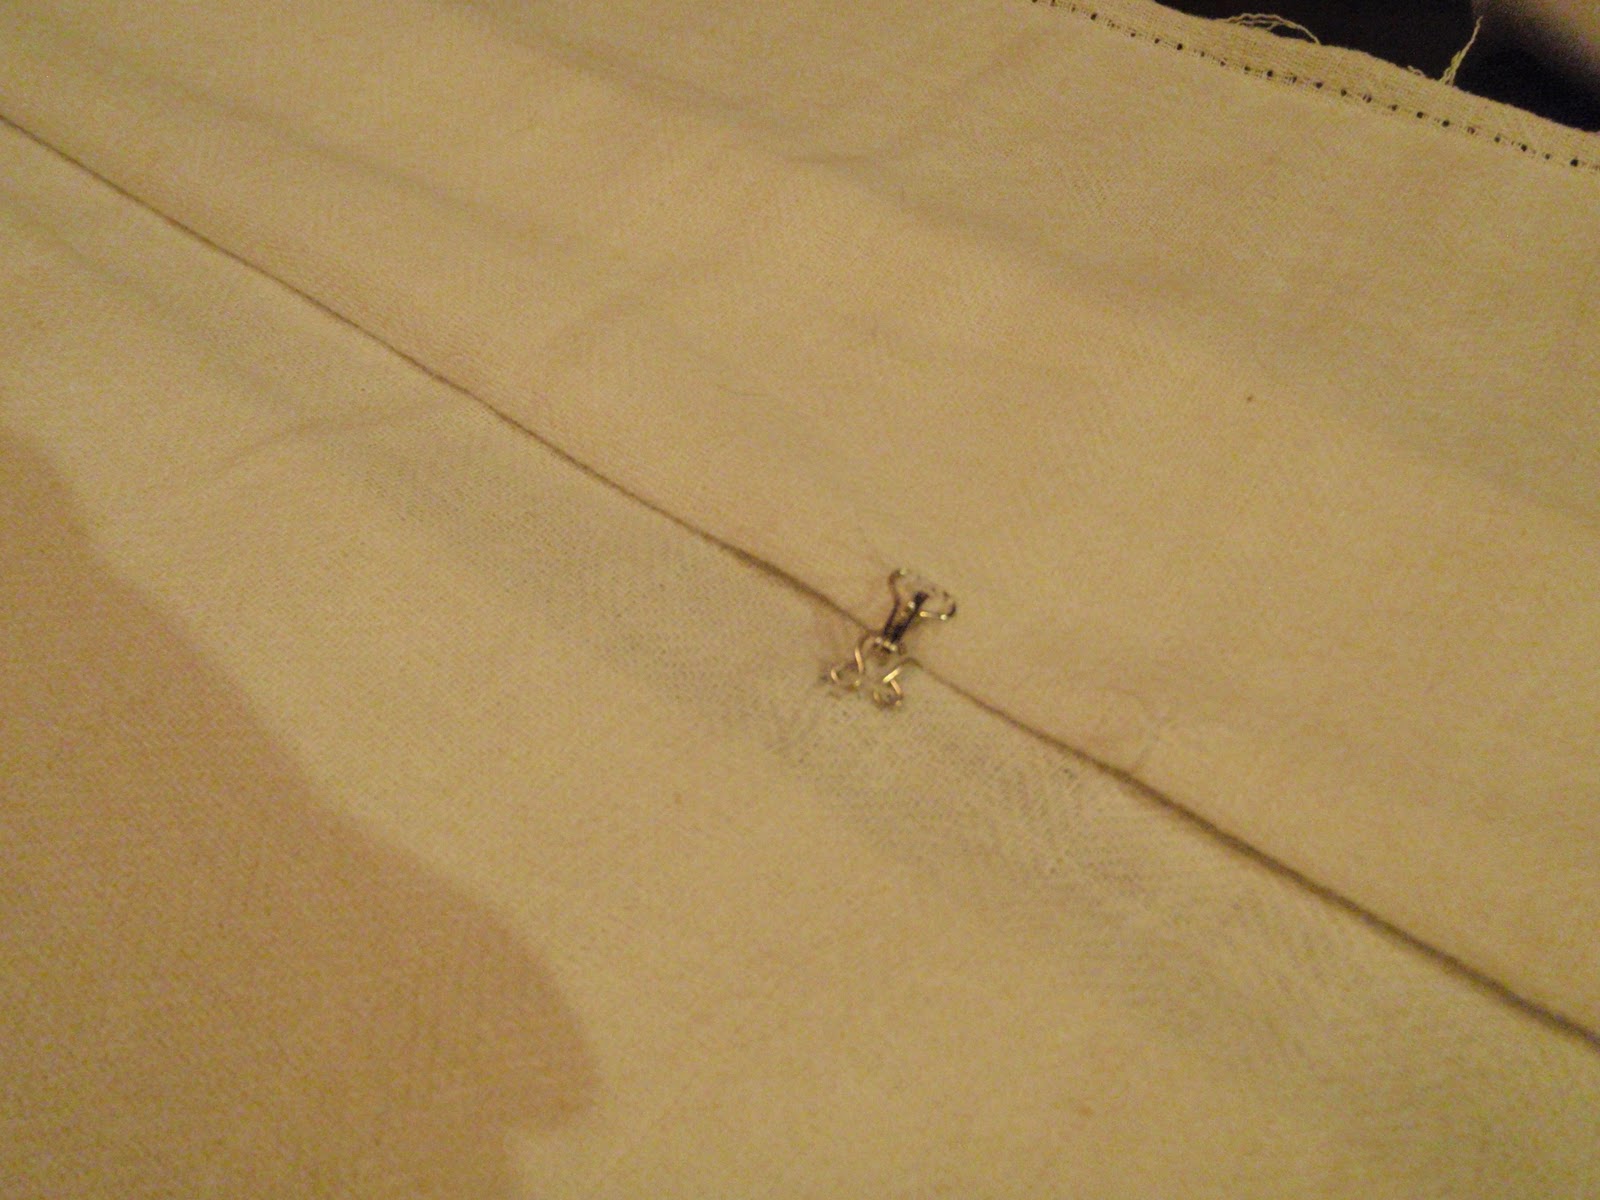
To illustrate the functionality here is a look when the hook and eye is unclasped.
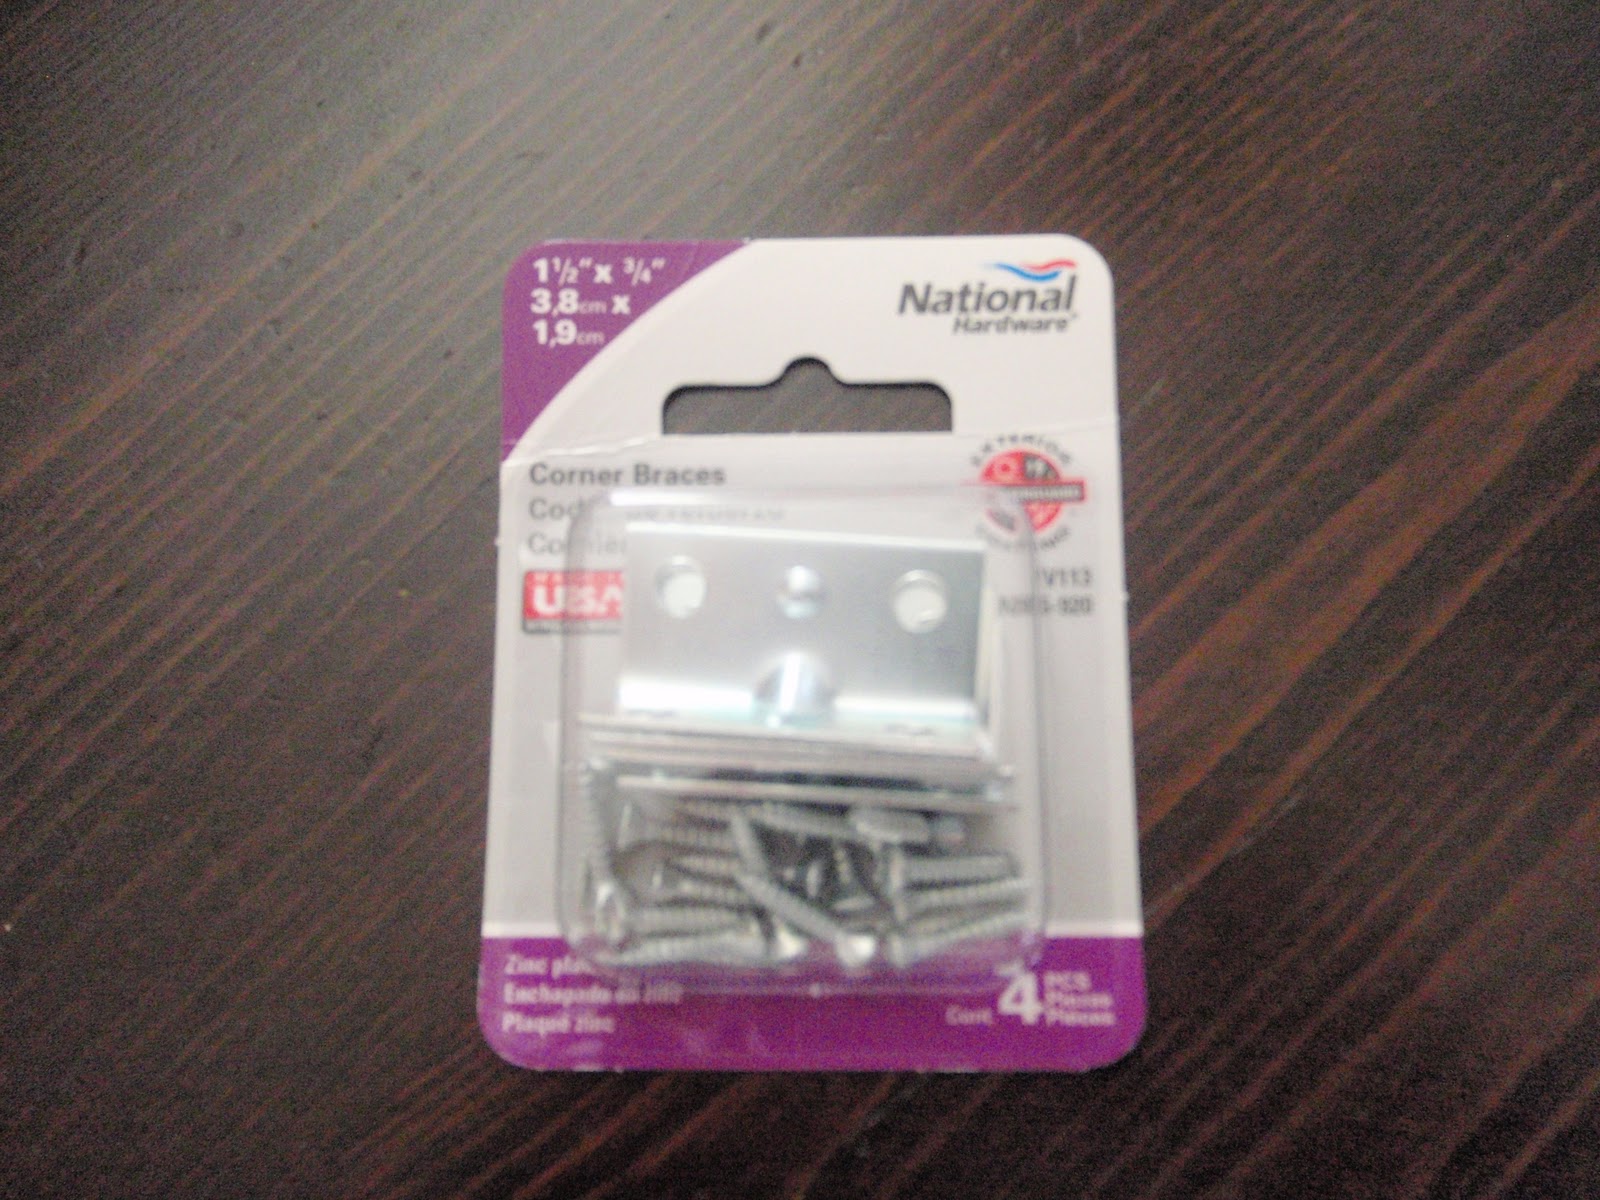
The last step is adding these L brackets to the back of the wood trim piece and hanging to your window frame. 
 Yes!  We are done!  Again, here is a look at the completed product!  So simple and gorgeous!
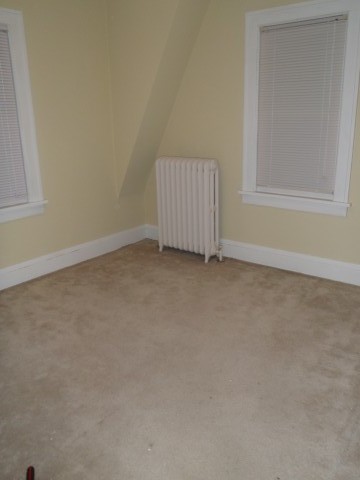
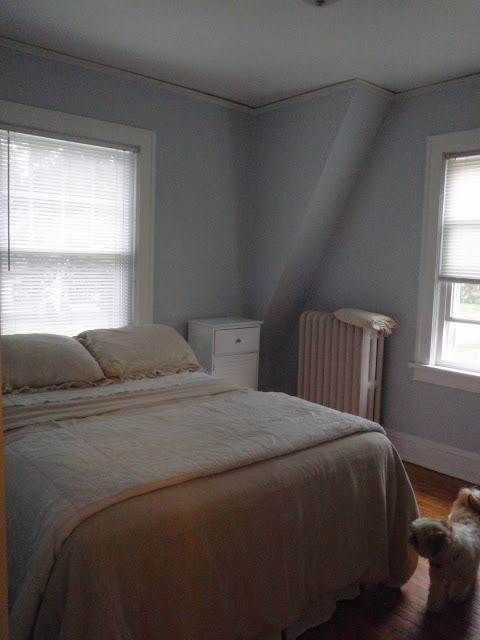
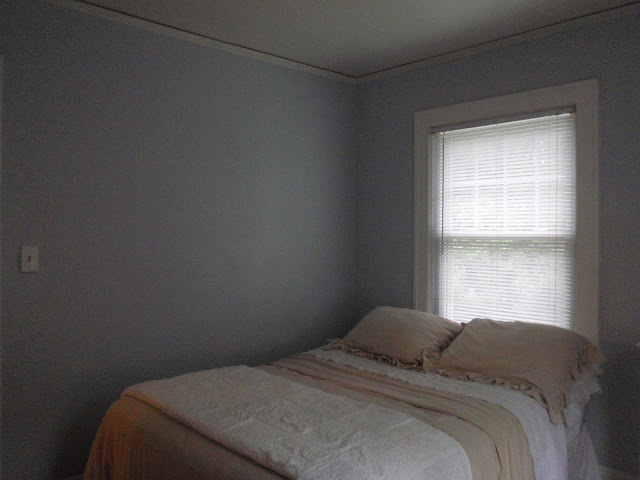
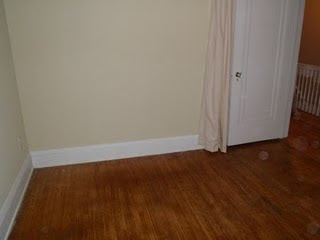
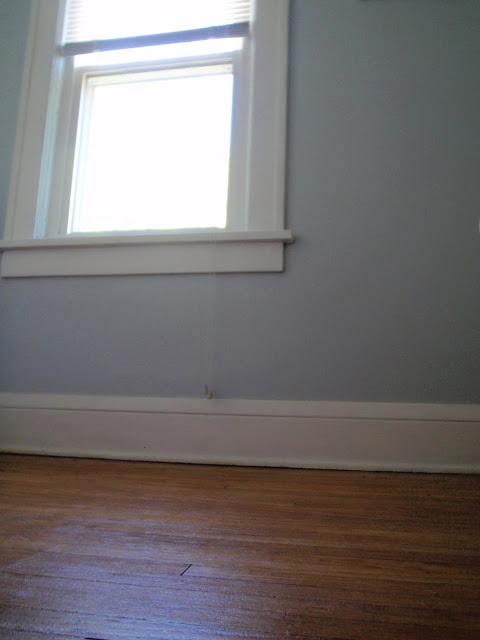
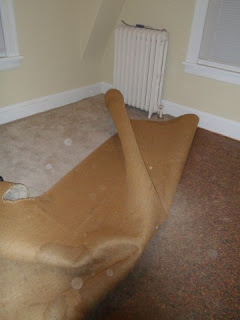
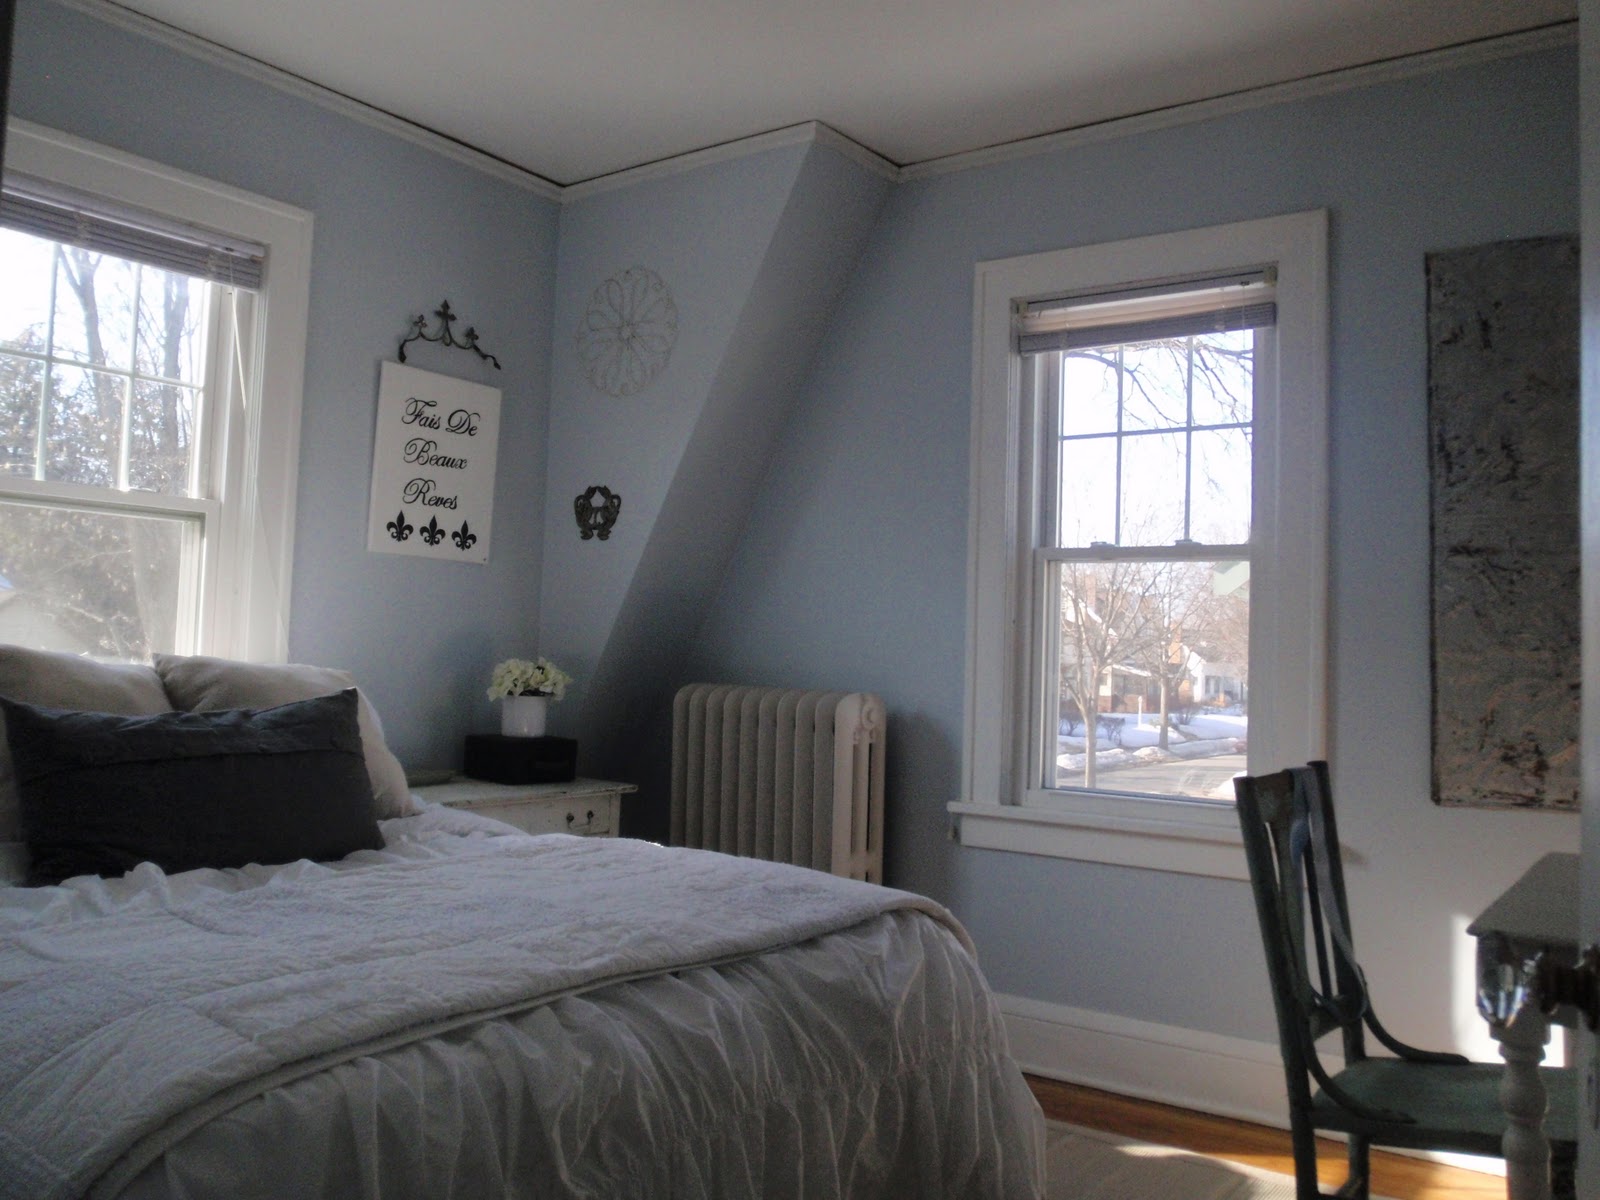
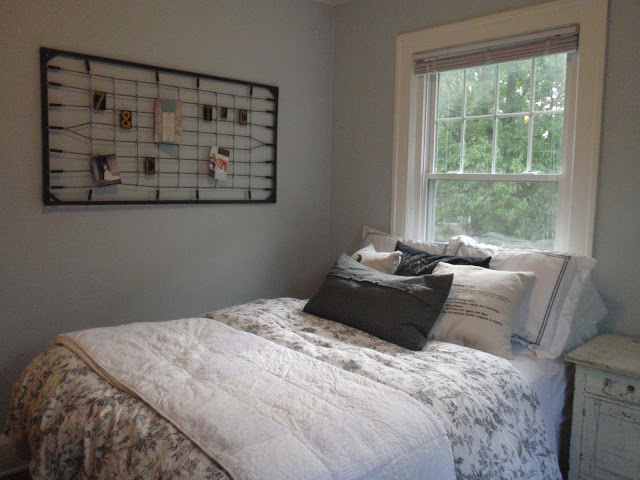
Here is how it looks now with the Vintage Grain Sack Window Shades!  It added sooooo much personality!  I can't believe how great they turned out!
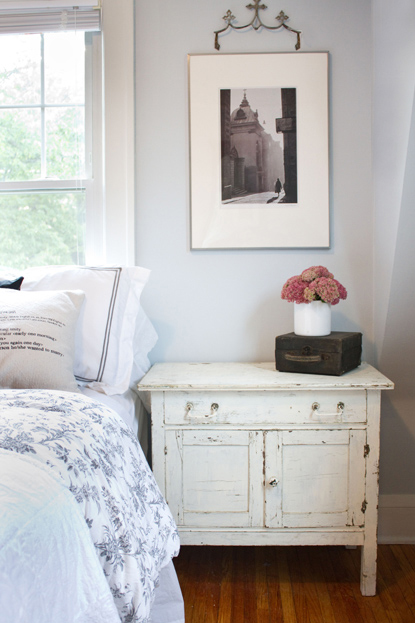
Our Guest Room definitely got a nice upgrade with these little $6 vintage grain sacks!  I can't wait for the next time we have company staying over, this room is just too sweet!  I can't wait to redo our Master Bedroom, I'm totally ready for that challenge!

*** We just added this to the Lettered Cottage's How-To's Day , the DIY Showoff Project Parade and Coastal Charm!  Link Up!***


DIY Club

An Update In Our Guest Room and Window Treatments

Kayd Roy11 Comments
Our guest room got a little bit of freshening up! Let's take a look at this lovely space once again as the sunshine beams in.
Do you know what we changed up?  The bedding! I am really excited to show it off!
To take a look back at the evolution of this room, here it is before we removed the carpet and painted the walls.
Here it is after Alex refinished the wood floors and painted the walls with Behr's Cumberland Fog.  It was better, but still just a little bland.
Then we got SUPER LUCKY when Kevin and Layla Palmer from the Lettered Cottage came and went junkin' with us and redid our room!  It was awesome!  Layla used the existing bedding we already had at the time and it looked totally perfect!
After a few months I had an itch to change the bedding to something that was just white and textured.  What do you think?  Still like the look? 
I left everything else the same way Layla had decorated it in September because, I still love it as is and we always get compliments on the room when we have guests over. 
Here is a closer look at the new bedding.  The duvet has a rouched texture and if you are curious it is the Home brand from Target.
The quilt is the same Shabby Chic Quilt I had in September.  Still in love with it!  I loved all the different textures on the patches of the quilt.  The pillow is a bolster from Ikea.
Here are the pillow shams that match the duvet and quilt.  Just dreamy!
Oh, I did make one other change.  I replaced the framed photo with this canvas painting I made that says 'Sweet Dreams' in French.
So what are we still missing in here?  Window treatments, ugh, I need window treatments everywhere I think and it isn't my strong suit picking them out.  When Layla and Kevin redid the room they wanted to pick out window treatments for us, but we didn't have enough time that day.
All we have in there are these ugly plastic blinds.  Ick! 
So, I'd love to hear any suggestions for what kind of window treatments we should get!  There is one challenge though.  Since this room is so small the bed only fits in there when it is butted up against the window.  So, long drapey curtains won't work.  All I can think of is bubble or tie up shades.  I would love any other ideas or suggestions!  Please sound off in the comments!

Thank you, thank you! Have a good weekend!

PS- Since I was out of town most of this week I will not be doing a Head Over Heels post.  I wanted to catch up on some house posts so stay tuned for next weeks, it will be awesome!


Here it is! The Guest Room Redo from Layla and Kevin Palmer of the Lettered Cottage!

Kayd Roy16 Comments
So as I wrote about in a previous blog, Layla and Kevin came to help us with our guest room redo (started here and here).  Again, I am a HUGE fan of their blog, we have done projects on our house based on ideas we got from their blog like here and here.

Here are the before pictures of our guest room before Layla and Kevin worked their magic (Rocco decided to be in the pictures)...
After we hit the Junk Bonanza, we got back to our house and Layla and Kevin started on our guest room.  We had to wait downstairs, it was nerve racking having our house in someone else's hands! But we totally trusted Kevin and Layla to do something amazing with our guest room!

****Drumroll.....  Here it is!  Our new Guest Room!****

We got most of the items at Junk Bonanza including: the chair, antique dress form, tin tiles, night table, metal wall markers, small antique case, vintage mint tin, and an antique framed bed spring with hanging letters.  Layla and Kevin definitely have an eye for nice junk!
Here is a view of the night table and wall markers.  I LOVE the table that they found, it is worn perfectly, so shabby and cute!
Layla used a container from our kitchen and picked these flowers from the front of our house.  She put them on top of the antique black case, totally cute!
Here's a closer look at the wall art, the picture is one we had already downstairs, I love that she put the metal widow's peak above the picture, I never would have thought to do that!
We had the bedding in our house already, same goes for the dec pillows. Layla and Kevin switched things up and it looks great! The duvet is from Ikea and the quilt is a Shabby Chic quilt from Target.
The lettered dec pillows are from Pottery Barn and the long bolster is from Ikea.
This is a closer shot of the antique bedspring.  We got some vintage letters and numbers to hang from it.  Layla found the cards on a bulletin board we had by our basement door. She also suggested that we get some clothes pins to hang cards or pictures on the bedspring, like a bulletin board.  Such a good idea! I can't wait to add the clothes pins! 
At Junk Bonanza, Layla told me to pick some letters that meant something to me.  I looked for a C, A, Z, R or S, and could only find a C.  I then thought what about a T and L so we can have TLC to stand for The Lettered Cottage so it will remind us of this experience. 
I think this is my favorite part of the room, well tied with the mattress spring.  I LOVE my antique dressform, it is something I always wanted to have. Alex found it and surprised me with it, it was so sweet of him!  
The chair that Kevin and Layla found is perfect!  I love the chipped paint and the color pops against our lighter blue walls. The mirror there was ours, Alex's mom got it for him, it also is a beautiful antique !

 There is a vintage mint tin on the table as well and an old mason jar with dandelions Layla got from the Bonanza.  I also LOVE the large vintage tin tile, it looked perfect with our paint!
Here we are with Kevin and Layla after the big reveal, which we had to tape about 5 times, and it is really hard to act surprised over and over, but it was fun!  Alex made a blooper the second time we filmed our reaction, we opened the door and Alex yelled "Oh my gosh, what did you do?  It looks terrible!"  Then we all cracked up and had to tape the reveal again. 
Our final picture before they left, we had to take with my dressform.
And that was it!  The whole day was a blur, but so much fun.  I also had to tape a few interviews about us, our house, and my love for the Lettered Cottage Blog!  It was amazing having them at our house and spending the day with them.  Layla and Kevin are so nice and fun to hang out with!  I hope they had as much fun as we did!

Getting a Guest Room Redo from Layla and Kevin Palmer of The Lettered Cottage, and Junk Bonanza!

Kayd Roy3 Comments
What an amazing day!  I guess I have to start back where this story began, yesterday when I checked out my favorite blog (it's the Lettered Cottage if you haven't heard), I read that Layla and Kevin were in Minneapolis and they were looking for someone that needed a room redo and wanted to go to Junk Bonanza with them. 

I immediately emailed them confessing my love for their blog and how badly I wanted their help with my room, and even more so that I wanted to shop at Junk Bonanza with them!  They were also arranging to shoot a possible TV show, so we would get to have everything filmed with a camera crew, which was very interesting. I found out later in the day that they chose Alex and I to go on their adventure.
We wrote a welcome message on our antique chalkboard (which Layla loved!  I was geeked!), and I have our kitchen nook project here.

Layla and Kevin arrived bright and early at 8:00am today. I got to snap a photo with them in my kitchen, so fun! 
Here are some photos of the crew filming me when I welcomed them to our house.
Here we are at the Junk Bonanza with our fun press badges!  Alex loved the junkin' too!
And here are some pictures of us shopping the junk!  We knew we had to look for a new nightstand/ night table, but other than that we needed some fun new decor! 
We kept our eyes peeled and found perfect items for our room that we knew we would love (with Kevin and Layla's skilled junkin' eyes of course), and trusted that Layla and Kevin would put everything together to make the perfect room with that "Lettered Cottage" feel that we love!
Alex found some really neat metal item that I thought would look cool as wall art, so we started to dig through to find some with just the right weathered look.  Turns out they were grave markers from Iowa, kind of creepy, but we think it's pretty cool, so we got those too!
We split up for a bit to cover more ground, Alex found a booth with some really neat items, it was called The Artique, they have a store in Anoka.  I think we bought a lot from them, the number one item being an antique dress form, it is something I always wanted and Alex scoped it out and surprised me with it, so sweet!  We also got some more antique crates for our kitchen, I love those!  Alex and I definitely want to visit their shop soon!  Here is a picture of me with the owner and my new crates!
And before leaving we had to take a pictures with the fun sign!  After that we headed home to see Kevin and Layla work their magic on our "Lettered Cottage" looking Guest Room!
Next post.... the before and afters of the room!

Heading to Junk Bonanza with Layla and Kevin Palmer from the Lettered Cottage!

Kayd Roy3 Comments
Tomorrow is a big day for us!  Alex and I are so excited that Layla and Kevin Palmer, stars from my favorite blog The Lettered Cottage, will be coming to our house tomorrow!  They will be helping us pick out some cute decor for our very plain and sad guest room which we have been working on shown here.  We will head to Junk Bonanza with them to search for some vintage finds and antiques.  I can't wait!  And I can't believe I am on her blog!  So exciting!  Alex is teasing me a little bit about the no make-up painting in my PJ's photo since now a lot more people will see it, oh well!  We are so anxious for tomorrow!!!!

Anyway, I will write a blog about the experience once we are done for the day! 

What an exciting and crazy day!

Guest Room Progress: Installing a New Closet Door and Refinishing Wood Floors

Kayd Roy3 Comments
We began our Guest Room redo in this blog, and now we have made some progess.

In the last blog I mentioned the two big projects that had to be done on this room, 1- refinishing the hard wood floors we discovered when we removed the carpet, and 2- installing a real closet door, as opposed to the beautiful curtain (sarcasm font) that was hanging there.  You can see the curtain covering the closet in this photo below behind the door to the room, unfortunately that was the only photo I have of it before we took it down, darn! 
So we went on yet another Home Depot Adventure (like seen here) to get a new closet door.  Sadly, we knew we were not going to find a door just like all of our other doors in the house since all of the doors are the original doors from 1924.  We just needed something basic that would be a huge step up from the curtain hanging there.  Once we picked the door we also picked a out a door knob, we got an oil rubbed bronze handle, trust me, I would have preferred one of the antique knobs, but those are pretty spendy at Home Depot, I am still hoping I can find a functional one at an antique store and re-install later.
Well, the day came to install the door, and it was not a pretty one, I only have photos of the door after install because at the time when we put it in, it was a weeknight, it was late, and we were just a bit cranky (understatement) hey, this whole home renovation thing isn't sweet rosey at all moments!  

So picture this, we get the door, the measurements fit the door frame, but of course... IT DIDN'T FIT!!!  So Alex had one of his ***** moments (censored, imagine B, F, and S words).  The main reason it didn't fit?  We live in a 86 year old home, so it has been through 86 years of life and winters, meaning the home has settled and shifted over those years, nothing is an exact even measurement anymore, and more importantly door frames aren't straight, boo.  So, we headed down to the basement so Alex could saw the door down a tad to fit. 

Have you ever sawed a door?  Neither have we, so again, picture this, we have a decent size work bench in our basement, but not as big as a door, so to get it to lay flat, we had to weigh it down on one side, so guess what we used?  ME!  I laid on the door to hold it in place and Alex sawed away, don't worry, he always sawed away from my direction and we had our sexy safety goggles on.  But yea, looking back I really wish I had a picture of this, talk about dedication to getting the job done!
After a couple tries (as you can see in this photo since the plate moved quite a bit) the door was up!
This photo show where we sawed the edge of the door off to fit, we also sawed at the bottom of the door.
And here we have the door up!  No more curtain, so much better!
Alex is a pro at finishing wood floors, so he got this done in a day since the space was a lot smaller than our living room, and here we have the gleaming floors that used to be hidden by carpet. 

I painted the room pretty quick as well, we chose Behr's "cumberland fog" for our color, we like neutrals mostly, so our house is mainly greys and light blues, so this matched the flow of the house.
So, I guess that photo is a bit of a preview for you, I am still trying to figure out final decor, I was thinking black and white to match the paintings I made, but now I am thinking I want something sweeter, lighter and more inviting for guests, hmmm.....

Starting on the Guest Room: Carpet Removal

Kayd RoyComment
The four objectives we had to accomplish before we could decorate our guest room were:

1. Removing the carpet
2. Refinishing the floors
3. Adding a closet door
4. Painting the walls.

This blog covers the first step, removing the carpet. We checked under the carpet in a corner of the room to see what the hard wood floors looked like underneath, they weren't in very good condition, but could totally be refinished to look gorgeous! Here is a picture of the room with the existing carpet:


And time to lift it up!


Then Alex got started removing the carpet pad.


Pulling out carpet nails is so much fun! Right Alex?!?! This part wasn't very fun, we stayed up late getting every last nail, it was a pain!


And finally, after every nail was removed, we had the hard wood floor clean and ready to be sanded and refinished! You can also see in this photo that there is a curtain behind the door, what is that you ask? It is the closet for the bedroom, and at some point they had taken the door off of the closet and it disappeared from the house, so sad! So we had to find and install a closet door, will cover that in a separate blog.


And the view from the doorway to the room with the wood flooring exposed.